Material

Introduction
The Material has secondary ribbon, which consists of the following tools:

The Create
Create Materials allows you to
The Built-in DB
Open the Material Database manager allows you to
The AMDC
Open the AMDC Material Database manager allows you to
Create Materials
- Click on the Create
- Enter a name for the material.
- Change the Class from Metal to Dielectric
- Define properties: enter a constant Value
-
Click on the OK button.
The material is created.
You can see it in the Property Browser (5th tab).
Open the Material Database manager
In order to open the material database manager, click on the
Built-in DB
It allows to open:
-
the SimLab Material Database
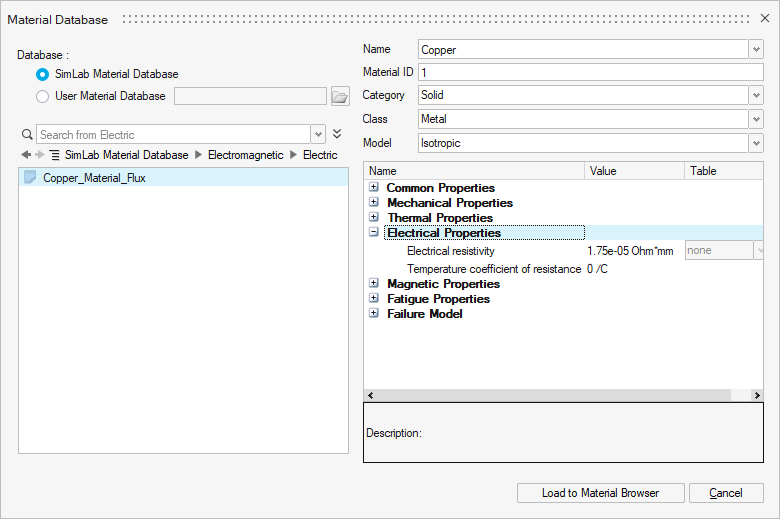
You can import materials from the predefined SimLab Material Database into the SimLab project using the Load to Material Browser button.
This database contains many materials of electric, hard magnetic and soft magnetic types.
-
a User Material Database if you have already created one
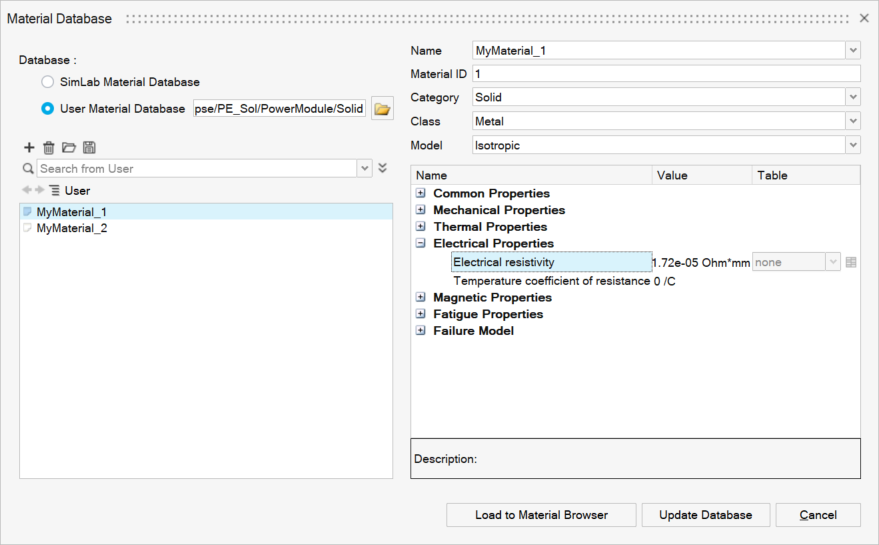
You can import materials from a User Material Database into the SimLab project using the Load to Material Browser button.
You can modify the material properties using the Update Database button.
Open the AMDC Material Database manager
In order to open the Altair Material Data Center (AMDC), click on
the AMDC
- the Altair Material Data Center (AMDC)
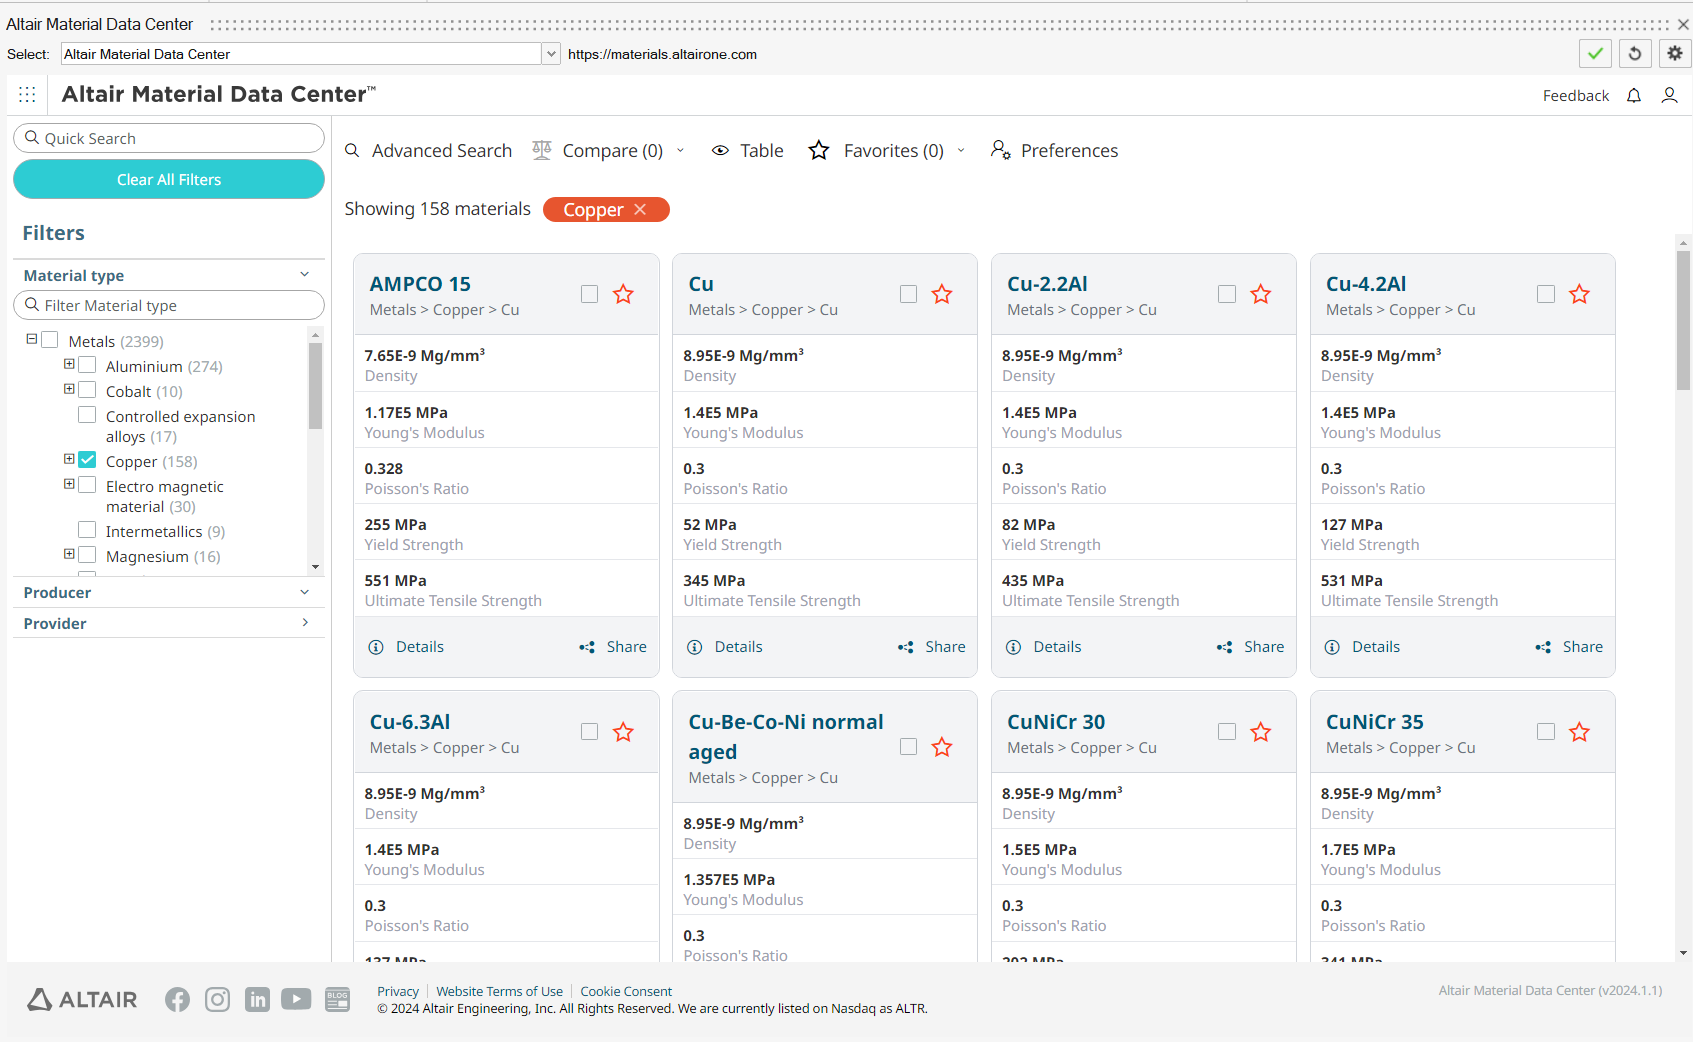
Altair Material Data Center (AMDC) is allowing you to choose best suited material from the huge collection of material from trusted suppliers. It permits search, compare data, and plots the material parameters using different filters like material type, provider, physics type.
SimLab provide the direct access to the AMDC, to download the appropriate material for multi physics solutions.
You can download materials from AMDC by following the steps below:- Select the required material.
- Go to CAE Model tab, then click on "Save to My material" option.
- Now the material added to the SimLab material browser.
- The downloaded material will be retained in the subsequent databases.
- Use "Reset Remembered Materials" in Material right click menu to delete the downloaded materials.
Assign materials to bodies
There are 3 possibilities to assign materials to bodies:
-
In the Create Material window:
After having entered the material properties, you can select the body which is composed of this material (the outline of this body is displayed in red), and then click on the OK button.

-
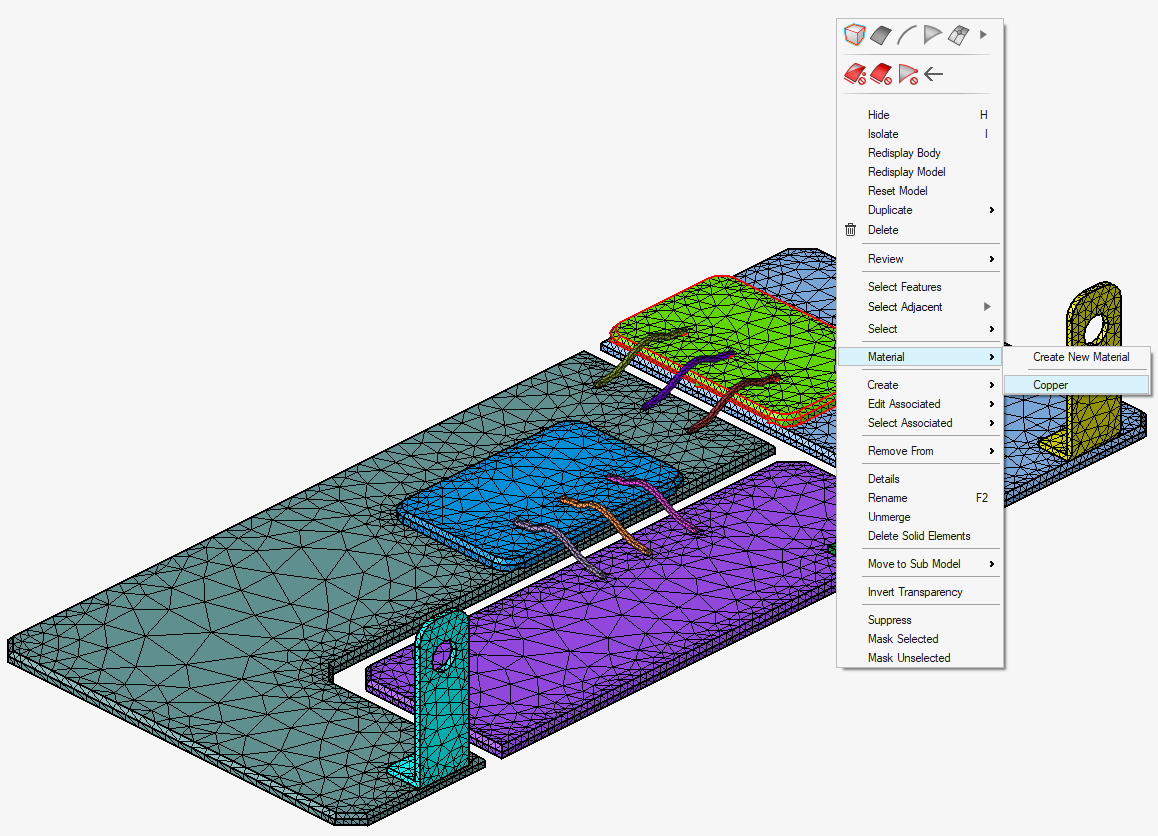
In the graphic window:
After having created the materials, select the body you want to assign a material to (the outline of this body is displayed in red), then right-click and select the contextual menu Material and then select the wanted material.
-
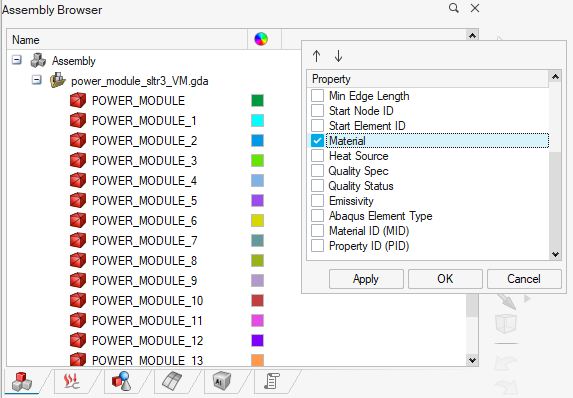
In the Assembly Browser (1st tab):
-
Display the Material column:
Right-click on the Name column title bar then check Material and then click on the OK button.
-
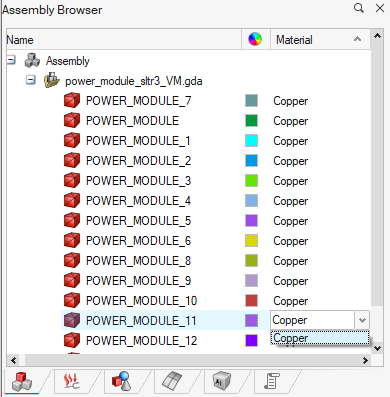
Assign the material to the body:
After having created the materials, in the column Material and in front of the body (of the .gda model), left-click and then select the material you want to assign to this body.
-
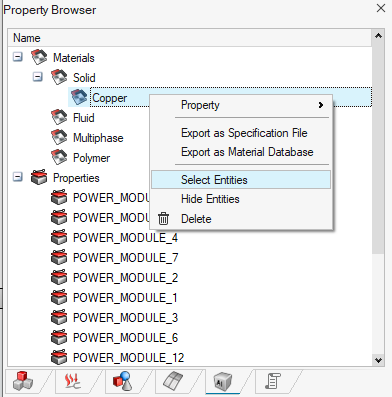
In the Property Browser (5th tab), right-click on a material and the 2 contextual menus Select Entities and Hide Entities allow you to select and hide the bodies assigned to a material.