Part 1: Create Design Study 1
Import Geometry
- Open a new SimSolid session.
-
Click Import from file
 .
.
- In the Open geometry files dialog, choose Pullup bar V1.x_t.
-
Click Open.
The assembly will load in the modeling window. The Automatic connections dialog opens.
Create Connections
- In the Automatic connections dialog, specify the Gap and Penetration tolerances as 1.
- Set Connection resolution level to Increased.
-
Click OK.
Note:
- SimSolid creates connections even in areas with overlapping geometry.
- SimSolid automatically identifies bolts, nuts and washers.
- Sliding contact is applied automatically in bolt shanks, bonded is applied otherwise.
Assign Materials
- On the Project Tree, click on the Assembly workbench.
-
On the Assembly workbench, click
 (Apply materials).
- Pick Steel from the Generic materials list.
- Click Apply to all parts.
-
Click Close.
In the Assembly branch of the Project Tree, material properties are identified for each part.
Create Structural Linear Analysis
On the main window toolbar, click Structural Analysis  > Structural linear.
The new analysis appears in the Project Tree
under Design study 1 and the Analysis Workbench
opens.
Create Immovable Support
-
In the Analysis Workbench, click Immovable
Support
 .
.
- In the dialog, verify the Faces radio button is selected.
-
In the modeling window, select the two faces shown in
orange in Figure 1.
Figure 1. 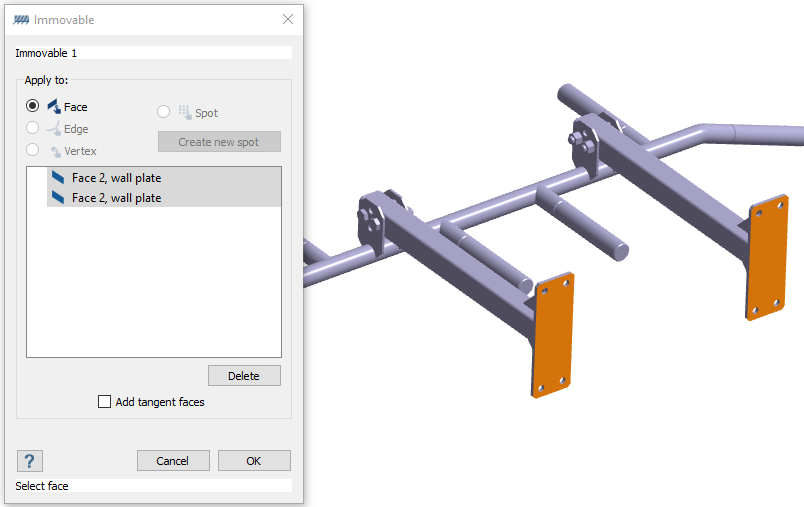
-
Click OK.
The new constraint, Immovable 1, appears in the Project Tree. A visual representation of the constraint is shown on the model.
Create Force Loads
-
In the Analysis Workbench, click
 (Force/Displacement).
- In the dialog, ensure the Faces radio button is selected.
-
In the modeling window, select the two handle faces
shown in orange in Figure 2.
Figure 2. 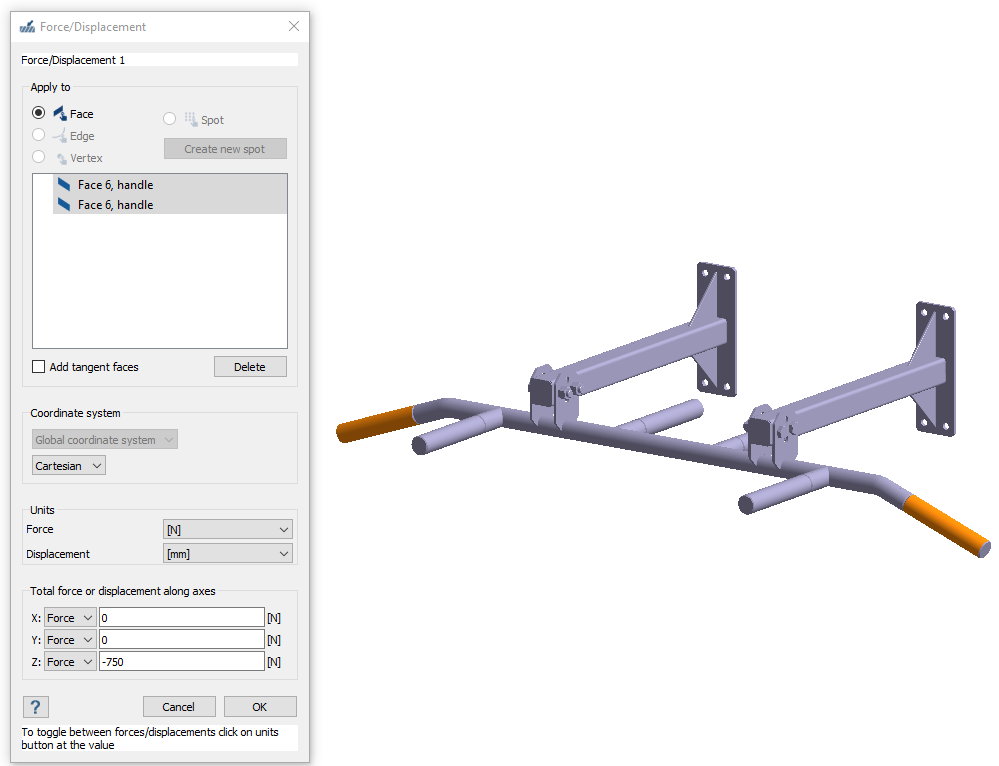
- Specify a Z direction force of -750 N.
-
Click OK.
The new force, Load/Displ. 1, appears in the Project Tree. Vectors representing the load are shown on the model.
Edit Solution Settings
- In the Analysis branch of the Project Tree, double-click on Solution settings.
- In the Solution settings dialog, for Adaptation select Global+Local in the drop-down menu.
- Click OK.
Create Second Structural Linear Analysis
- In the Project Tree, right-click on Structural 1.
-
Choose Copy from the context menu.
The Structural 2 analysis appears in the Project Tree.
-
Click
 next to Structural 2 to expand the analysis
branch.
next to Structural 2 to expand the analysis
branch.
-
Edit the handlebar loads.
-
In the modeling window, choose the two front
handle faces.
Figure 3. 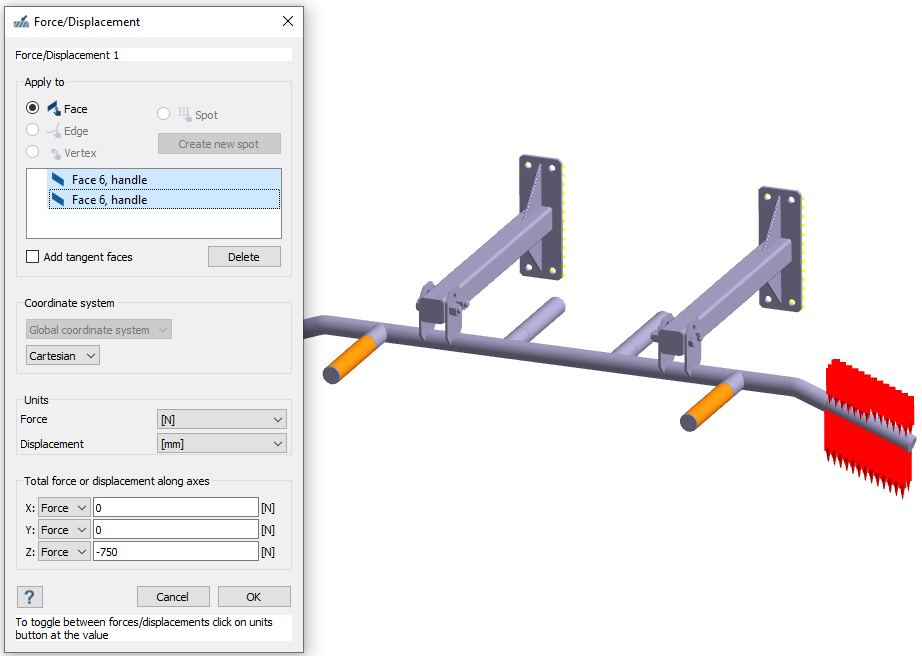
-
Click OK.
Vectors representing the load are shown on the model.
Figure 4. Load case 1 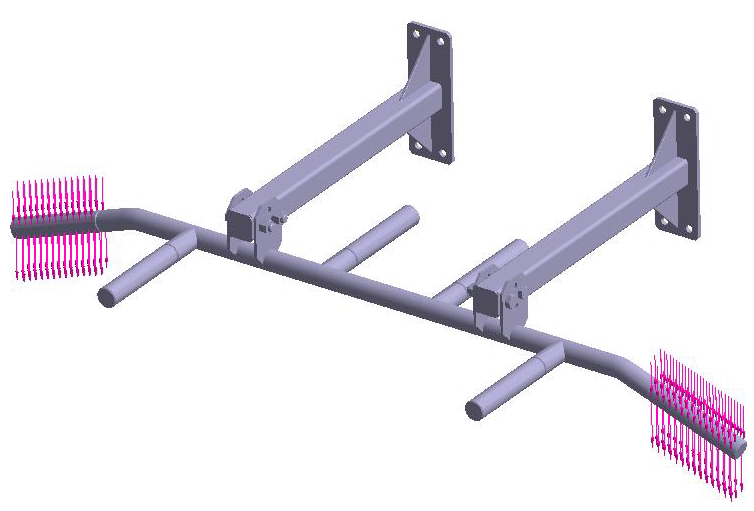
Figure 5. Load case 2 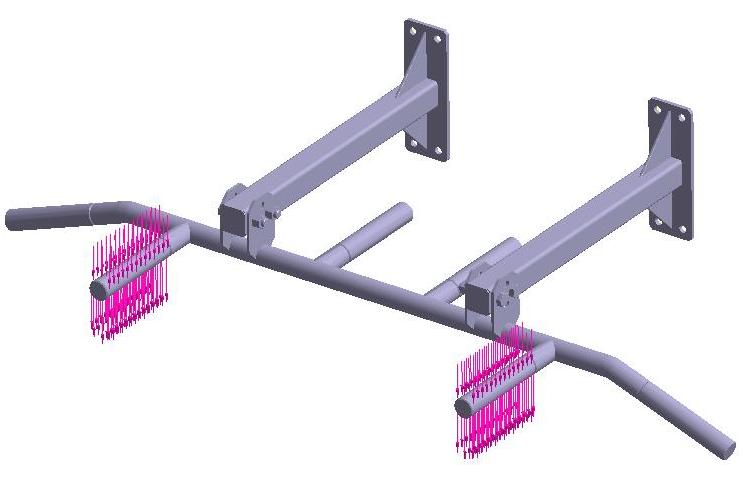
-
In the modeling window, choose the two front
handle faces.
Run Design Study
Solve all analyses in the design study.
- In the Project Tree, select Design study 1 branch.
-
Click Run All Analyses
 .
.
- In the Solver Manager, verify all analyses are selected.
-
Click Solve.
SimSolid runs all analyses in the design study branch. When finished, a Results branch for each analysis appears in the Project Tree.Note: Analysis 1 runs in 11 seconds. SimSolid reuses model data structures for Analysis 2 so the analysis runs faster.
Compare Results with Bookmarks
- In the Project Tree, select the Results branch for Analysis 1.
-
On theAnalysis Workbench, click
 (Results plot).
- Select the Displacement Magnitude plot.
-
In the Legend window, click
 (Show deformed shape).
The modeling window updates to show the chosen results and display options.
(Show deformed shape).
The modeling window updates to show the chosen results and display options. -
Click the
 (Snap bookmark) icon.
SimSolid saves the data currently displayed in the modeling window as an image or animation, and a thumbnail appears in the Bookmark browser. You can select a bookmark at any tine to display a saved view in the modeling window.
(Snap bookmark) icon.
SimSolid saves the data currently displayed in the modeling window as an image or animation, and a thumbnail appears in the Bookmark browser. You can select a bookmark at any tine to display a saved view in the modeling window.Figure 6. 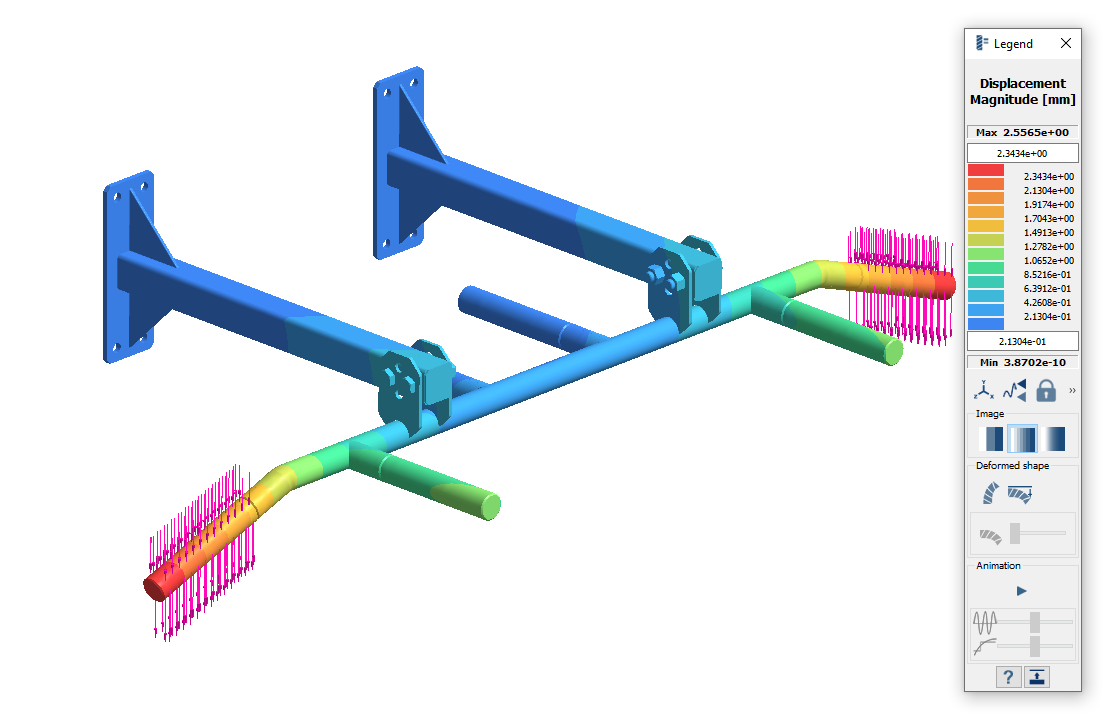
- Repeat steps 1 through 5 for Analysis 2.
- Toggle between the different results using the Bookmark browser.