Defining a Cable Path Using Points
Create a cable route along which cables are installed, specified as a series of straight lines.
Note: A cable path may not consist of overlapping sections.

-
On the Cables tab, in the
Definitions group, click the
 Cable Path icon.
-
Define the cable path using one of the following methods:
- To specify the corner points, use point entry or add the U, V or N values directly for each point.
- To import the points from a ASCII text file, click
the Import points button.
- Under Source file, click ASCII text file.
- Under Source file, in the Filename field, browse to the file.
- Under Delimiter, click the relevant delimiter for your ASCII file.
- To import the points from a NASTRAN file, click
the Import points button.
- Under Source file, in the Filename field, browse to the file.
- Under Settings, in the Scale factor to metres field, modify the value to scale the cable path.
- Under Settings, in the NASTRAN segment ID field, enter the id of the segment to import.
Note: Points imported from a NASTRAN file are assumed to be in metres.
-
View the cable path in the 3D view.
- Select the Construct tab in the model tree.
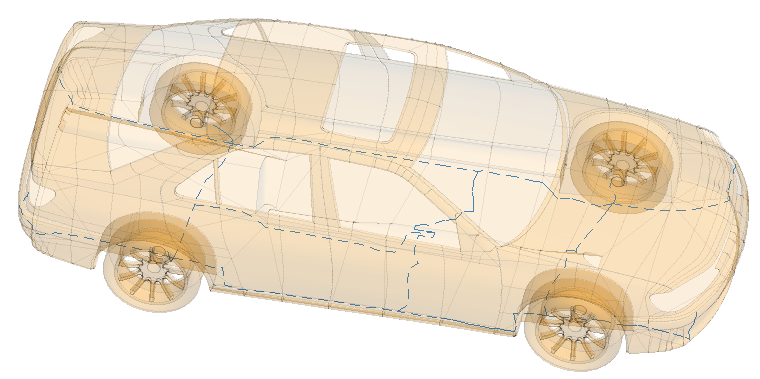
The cable path is displayed as a dotted-blue line in the 3D view.Figure 2. Cable paths are visible in the 3D view when the Construct tab is selected. The cable paths are indicated by dotted-blue lines. 
- In the Label field, add a unique label for the cable path.
- Click the Create button to create the cable path and to close the dialog.