Scripting: Play
Introduction
The scripts recorded can be play back using the following modes.
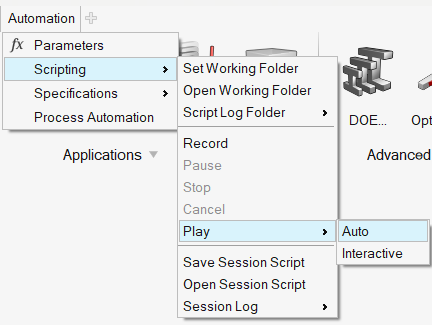
Auto
Auto play will execute the script in single shot. A log file (ProjectLogFile.txt) will be created under the script folder. This will be helpful to check the status of the operation.
Interactive
Interactive play will execute the operations in the script one by one. Following are the different interactive play debugger for Python, Java and XML script.Python (*.py)
Python scripts can be debugged with the help of Compose tool. Click on the below link contains the steps to configure Compose with SimLab.JavaScript (*.js)
Interactive debugger window is inbuild with SimLab to list the operations in JavaScript. Following debugging action is provided to execute the script interactively.
| Command | Icon | Description |
|---|---|---|
| Continue |  |
Gives the execution control back to the script engine. |
| Interrupt |  |
Suspends script execution as soon as the next script statement is reached. |
| Step Into |  |
Performs a step action. |
| Step Over |  |
Performs a next action. |
| Step Out |  |
Executes the script until the current function returns. |
| Run to Cursor |  |
Continues execution to the selected line (which contains the cursor) in the CodeWidget. |
| Run to New Script |  |
Returns control to the script engine until a new script is executed. |
| Find in Script |  |
Displays the CodeFinderWidget. |
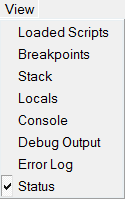
| Command | Description |
|---|---|
| Loaded Scripts | Displays a list of currently loaded scripts. |
| Breakpoints | Shows breakpoints that have been set. |
| Stack | Shows a backtrace of the script's execution state. |
| Locals | Shows the local variables of the current stack frame. |
| Console | Provides a command-line interface to the debugger. |
| Debug Output | Contains output from the print() script function. |
| Error Log | Shows error messages that have been generated. |
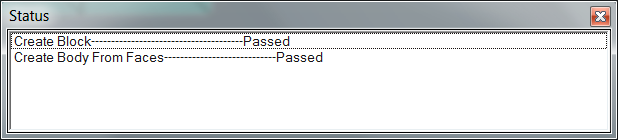
| Status | This will list the status of each script operation. |
Session (*.xml)
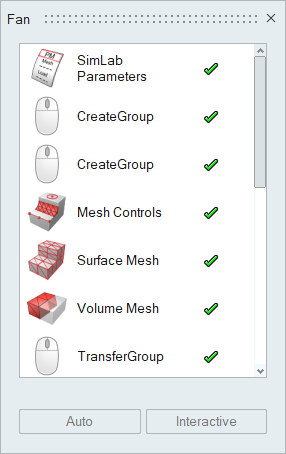
This will list the operations as icons in the interactive window. For example, record the script by capturing the surface mesh operation. Play back the script will list the surface mesh icon in the interactive window as shown below.
 The session script can be executed either through auto or
interactive mode.
The session script can be executed either through auto or
interactive mode.
- Auto
This will execute all the operation in one shot. If we select any operation, then it will execute from that operation till the end.
-
Interactive
This will execute the operation one by one. If any operation failed, then we can manually do that, right click on the operation and click on the resolve button.
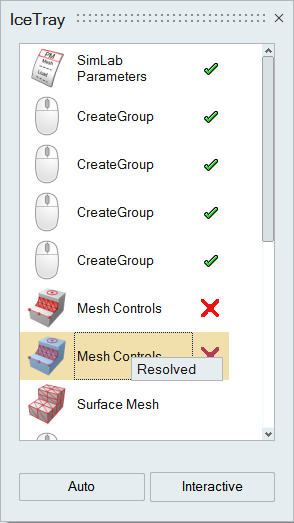
Below are some of the action available in session interactive window After executing each operation, it will display the status of the operation.
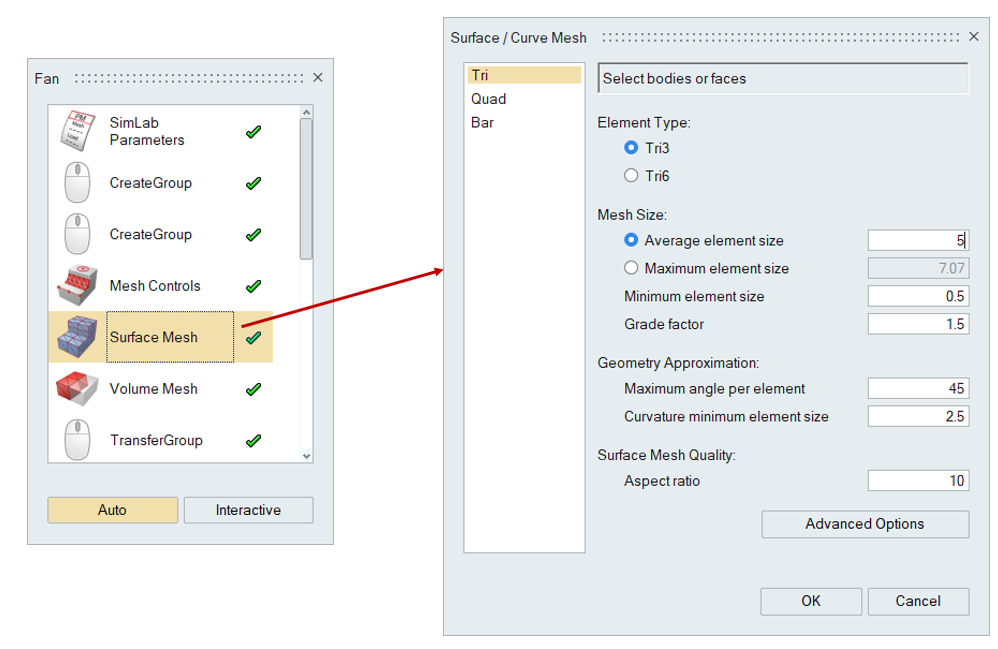
Double click on the operation will open the corresponding dialog and display the values in each field which are available in the session script.
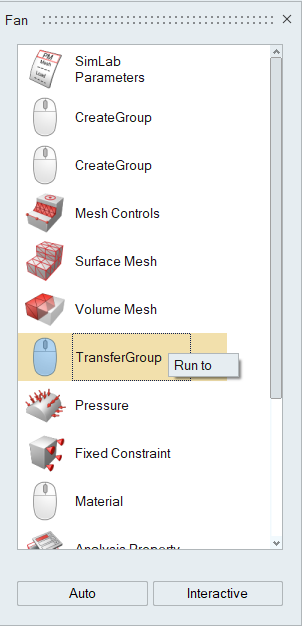
Right click on the operation will have an option "Run to". This will execute the script upto that operation and wait.
Command
The script can be executed also through command window. Below arguments to execute the script in command window.
| Argument | Description |
|---|---|
| -auto (or) -sp | To specify the script file and the path. |
| -param | To specify the paramater file (*.xml or *.CSV) and path. |
| -response | To specify the respose file and path. |
| -nographics | To hide the SimLab GUI. |
| -nowait | To release the command prompt during script execution. |
| -doe | To specify the design of experiments file. |
- Windows
SimLab.bat -auto d:\script.py -param d:\Param.xml -nographics
SimLab.bat -auto d:\script.py -param d:\Param.xml -doe d:\designexperimentsfile.xml -nographics
- Linux
SimLab.sh -auto /home/usern/Desktop/ script.py -param /home/usern/Desktop Param.xml -nographics
SimLab.sh -auto /home/usern/Desktop/ script.py -param /home/usern/Desktop Param.xml -doe/home/usern/Desktop/designexperimentsfile.xml -nographics