How to create Custom GUI?
Introduction
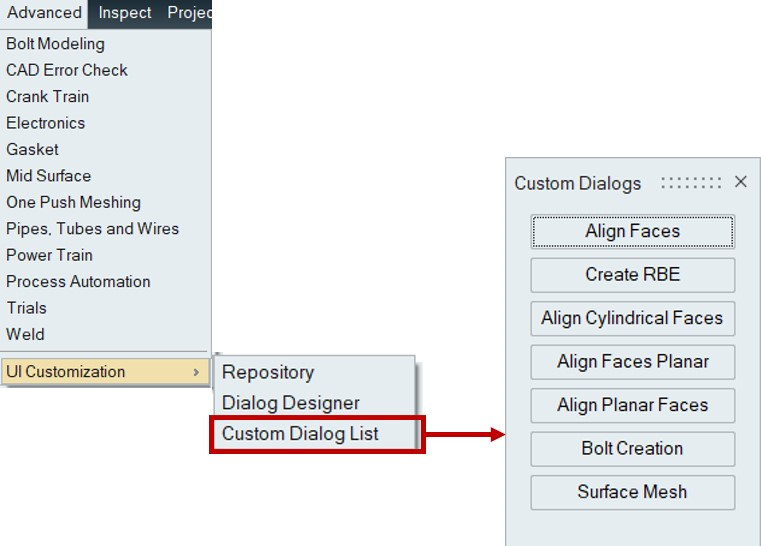
The options under Automation > UI Customization are used to create customized dialogs inside SimLab by linking the python script to execute the process. These custom dialogs will be listed under the custom dialog list.
Following options are available under the UI customization.
- Repository
- Dialog Designer
- Custom Dialog List
Repository
Repository is used to store the files related to the created custom dialogs. By default, the repository is set to ".altair" folder.Default repository will be "C:\Users\<username>\.altair\SimLab_V2019.2\simlab\UICustomization". The repository can be set to the user defined folder.
Dialog Designer
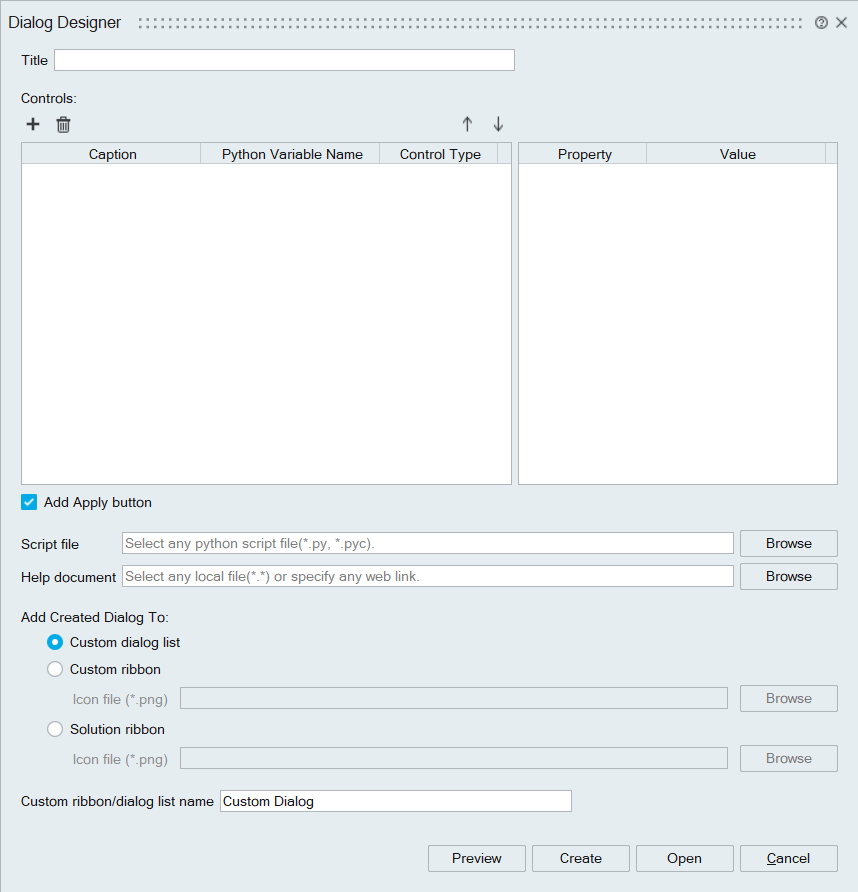
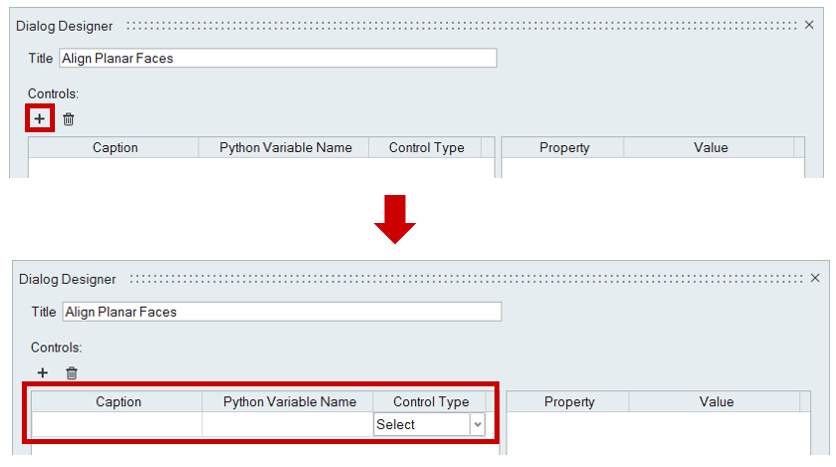
Title
Custom dialog title will be set here.

Controls
Click on "+" button will insert a row in the below table.
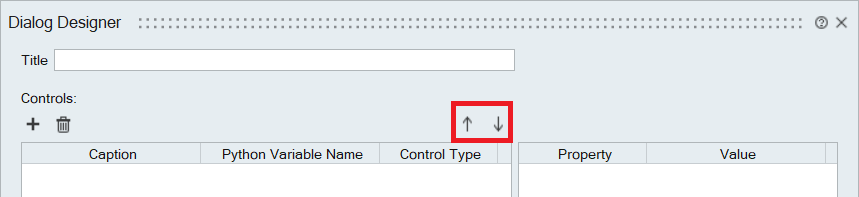
Rearrange Controls
Click on the Move Up and Move Down buttons to move the controls up and down.
Below points will explain about the parameters in the table.
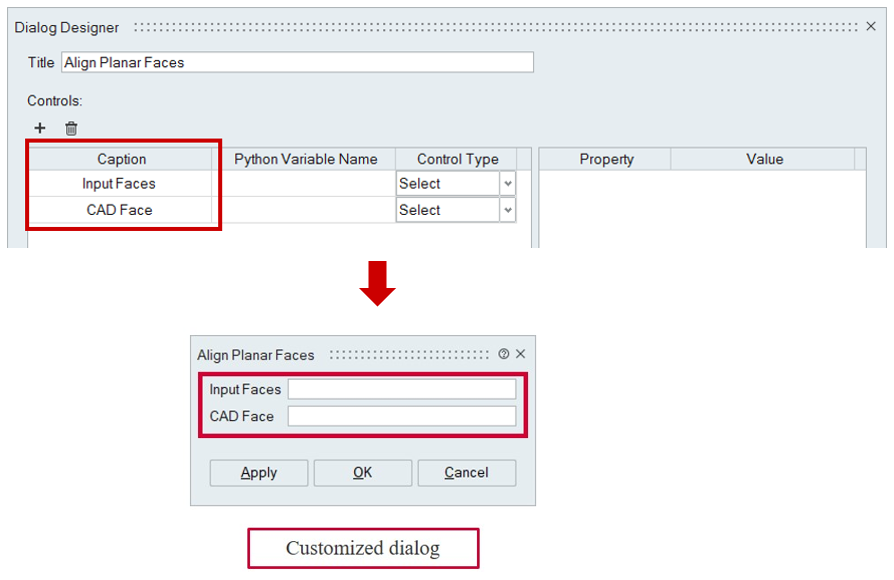
Caption
Text entered in this field will be displayed in the custom dialog.
Python Variable Name
Type the name of the variable used in the python script.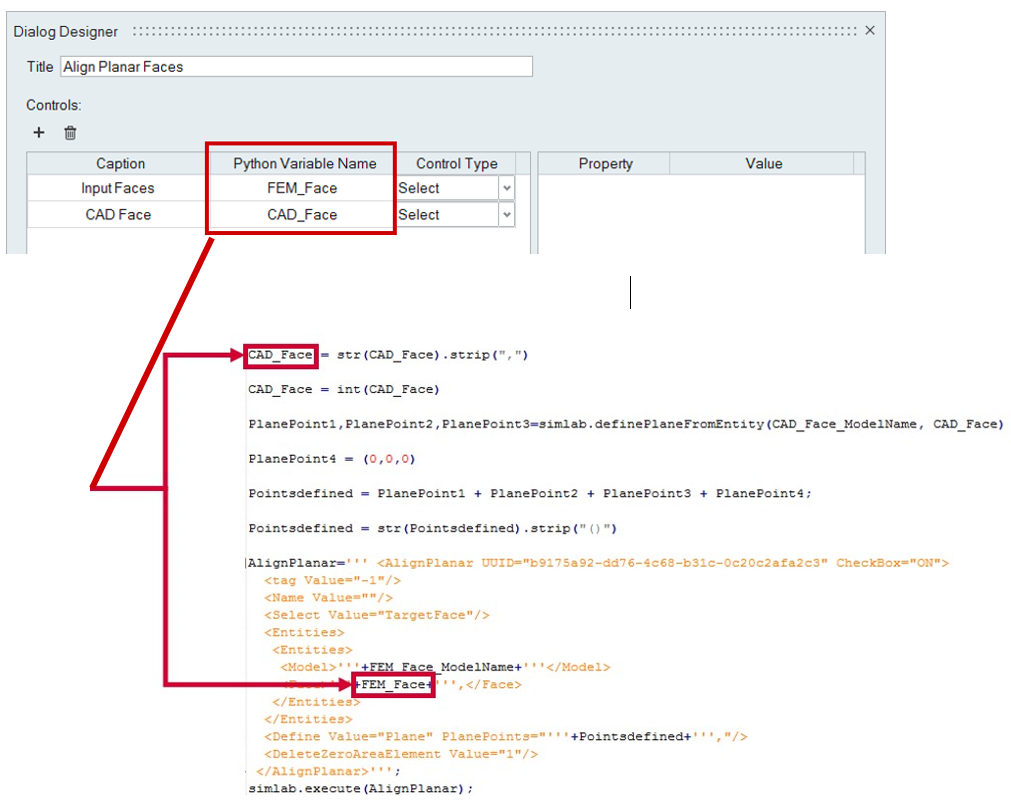
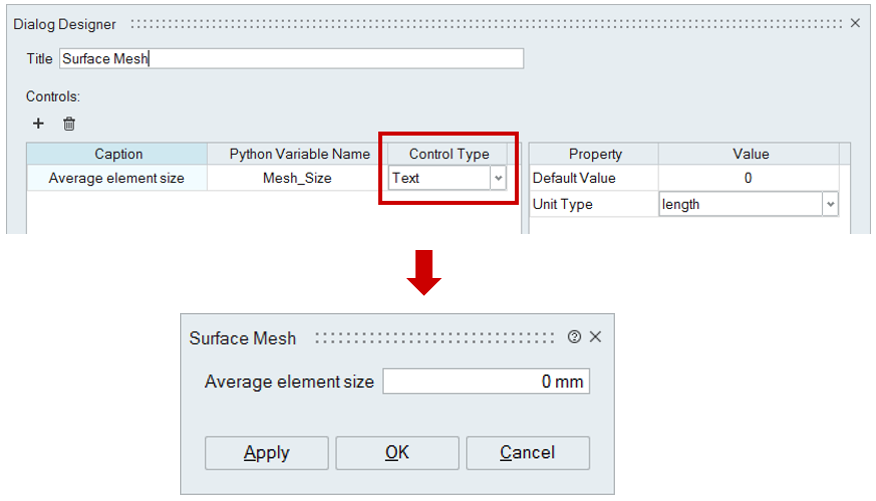
Control Type
Input type for the variable will be defined in this field. Following input types are available.
- Text
This is used to set the line edit action as editable one.
Example: Average mesh size line edit should be editable to enter the mesh size value. For this case, set the line edit type as text.
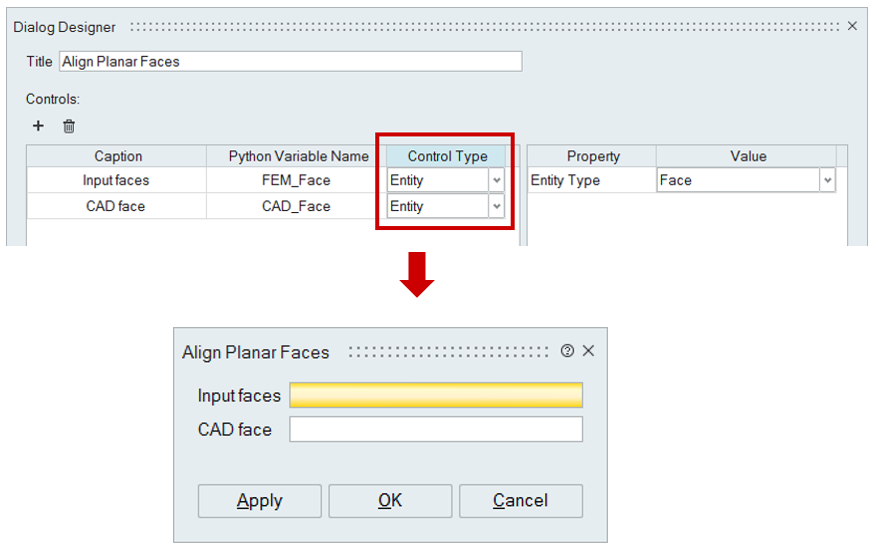
- Entity
This is used to select the entity type for line edit.
Example: For aligning Fem face to CAD planar face, input should be FEM and CAD face. For this case, face entity type can be set.
Allow same entity selection in multiple line edits

This option is used in special cases where users might be interested in selecting an entity in more than one line edit. This option is accessible when users define more than one entity control of the same type.
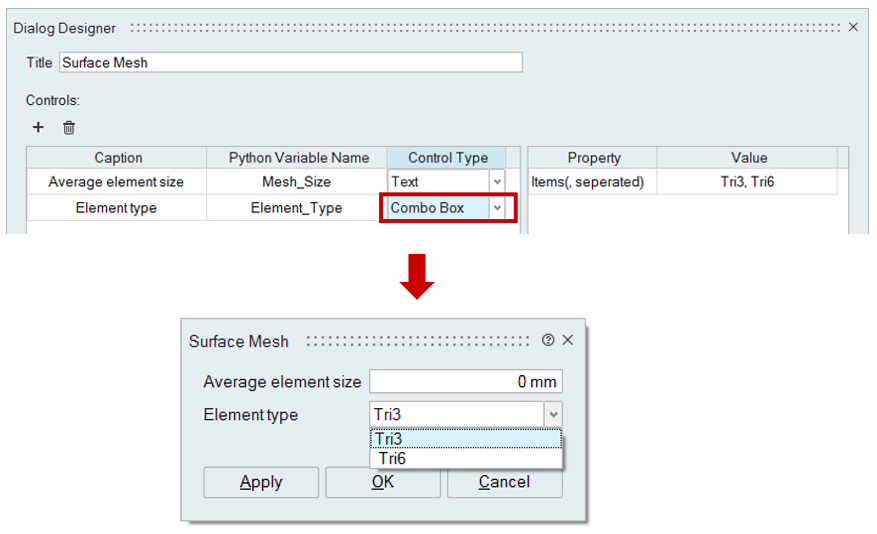
- Combo Box
This is used to create a drop-down menu in the dialog. User should list the items in comma separated.
Example: To mention the element type to generate surface mesh, combo box option can be set.
- Radio Button
This is used when there is a list of two or more options that are mutually exclusive and the user must select exactly one choice. User should list the items in comma separated.
Example: To mention the element type to generate surface mesh, radio button option can be set.

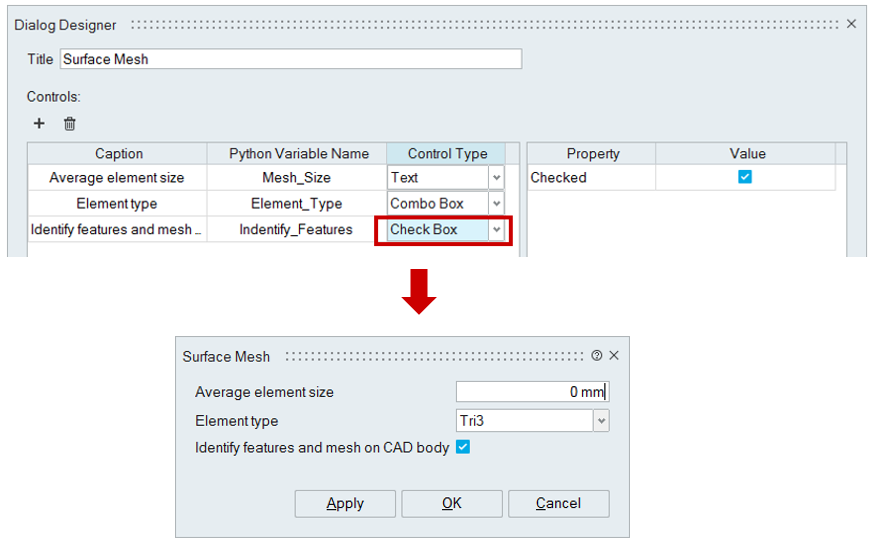
- Check Box
This is used to create a check box.
-
True Turn on the check box
-
FalseTurn off the check box
For example, To identify features and mesh on CAD body in Surface Mesh, check box can be added.
-
-
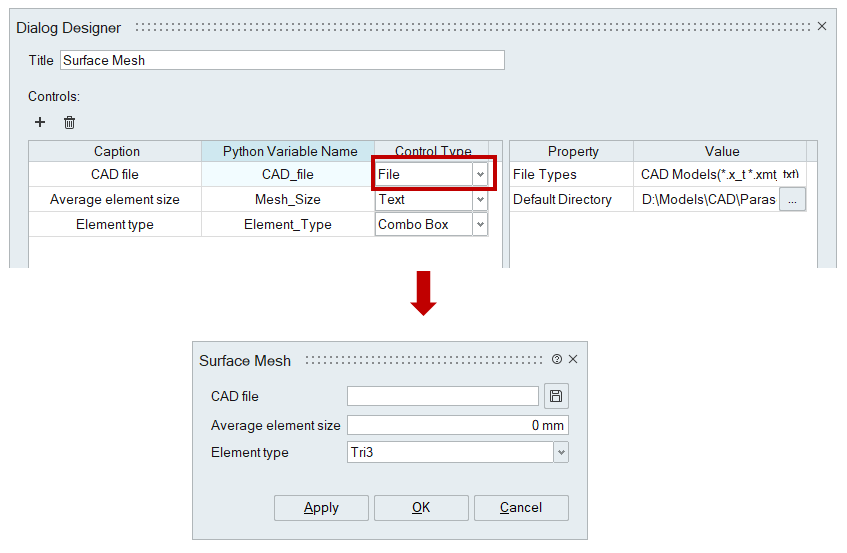
File
This is used to import / point the file. For example, To import the CAD file and generate mesh, file option can be used.
Default Directory is used to specify the default folder to be opened when the file control is clicked.
-
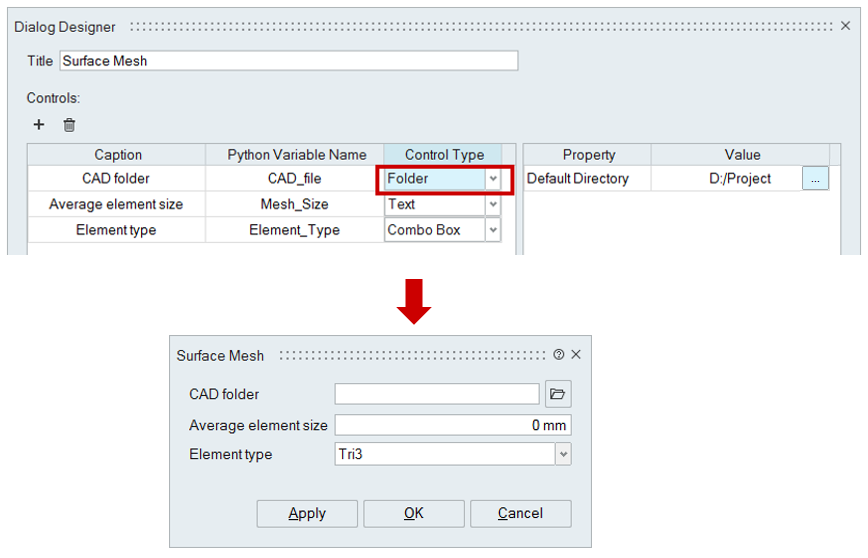
Folder
This is used to point the folder. For example, In order to import multiple CAD file available in the specified folder and generate mesh, folder option can be used.
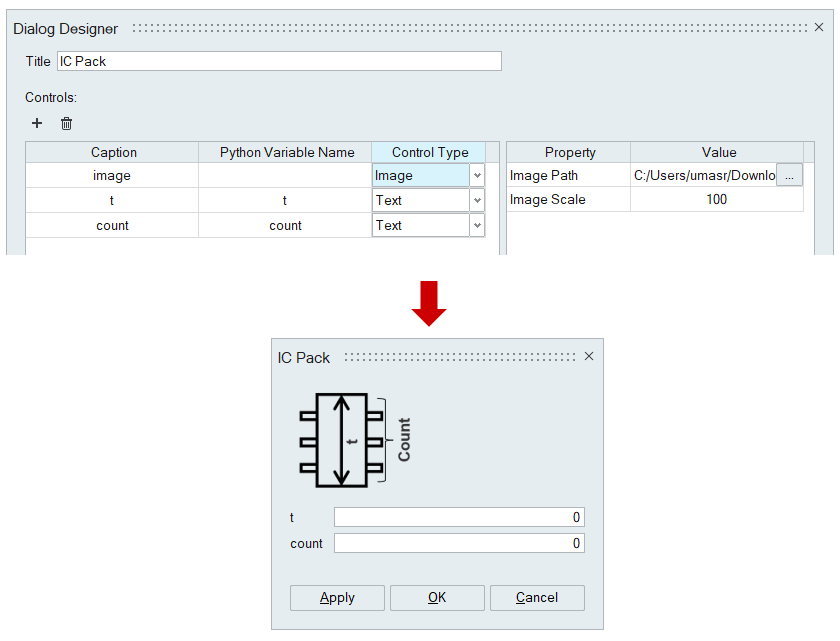
- Image
This control is useful when the user needs to display an image in the dialog. The user should select an image. The default size of the image in the dialog will be the actual size of the selected image. The user can resize the image using the "Image Scale" attribute. The default value is 100, which corresponds to the actual size of the image. The image scale value should be greater than zero.
-
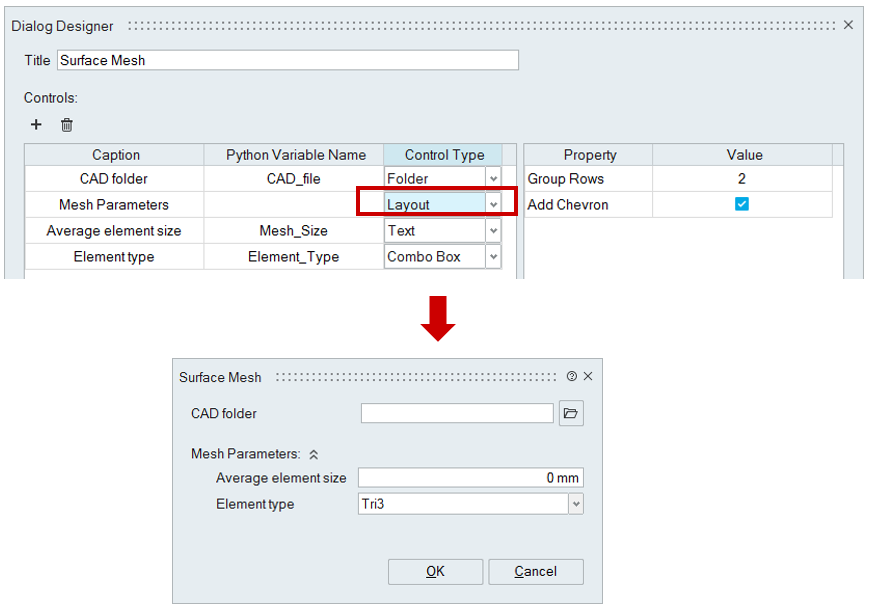
Layout
This is used to group the controls. If needed, Chevron can added to the created group.
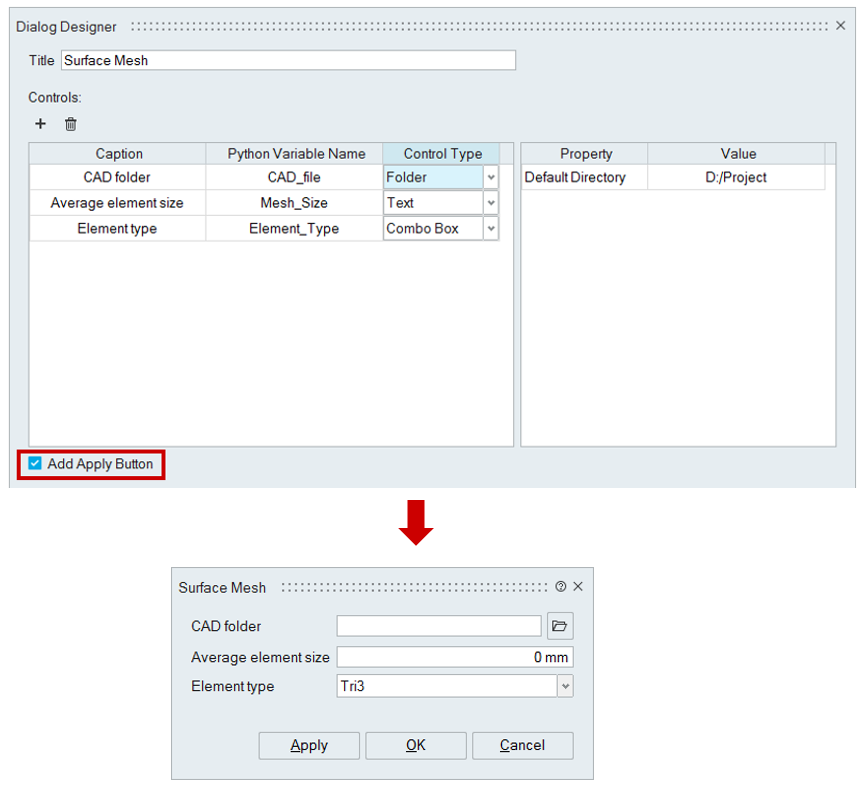
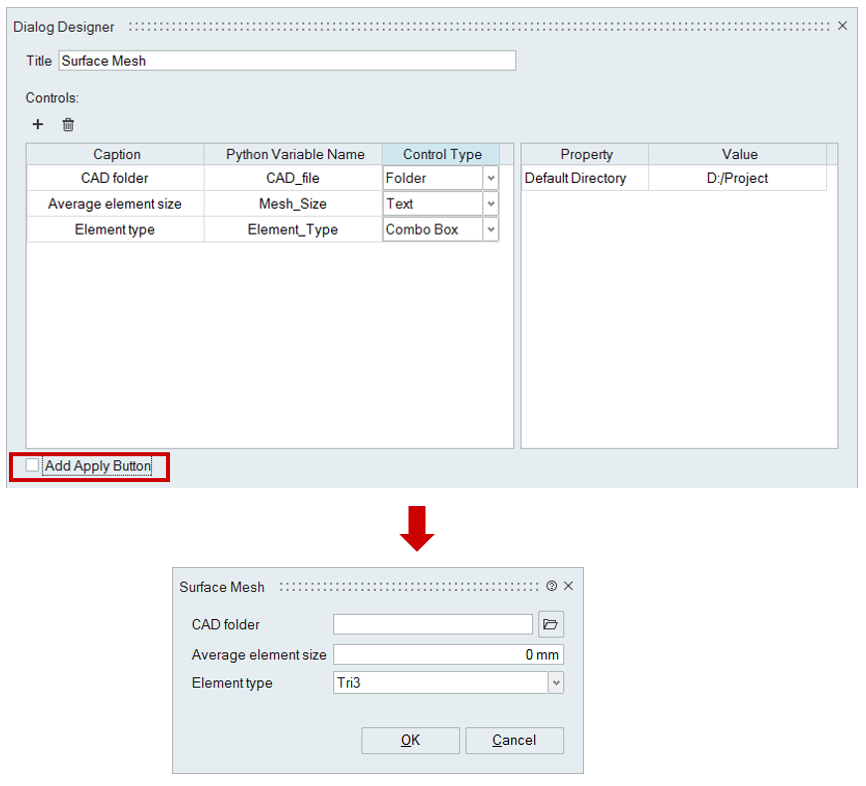
Add Apply Button
It is used to introduce 'Apply' button in custom dialog.
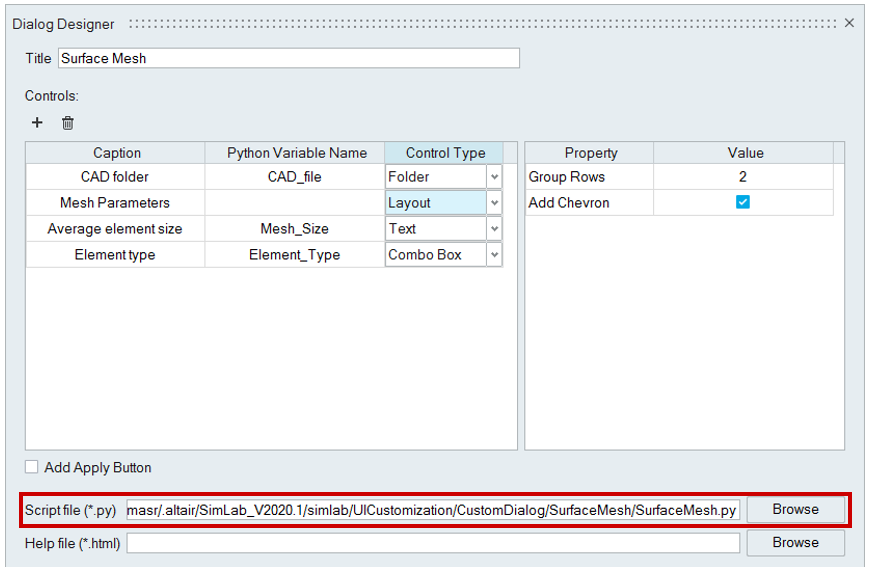
Script File
Select the python script file(*.py or *.pyc).
Help File
Option provided to link the Help pages (*HTML) to the custom dialogs.
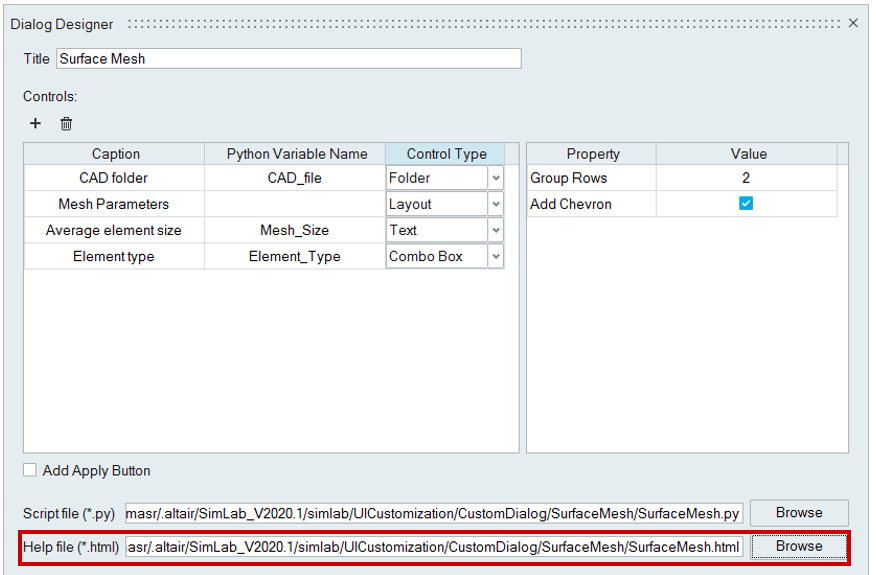
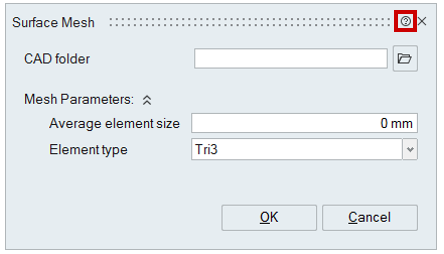
"?" icon will be displayed in the right corner of the custom dialog. Click on the "?" icon will open the linked HTML page.
Add Created Dialog To
Customized dialog can be added to one of the following:
- Custom dialog list
- Custom ribbon
- Solution ribbon.

Example : Custom ribbon
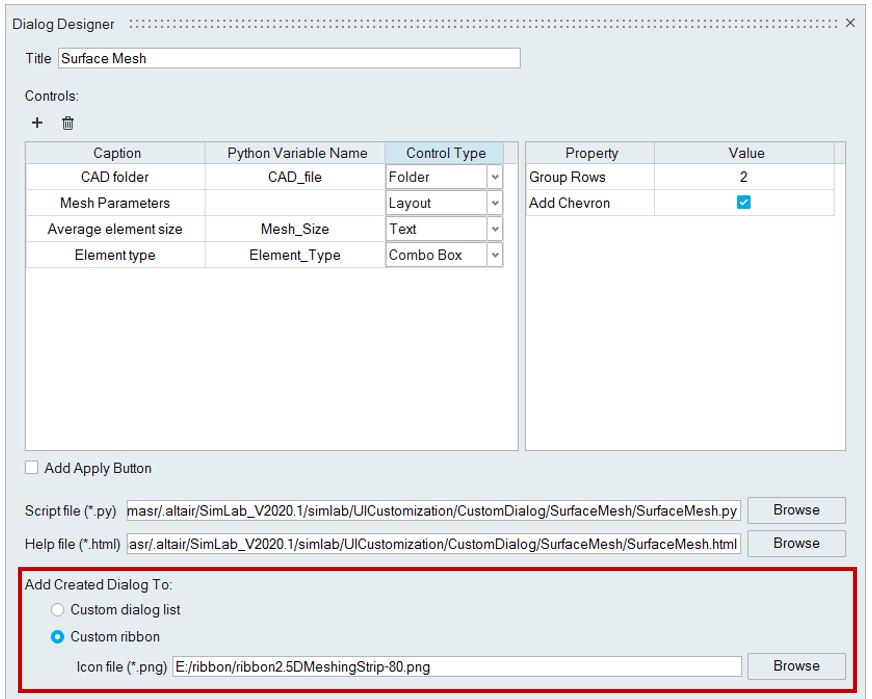

The user can drag and drop the UI Customization dialogs from the Custom Dialog ribbon onto the SimLab Custom ribbon pages.
Ribbon/dialog list name
User can specify customized name to the ribbon/list created by the Dialog Designer.
Preview
Preview button will visualize the custom dialog. This is to ensure the custom dialog design before creation.
Create
Create button will create the custom dialog based on the controls provided in the table. Custom dialog related files will be stored under the repository.
Open
Open button will take you to the repository folder location. This will allow to select the existing custom dialog and enhance. Also, it will update the custom dialog modification in repository.
Custom Dialog List
This option will list the custom dialogs available in the repository. The custom dialog list will float by default and it is dock able.