Calculate the Standard Deviation
-
From the MPDB Projection Tool dialog, verify that the Animation
File option is checked and use the file browser to select the
desired solver animation file to import.
Tip: The Animation File option is activated by default, however you can uncheck the option to deactivate the standard deviation calculation process.
- Click the Import button to import the selected file.
- Optional:
Activate the Compute Intrusion Depth from Elements
option to convert nodal based projection distance results into element based
results using an average.
Note: By default, the projection distance results are available only as nodal based, therefore the option is unchecked.
-
Use the Origin, Y-Axis, and
YZ plane node selectors to define the system at the
back of the barrier frontal block, which will be the reference system for the
projection calculation.
Figure 1. 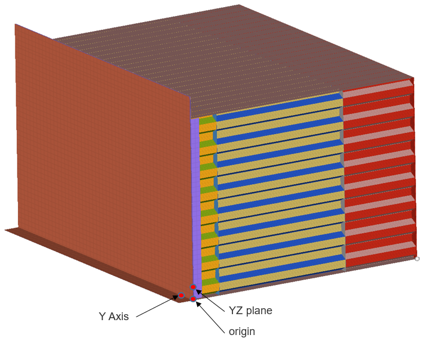
-
Use the Top right, Top left,
Bottom right, and Bottom left
node selectors to select the four corners of the front face of the
barrier.
Figure 2. 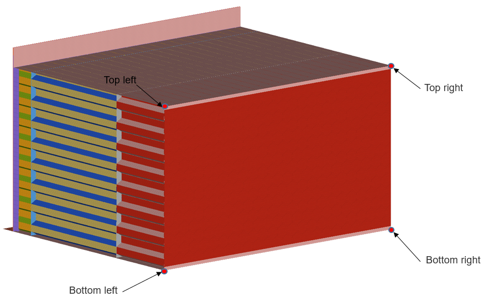
-
Select the whole components defining the full barrier block.
Figure 3. 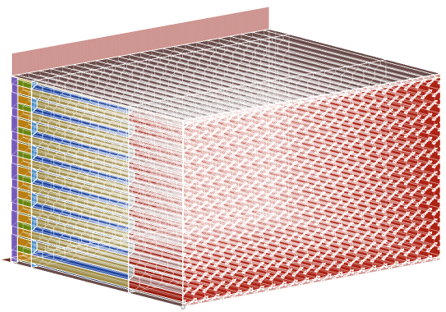
-
Select the outer cladding components of the barrier block.
Figure 4. 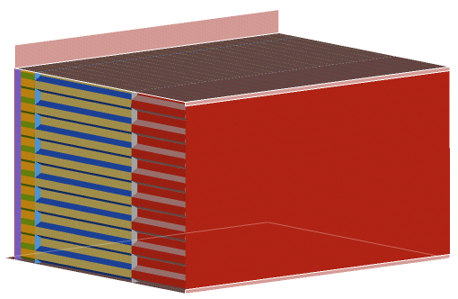
- Define the total vehicle width requested to calculate the rating area on the barrier.
-
Select the solver used and the directory for the tool outputs.
- Dyna-Standard
- Dynakey-i10
- Dynakey-Long
- Radioss
Default: Animation directory/Output - Optional:
Use the Calculate Standard Deviation options to select a
new entities and calculate the standard deviation for the selected area.
Attention: These options are meant to be used when the first evaluation of the Standard Deviation and Intrusion projections have been calculated and are available in the modeling window (after clicking the Apply button at the bottom of the tool).
- Select Entities
- Select a new calculation area.
- Calculate
- Calculate the standard deviation for the newly selected area.
- Clear
- Clear the results.