The Pedestrian Impact tool facilitates the post-processing of pedestrian
analysis.
This tool uses time-history and result files as input and conforms to the pedestrian
safety regulations GTR, EuroNCAP, and Homologation. Pedestrian Impact automates the
process with minimal input, therefore reducing the deck generation lead time with
less human error.
In HyperView or HyperGraph,
from the Safety ribbon > Impacts tool group, click the Pedestrian tool to
invoke Ped Pro Post browser tab.Figure 1.
Note: Pedestrian Impact is not supported for the Vehicle Safety Tools + HyperView -
MultiCore preference.
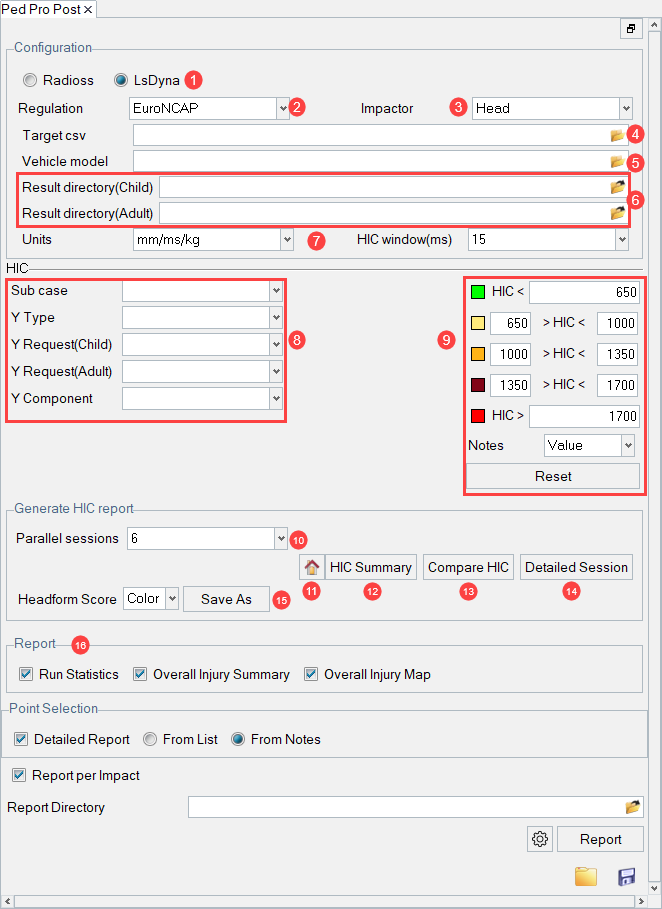
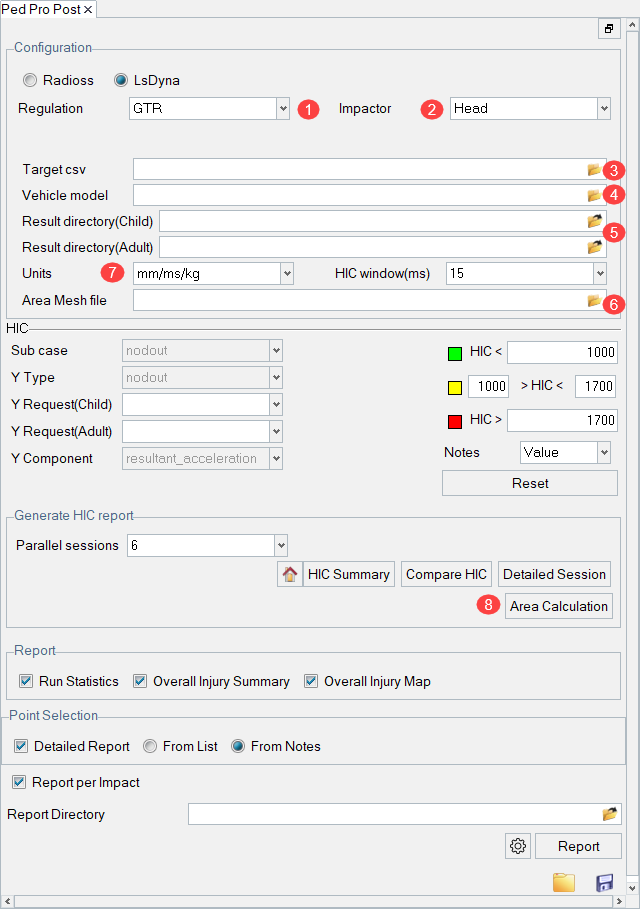
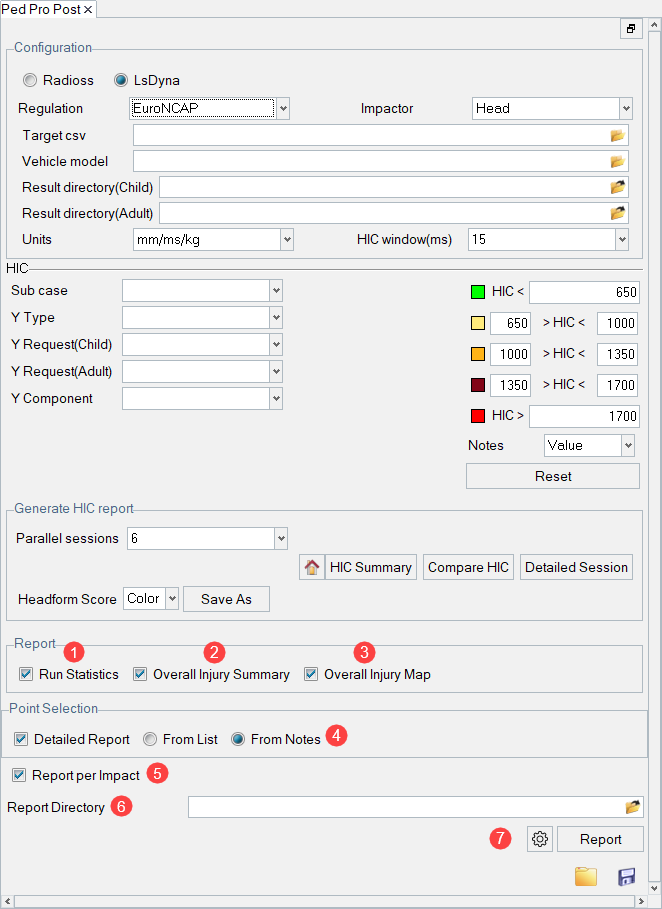
Pedestrian Impact - EuroNCAP Regulation
Figure 2.
1. Solver selection
Supported solvers are Radioss and LS-DYNA.
2. Regulation
Select a supported regulation.
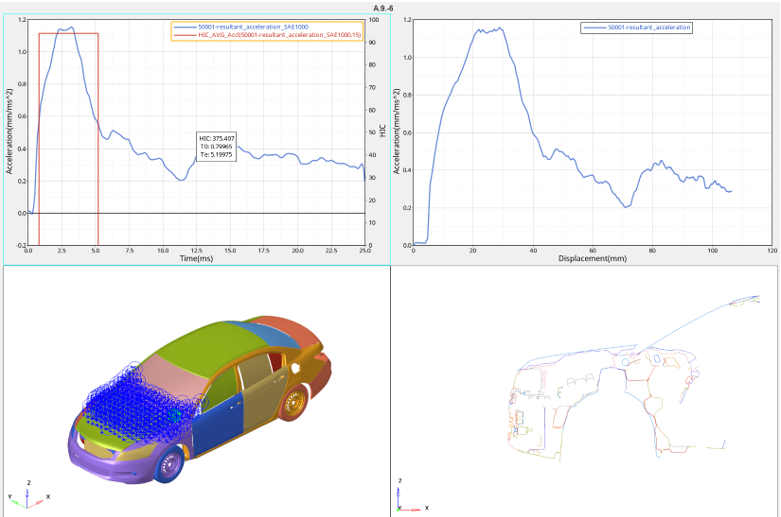
3. Impactor
From the drop-down menu, select Head,
Upper Leg, or Lower
Leg.
4. Target csv
Select a HyperMesh-created
.csv file.
Note: Upon using HyperMesh to mark and position the headform,
HyperMesh generates a
.csv file.
5. Vehicle model
Select a solver input file or a result file that contains the vehicle
model.
6. Result directory
Select the root directory that contains the analysis directories as
sub-directories.
7. Units
Select model units from drop-down menu.
8. Type/Request/Component selection
Select the following:
Subcase
Y Type
Y Request, the ID used for the section cut in the model.
Y Component
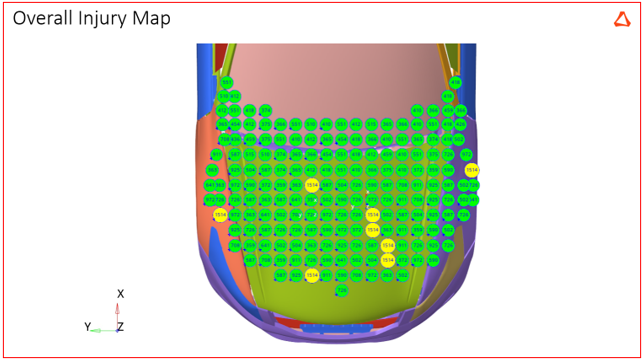
9. Threshold/Limit Values and Color Selection
Based on the Impactor selection, you can define limit values and
colors.
Click the color palette to select a color.
Define the limit/threshold values in the value field.
For Head, select the HIC value or impact location name for the
HIC summary.
Reset: Resets to official regulation limits.
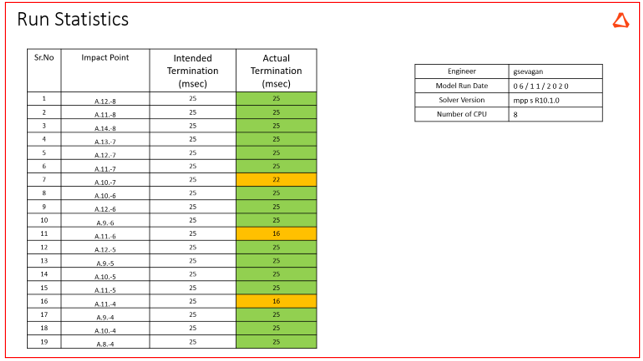
10. Parallel Sessions
Select the number of batch processes to launch. For example, if
processing 200 impact locations, the specified number of parallel
process are launched to reduce processing time.
11. Home button
Click to go back to the summary page.
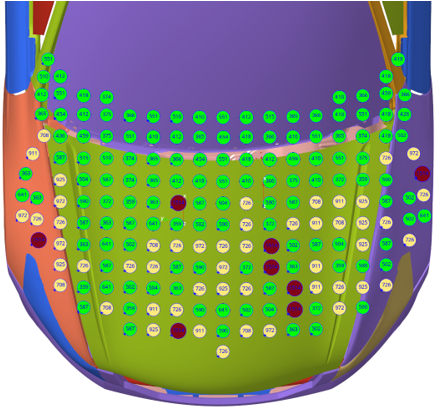
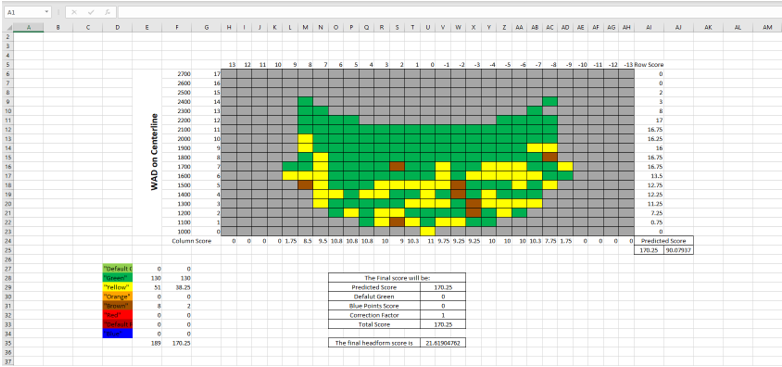
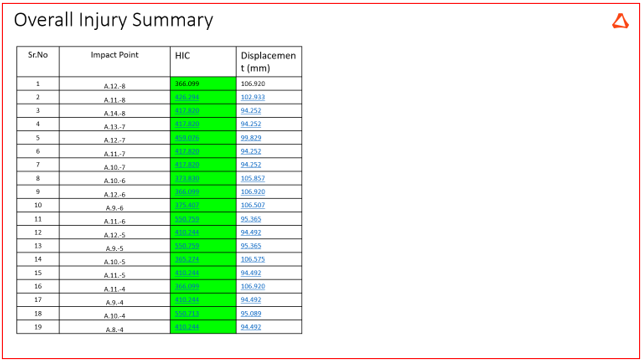
12. HIC Summary
If Impactor = Head, HIC summary.
Figure 3. EuroNCAP HIC summary
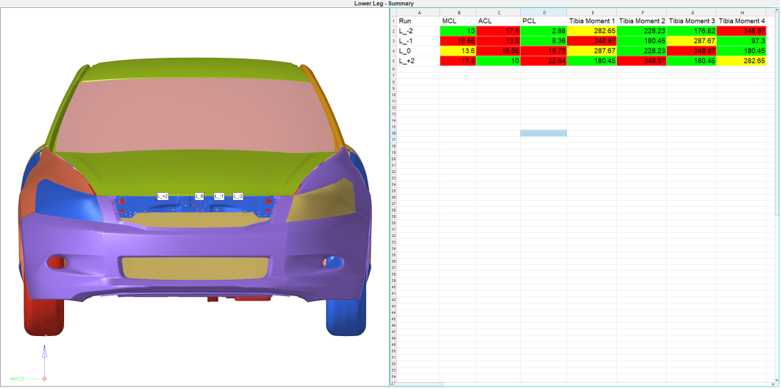
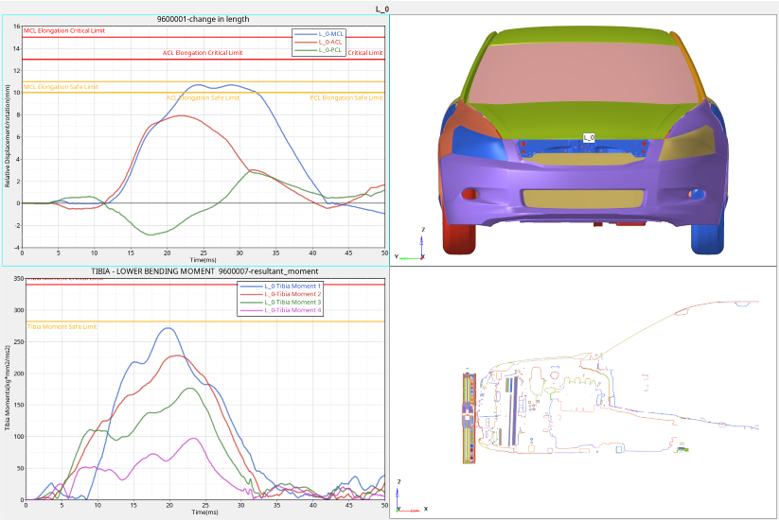
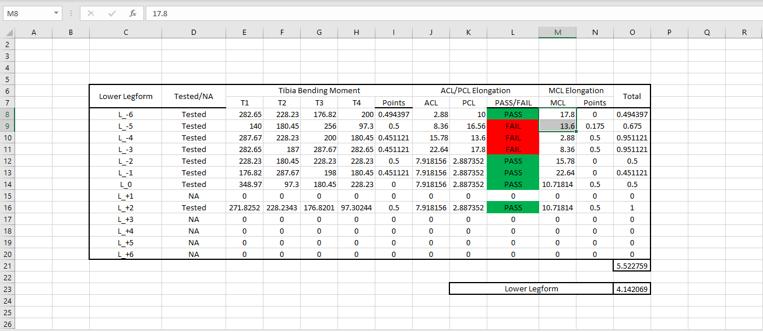
If Impactor = Lower leg.
Figure 4. EuroNCAP Lower Leg Summary
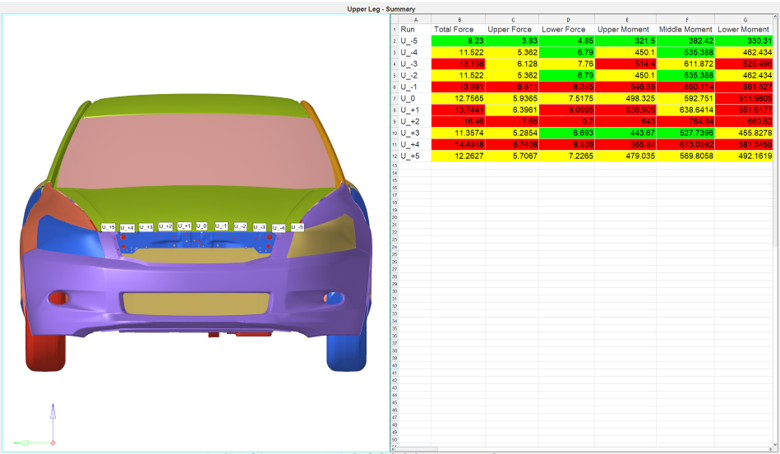
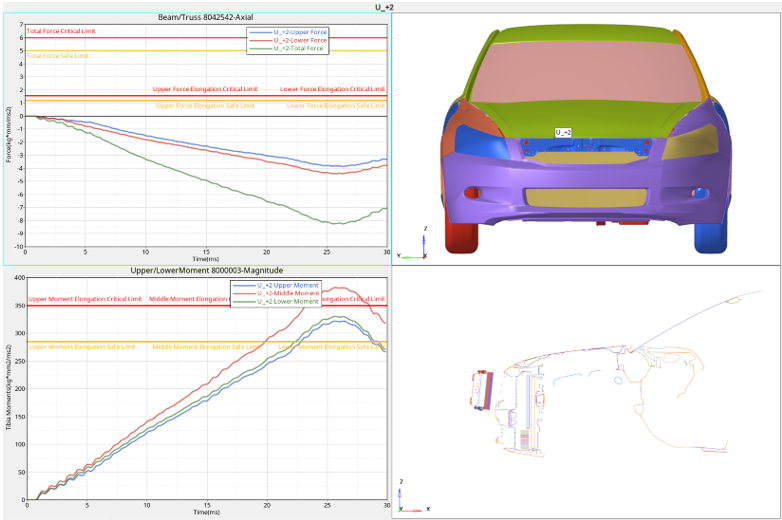
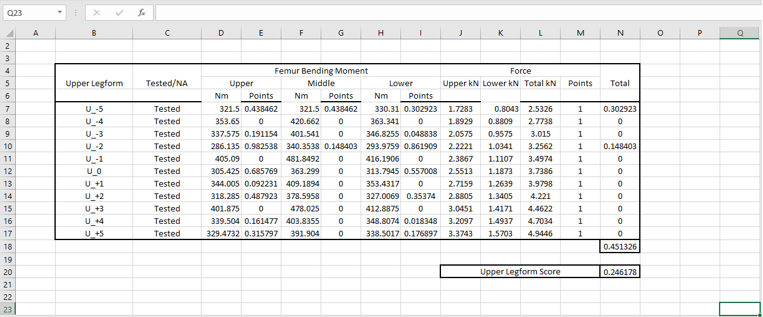
If Impactor = Upper Leg
Figure 5. EuroNCAP Upper Leg Summary
13. Compare
Clicking Compare prompts you to select the impact
location to be processed using the Select compare
options dialog.
Select folders to compare
From the file browser, select multiple analysis folders to
be compared.
Select notes to compare
Select multiple notes at the summary window to be
compared.
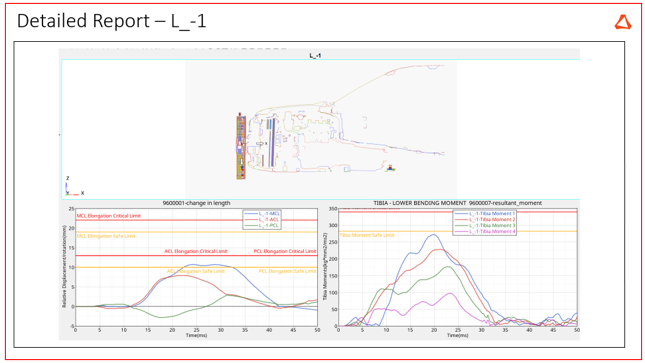
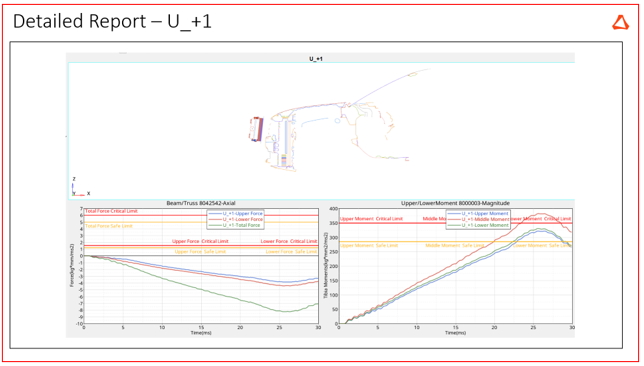
14. Detailed Session
Clicking Detailed Session prompts you to select
the impact location to be processed through the Select target
points window.
Figure 6.
1
Sort columns by clicling on the column titles.
2
Select impact locations to be processed. Select all points
using Windows shortcuts Ctrl+A.
3
Right-click on the respective column to invoke
Add as Filter.
4
Search filters support AND/OR/>/<.
5
Click Cancel to cancel the selected
operation.
6
Click OK to confirm the selected
operation.
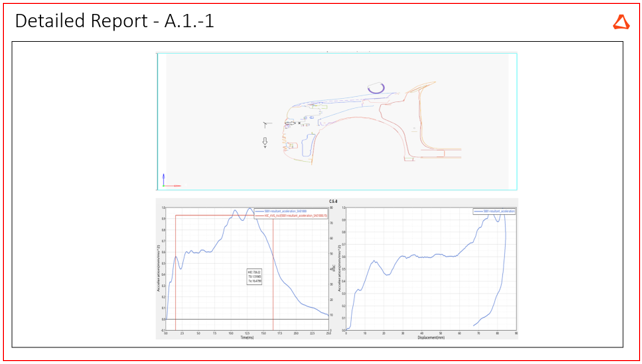
Figure 7. EuroNCAP Headform detailed report summary for selected
location.