
NURBS Curve
Create a NURBS curve, which is a free-form curve.
-
On the Geometry ribbon, select the
NURBS tool.
Note: The tool may be hidden in the dropdown menu. To access the dropdown menu, you can do one of the following:- Select
 at the lower right corner of the
currently displayed tool.
at the lower right corner of the
currently displayed tool. - Click and hold the currently displayed tool.
Tip: To find and open a tool, press Ctrl+F. For more information, see Find and Search for Tools. - Select
- Optional:
In the guide bar, select a Degree.
Tip: Enter a higher degree for a smoother curvature.Note: The degree of the curve depends on the number of control points. For example, a Degree 3 curve would need at least 4 (3+1) control points.
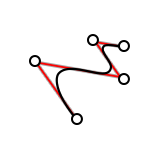
- Click to place the control points.
-
To edit points during creation, click the
 in the microdialog to expand it and
type values in the X, Y, or
Z boxes to fine-tune each point's coordinates. To add
a variable to any coordinate, select the
in the microdialog to expand it and
type values in the X, Y, or
Z boxes to fine-tune each point's coordinates. To add
a variable to any coordinate, select the 
icon.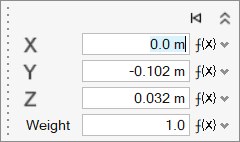
Tip:- To
suspend snapping, hold Alt. You can then move the point freely along
its current face or edge.
Figure 1. Suspend Face Snapping 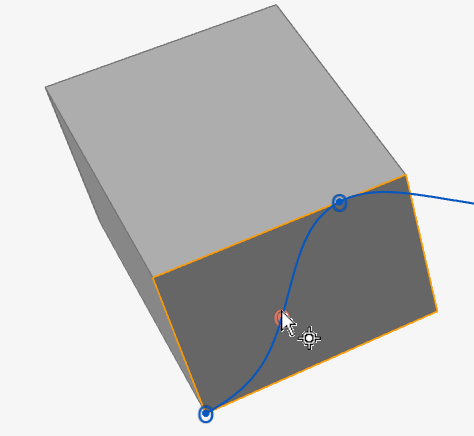
Figure 2. Suspend Edge Snapping 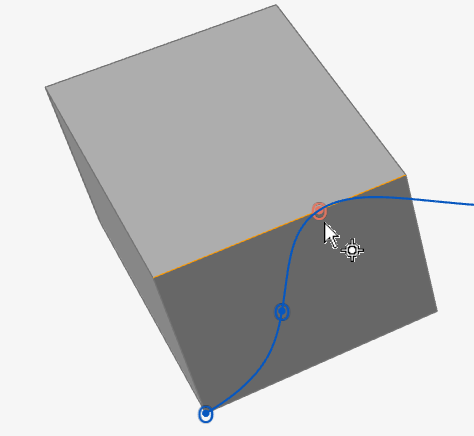
- Press Esc to clear the current curve and exit the tool. Click
Reset
 in the microdialog to
clear the current curve without exiting the tool.
in the microdialog to
clear the current curve without exiting the tool.
Note: To edit after creation, right-click the NURBS curve in the History Browser (F6), and then select Edit. - To
suspend snapping, hold Alt. You can then move the point freely along
its current face or edge.
-
To edit the NURBS curve, adjust the control points, degree, and other
options.
Note: To extend the NURBS curve, click the plus sign near an endpoint. To insert a control point within the NURBS curve, click a plus sign on the control polygon (dotted gray line).
In the microdialog, you have the following options:
Option Description Smooth Close the curve smoothly. Cusp Close the curve with a sharp corner. Open Open the curve at a selected control point. Maintain/Break Snap Reference - Link the control point to a snap point. The shape of the NURBS curve will change based on the position of the snap point.
- Or break the link between the control point and the snap point.
X Enter the x-coordinate of the control point. Y Enter the y-coordinate of the control point. Z Enter the z-coordinate of the control point. Weight Add weight to a control point to give it greater influence over the shape of the curve. Reset Clear all selected features and restore the default values. - Right-click and mouse through the check mark to exit, or double-right-click. The curve is in edit mode.