
Rib
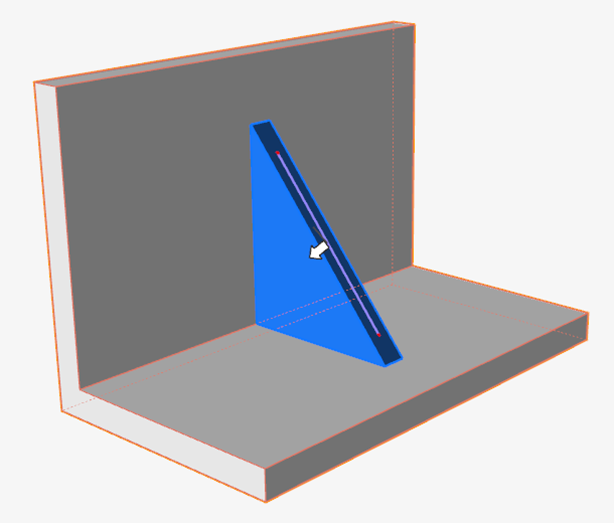
Extrude rib geometry from a sketch to stiffen your model. You can select an arc, curve, straight line, or curved surface.
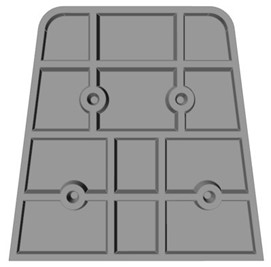
First, create a target part and a sketch.
-
On the Geometry ribbon, select the
Rib tool.

Tip: To find and open a tool, press Ctrl+F. For more information, see Find and Search for Tools.The guide panel appears.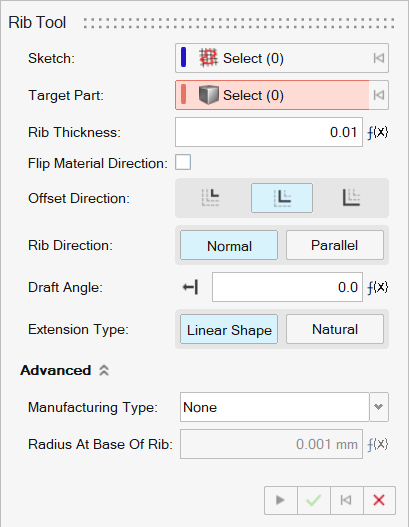
-
Select a sketch.
Note: The sketch should not extend beyond the part. The Rib tool currently does not support sketch profiles when they extend beyond the boundaries of the part or penetrate the walls of the part.
-
Select a target part.
The rib is automatically extended past the nearest face on the solid.Warning: Sometimes, the rib may not be extended as expected. In this case, create the desired sketch, without the need for automatic extension, and then repeat the previous steps to create the rib using the desired sketch.
- Define the Rib Thickness.
- To flip the direction of the rib's material, turn on Flip Material Direction.
-
Select an Offset Direction:
- S1: Add material to one side of the sketch.
- Symmetric: Add material symmetrically to both sides of the sketch.
- S2: Add material to the other side the sketch.
-
Select a Rib Direction:
- Normal: The rib will be created normal to the sketch plane.
- Parallel: The rib will be created parallel to the sketch plane.
-
Define the Draft Angle. To change the direction of the
draft, click Reverse Draft Direction
 next to the entry field.
-
Select an Extension Type:
- Linear Shape: The extension is straight.
- Natural: The original curve is extended.
-
Click Advanced Options
 to choose rib settings based on the material
or manufacturing process used to create the ribs.
Note: Advanced Options is available only when Rib Direction: Normal is selected.
to choose rib settings based on the material
or manufacturing process used to create the ribs.
Note: Advanced Options is available only when Rib Direction: Normal is selected. -
Click Apply
 .
.
- Right-click and mouse through the check mark to exit, or double-right-click.