The Quick Hotspot tool helps you find the entity with the highest or lowest result
value, or both, in a given selection and display this information in a Note.
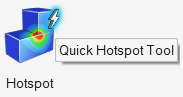
From the Query tools, click the satellite icon of the Hotspot
tool.Figure 1.
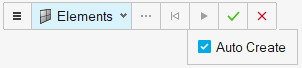
The Quick Hotspot guide bar is displayed.Figure 2.
Set Preferences
Use the Options menu, located on the left of the guide bar, to specify some preferences upfront before running the tool.
Open the Options menu by clicking on the guide bar.Figure 3.
Reset the settings by clicking the Refresh icon .
Set the Hotspot Criteria that the tool will run.
Note: If Max and Min criterion is chosen, then
two notes will be created, one showing the max value and entity ID and the other
showing the min value and entity ID.
The remaining options pertain to the note that will be displayed after the hotspot is
found. You can specify the following:
Note Type
Static or Dynamic. Static will
find and evaluate the templex at the current step and put the actual value in the
note. The value will not change when the step changes. Dynamic, on the other hand,
will evaluate the templex every time the step changes and update the value.
Text
By default, the Text is set to ID:{entity.id}Val:{entity.contour_max} OR
{entity.contour_min} depending on Hotspot criteria, however
you can add additional fields by clicking the A icon to
display the Edit Text dialog.
Note: This option is not
available for Max and Min criterion, as it will just use
the text to set the individual criteria.
Font
Set the desired Font type and size.
Arrange
Select the arrangement method for new notes.
Place at entity will create the new notes at the
location of their attached entity. It can also be manually dragged.
Place off the model (default) will place the new note
automatically outside the model in the modeling window, in the nearest
location possible without overlapping the other notes.
Explode off model center will place the new note
automatically outside the model, in the direction from the center of the model
to the location of the entity in a 2D projection plane.
Explode with offset will place the new note in the
direction from the center of the model to the location of the entity in a 2D
projection plane, using the offset value specified under this field.
Screen Anchor
Select this option to anchor the note in the modeling window to stop it from moving during animation, zoom,
pan, and rotation.
Border Thickness
Set the desired border thickness.
Colors
Set note colors upfront for new notes by selecting coloring modes for the note
Text, Border, and
Fill.
Select the User color mode to set a color of your
choice for the note Text, Border, or Fill. This is the default setting for
note Text and Border.
Select the Maintain Contrast note text color mode to
make sure that the note text color always maintains contrast with respect to
its fill color by using the text color black or white.
Select the Component color mode for Text, Border, or
Fill to set the respective color the same as the parent component color of the
entity attached to the note.
Select the Contour color mode for Text, Border, or
Fill to set the respective color the same as the contour color assigned to the
entity attached to the new note.
Select the None color mode for Fill to maintain the
note fill as transparent. This is the default setting for note Fill
color.
Select Entities and Create Notes
The entity selector is located next to the options menu. The tool works with nodal,
elemental, component, and system-based contours and the entity selector type is set
automatically based on the binding type of the contour. In addition, the entity type can
be set to Notes. This allows you to select and edit any of the Notes created through
this tool.
The selection of entities is based on the creation mode.
Auto-Create mode
This mode is for the primary use case, where you can drag a window around any
region of your model and the tool instantly finds the hotspot entity and displays
its ID and value in a note.
Manual Create mode
In this mode, the Advanced selection and
Create buttons are activated. This allows you to first
build a selection of entities through any one of the available selection methods
(graphical picking, selecting by window, by set, by components and so on) and then
upon clicking the Create button, a note is shown attached
to the hotspot entity with its ID and value.
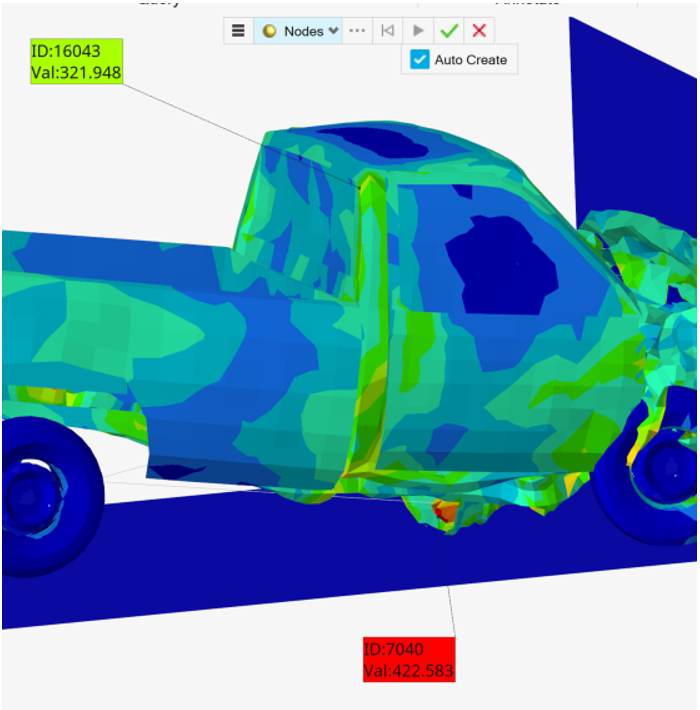
The image below shows the sample results of the Quick Hotspot Tool (Hotspot criteria = Max,
Arrange option = Place off the Model and Fill color = Contour). Figure 4.
Note:
The tool does not work with FLD or collision plots.
The tool works only on the active model. If the selection contains entities from
overlaid models, only the active model entities are considered in finding the
hotspot.
The tool is a quick but basic version of the Hotspot finder as it simply finds the
max or min entity in a selection in just a few clicks. It does not offer any of the
advanced search criteria that the Hotspot finder supports, such as ignore elements or
hotspot separation.
Unlike the Hotspot finder, the notes created by this tool are permanent and are
shown in the Results Browser. This means that the notes will get
updated if the contour changes. For example, if the quick hotspot notes were created
from a nodal contour such as displacement, it will show N/A when the contour is
changed to an elemental contour such as stress.
 on the guide bar.
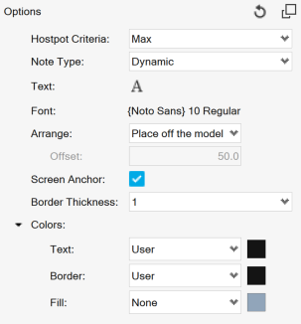
 .
.