Create and Delete Elements
Use the Edit: Create tool to create new 1D/2D/3D elements and delete elements.
-
From the Discrete ribbon, click the tool.
Figure 1. 
Elements are colored according to how well they adhere to the pre-set quality requirements defined in the criteria file. -
On the guide bar, click to
 to define which type/config of element to
create, where new elements are organized, and any find
tolerances.
- 1D
-
Figure 2. 
- 2D
-
Figure 3. 
- 3D
-
Figure 4. 
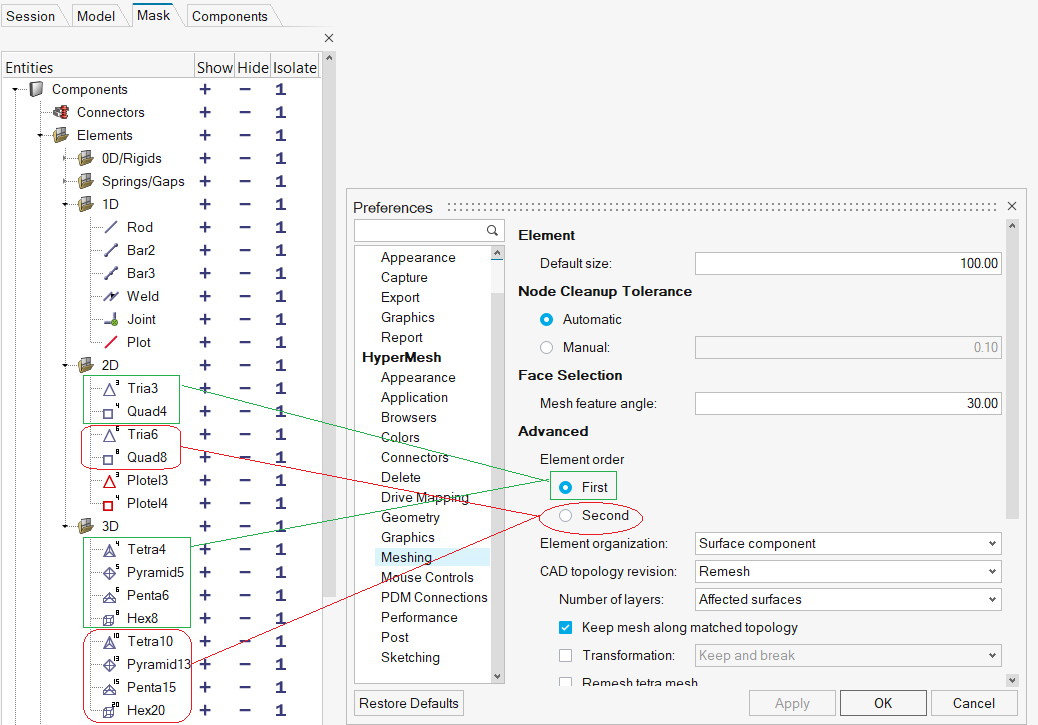
By default, first order elements are created. In order to create second order elements, set the meshing element order preference to Second.Figure 5. 
-
Select an element issue type from the guide bar.
- Quality
- Checks for quality as defined in quality criteria.
- Intersections
- Checks for intersecting elements.
- Face angles
- Checks for folded or sharp angle elements.
- Optional:
Find all elements at or below a certain quality level.
- Click Find on the guide bar.
-
Increase or decrease the number of layers around patches of failed
elements by clicking
 or
or  on the guide bar.
-
Review the next or previous patch of failed elements by clicking
 or
or  on the guide bar.
-
Create or delete elements.
- Select nodes to create 1D/2D/3D elements.
- Select the element(s) to delete, then left-click to delete element(s).