Edit
Edit a material
It is possible to edit materials from the user material database to update their properties. Editing is necessary to introduce the physical properties of a newly created material.
- Open the material to display its properties.
- Edit the material properties navigating through the different physical domains via the scrolling selection bar.
 |
|
|---|---|
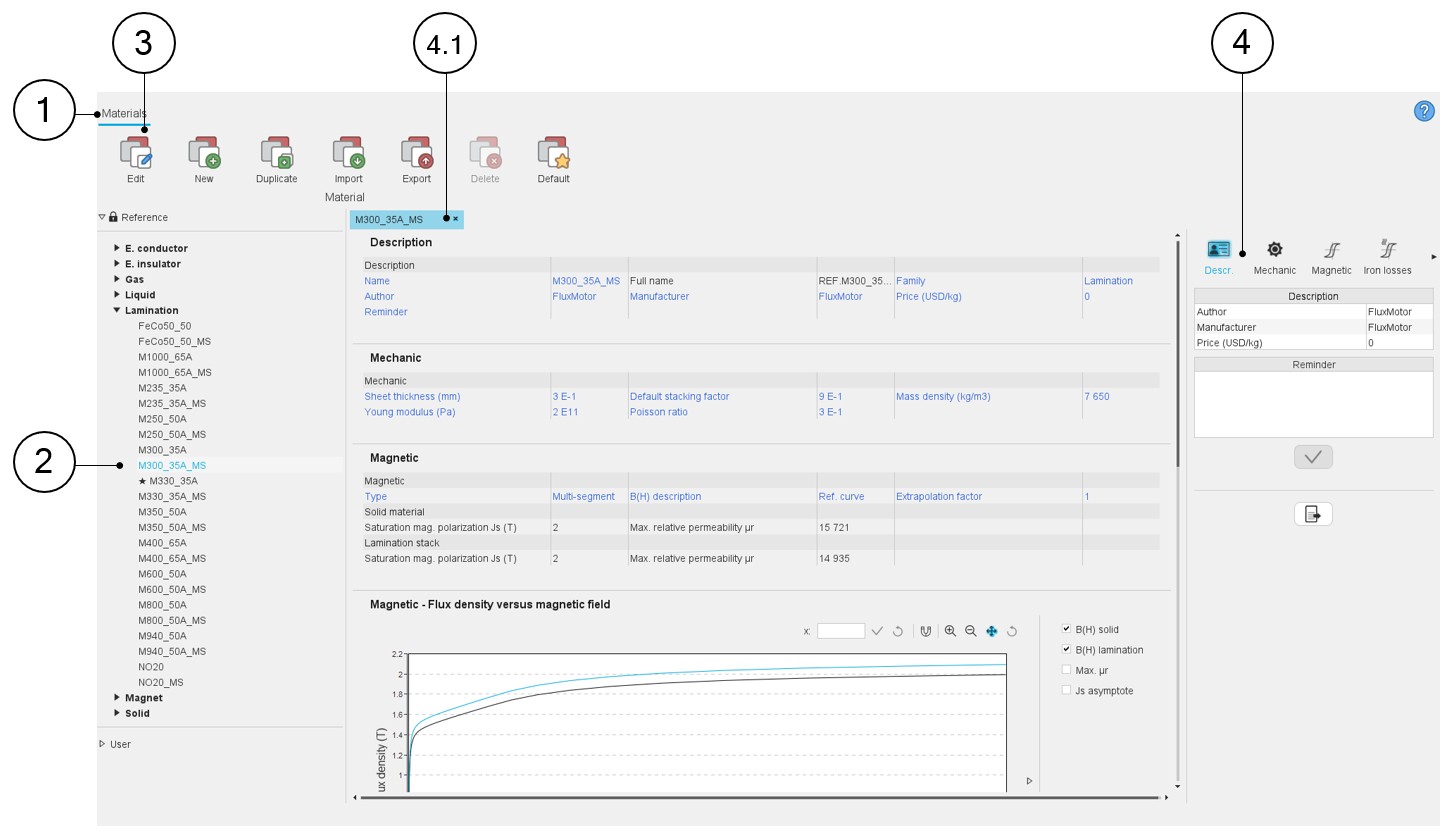
| 1 | The application “Materials” is opened. |
| 2 | Select a material to update. |
| 3 | Edit the material by clicking on “Edit” in the “Materials” top menu or by using the right mouse button on the selected material of the user material database. |
| 4 | Use the scrolling selection bar to select the category of
properties to define. Depending on the family, some or all of
these categories may be available:
|
| 4.1 | Outputs datasheet - Material properties (values and eventually
curves) will be displayed. In this area all the physical properties of materials will be shown, including the input variables (written in blue) and the physical properties deduced from the inputs and curves describing the material behavior (written in black). |
In this user’s input area, the properties of the material can be edited and modified if it belongs to the User database.
To introduce the variable values, the user should navigate between the different categories. Categories will vary depending on the family of the edited material.
 |
|
|---|---|
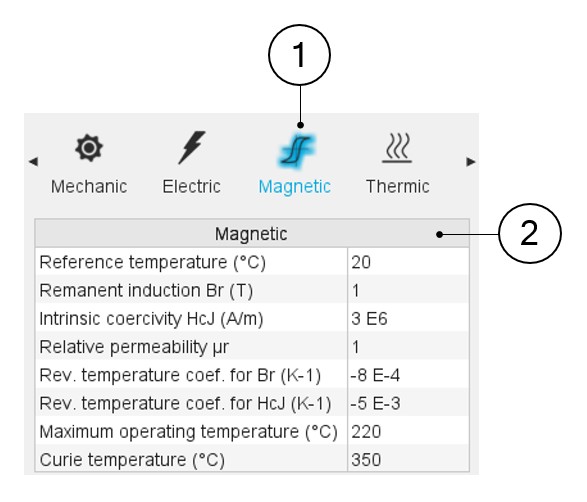
| 1 | Select the category. Use the scrolling selection bar to select
the category of properties to define. Depending on the family,
some or all of these categories may be available:
|
| 2 | Introduce the desired values in the user’s inputs table and apply values with the button below. |