New
How to create a new library?
 |
|
|---|---|
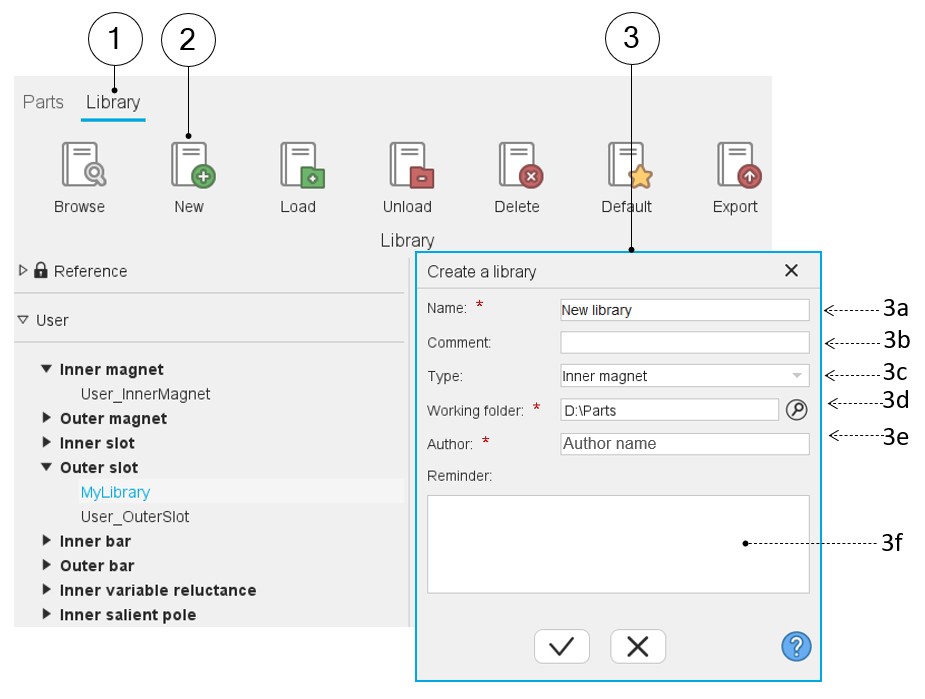
| 1 | Selection of the catalog area of the Part Library application. |
| 2 | Click on the button “create a new library” (Shortcut
Ctrl+C). Note: The new library will be
stored in the user’s library. |
| 3 | Clicking on the button “Create a new library” opens a dedicated dialog box. |
| 3a | A library is defined by a name (New library). Note: A default new name is proposed. One must
choose a name that is not already used in the Part
Library. |
| 3b | A comment can be added if needed (it will be the tooltip of the created library). |
| 3c | Select the type of part to be considered. |
| 3d | Select the folder in which you want to store the new library (D:\CatalogFolder) |
| 3e | Set the author of this new library. |
| 3f | A reminder allows you to keep important notes to know what was considered in the new library. |
Note: Once created, the library “MyLibrary” corresponds to a
folder where the name is “MyLibrary” in which are stored the parts. The library
folder “MyLibrary” is stored in a parent folder, Library Slot, for example. Here is
the corresponding path: D:\Library_Slot\MyLibrary.
Note: The “Parts” are stored in the library folder (folder
"Parts").
All the data corresponding to a part, like the associated Excel file (see Part Factory section), are stored in a specific folder. There are also the “Attachments” (folder "Attachments") joined to the part by the user.