Part Factory
How to get into Part Factory?
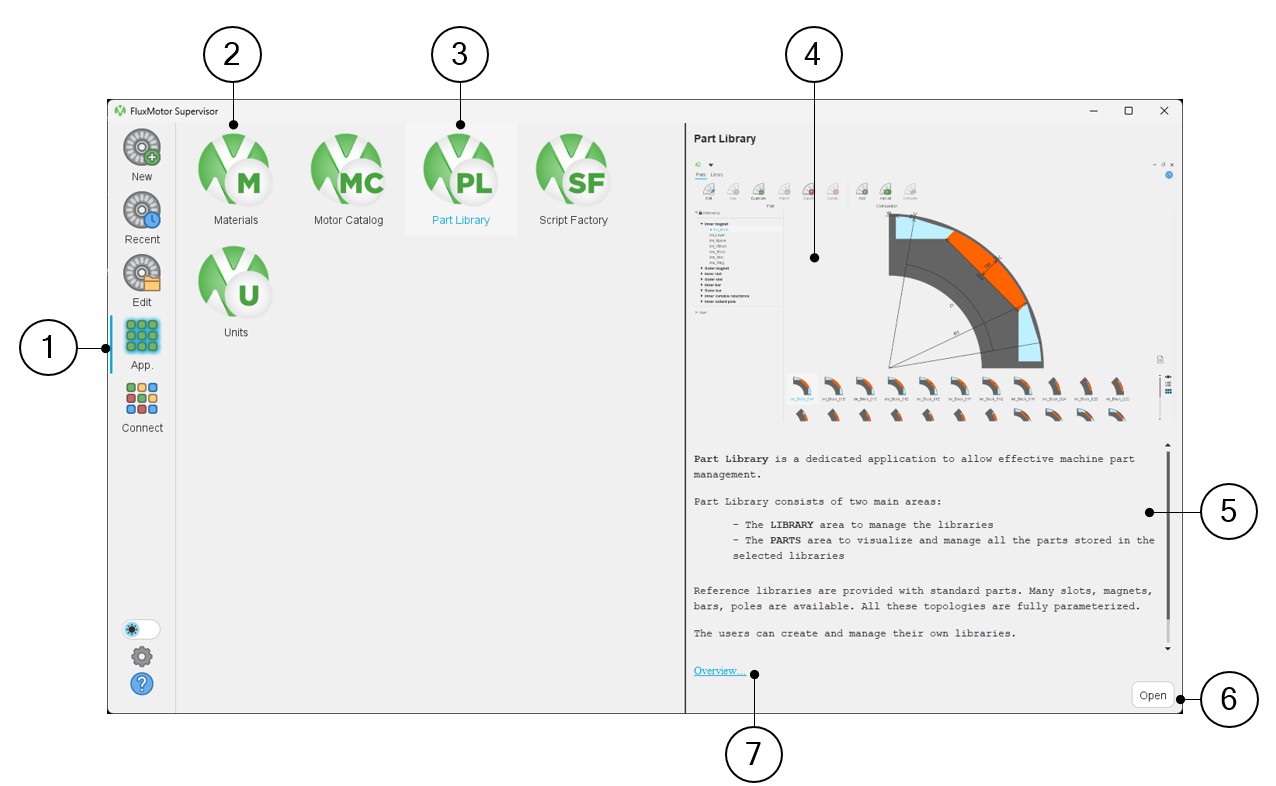
Before getting into Part Factory, first one must get into Part Library
 |
|
|---|---|
| 1 | Select the button to access FluxMotor applications |
| 2 | Icons of FluxMotor applications (Materials, Motor Catalog, Part Library, Script Factory, Units) |
| 3 | Selection of the application “Part Library” |
| 4 | Picture of the selected application: “Part Library” in our example. |
| 5 | A short description of the selected application. |
| 6 | Once selected, the application can be opened either by double clicking on the corresponding icon or by clicking on the button “Open”. |
| 7 | A link “Overview” to reach the online user help guide, which described the selected application. |
- Editing part from Part Library
- Creating a new part from the Part Library
- Access to Part Factory is possible from Part Library by editing an existing
part.
FluxMotor allows the user to design parts and add them to Part Libraries. This can be done by starting from a part given in FluxMotor which is close to the shape to be designed.
Figure 1. Main steps to customize part from “Part Library” 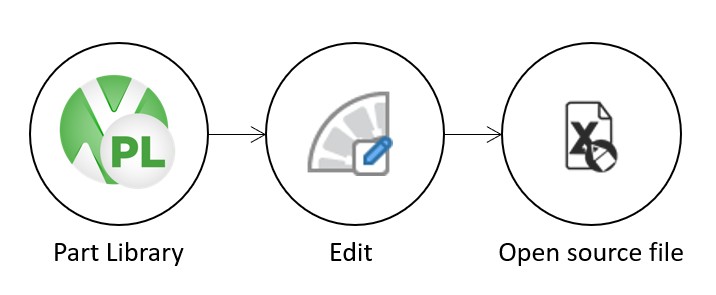
Table 2. How to get into Part Factory from Part Library? - Edit a part 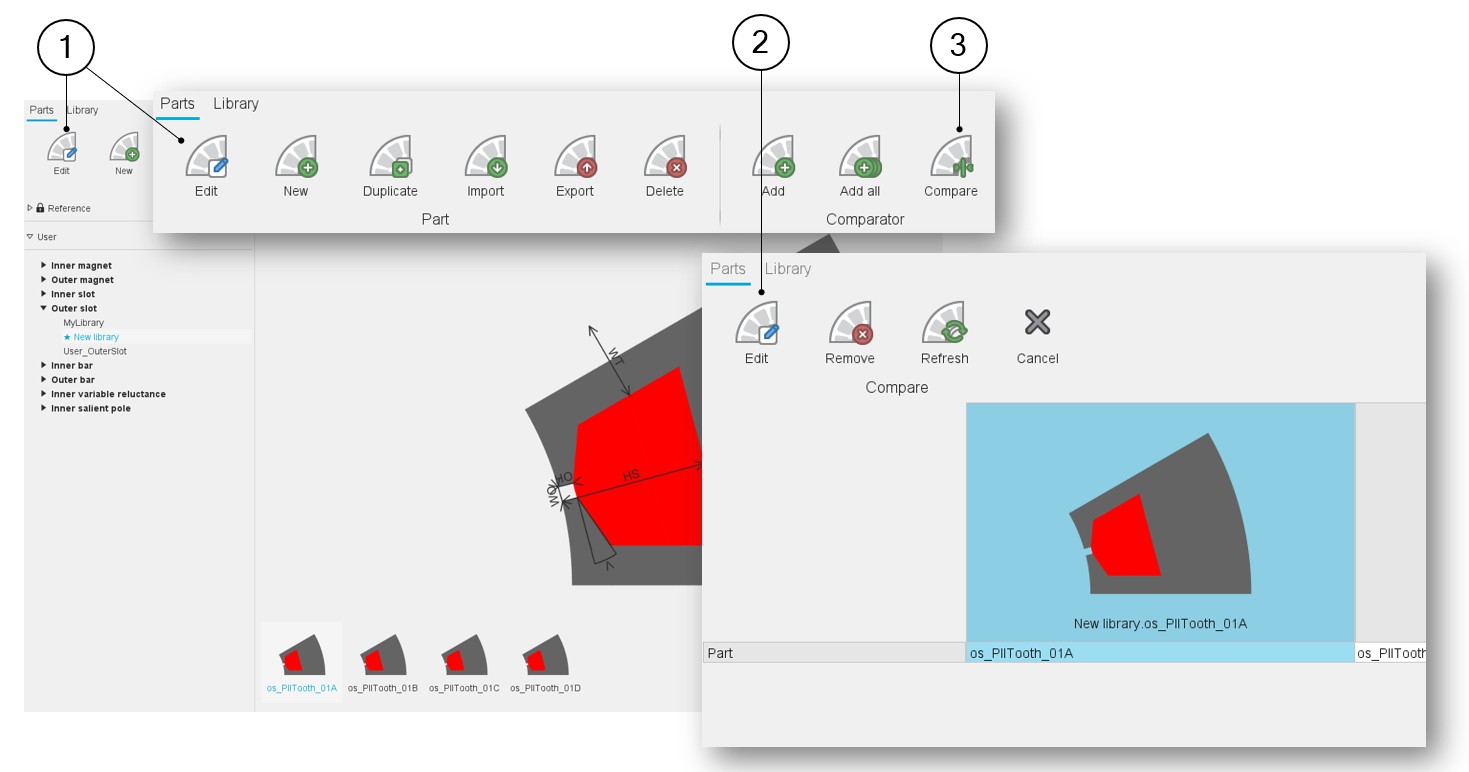
1 Editing a part from the Parts area of the Part Library allows getting into Part Factory. See the Part Library help documentation for more details.
2 Editing the part is possible by accessing comparator (3) from the Parts area of the Part Library. This editing of a selected part allows us to get into Part Factory. See the Part Library help documentation for more details. - Access to Part Factory is possible from Part Library by creating a new
part
FluxMotor allows the user to design parts and add them to Part Libraries.
This can be done by creating parts from scratch, using the reference file corresponding to the type of part to create (Inner Magnet, Outer Slot, etc.).
In Part Library, it is possible to create a new part by selecting an Excel file in which all the parameters of the part to create are defined. See section Part Library.
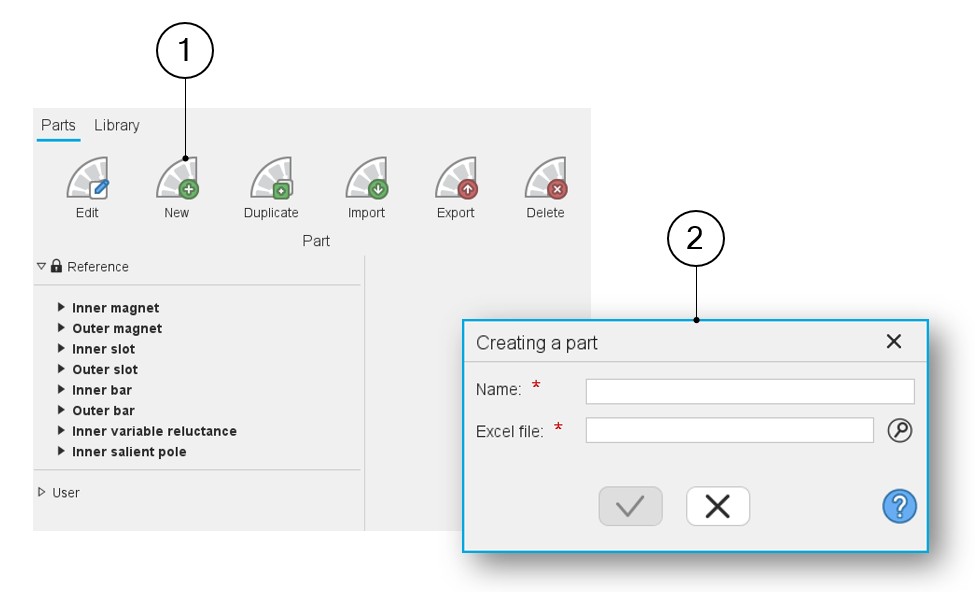
Figure 2. Main steps to create a new part from the Part Library 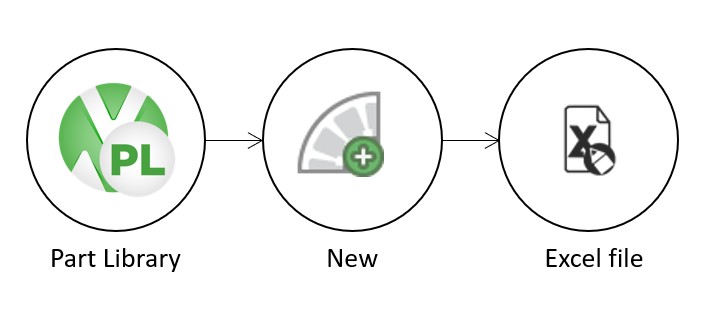
 |
|
|---|---|
| 1 | Click on the icon “New” to create a new part. |
| 2 | A dialog box is opened to select the corresponding Excel file (via browser) and give a name to this new part before getting into Part Factory with the considered part. |
Main areas of Part Factory - Overview
To build a machine, parts are needed. Several families of parts can be considered depending on the machine to be designed (slots, magnets, bars, saliencies, poles).
Part Factory is a dedicated application to allow the creation or the modification of parts, i.e. the customization of parts.
All the properties needed to build a part can be defined and written in dedicated Excel files.
- The Design area to visualize and modify the properties of parts
- The Test area to evaluate the relevance and the robustness of the part being built.
 |
|
|---|---|
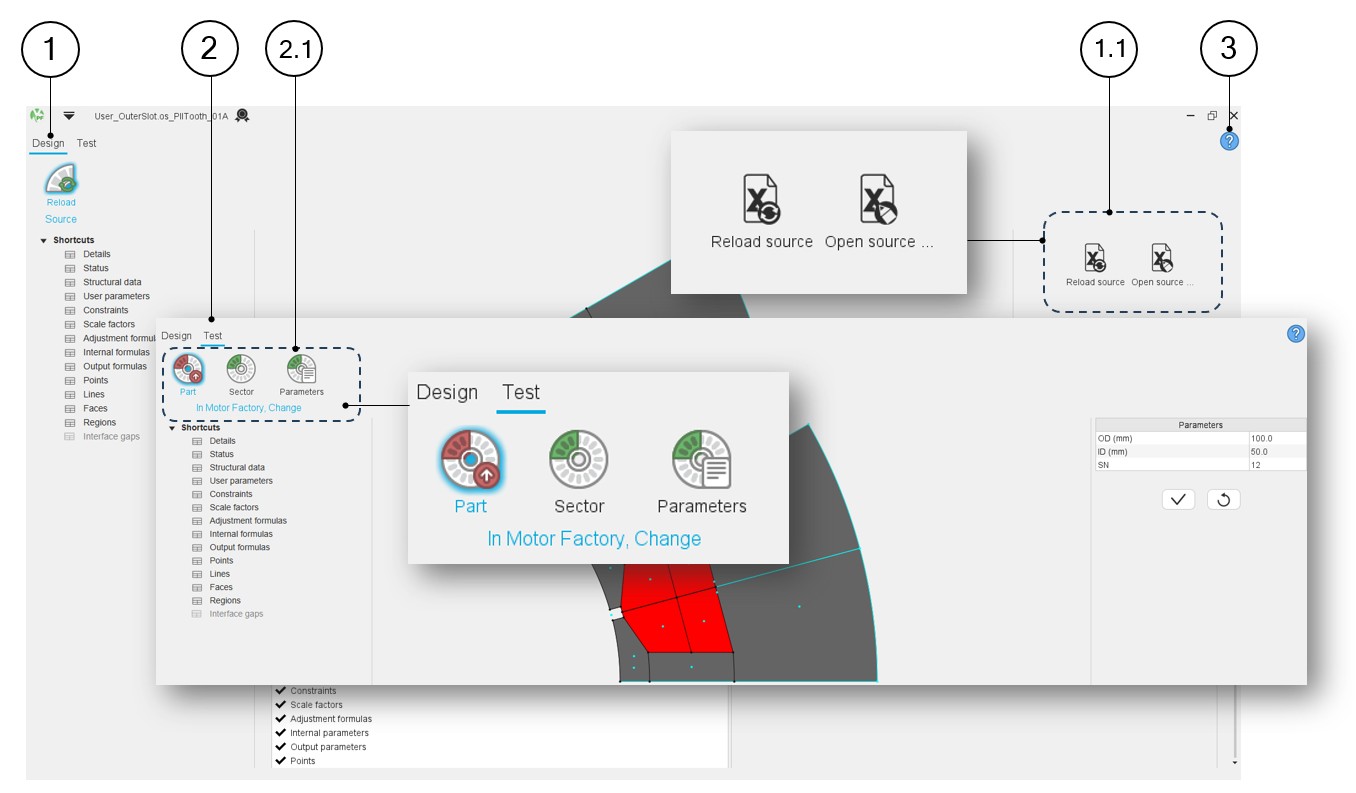
| 1 | Selection of the Part Factory - Design environment |
| 1.1 | Group of icons allowing the management of the part based on
the Excel file:
|
| 2 | Selection of the Part Factory - Test environment |
| 2.1 | Three main functions allow testing the behavior that the part
will have in Motor Factory by considering the properties
described in the associated Excel file.
|
| 3 | Access to the online user help guide dedicated to the usage of either the design or the test environments of Part Factory. |
The building of parameterized parts can also be performed with SimLab.
We invite you to read the online user help guides that describe the links between SimLab and FluxMotor:
And more precisely, the workflow to create a part in SimLab:
Expanding the menu in Part Factory
This menu gives access to system functions like help and exit.
 |
|
|---|---|
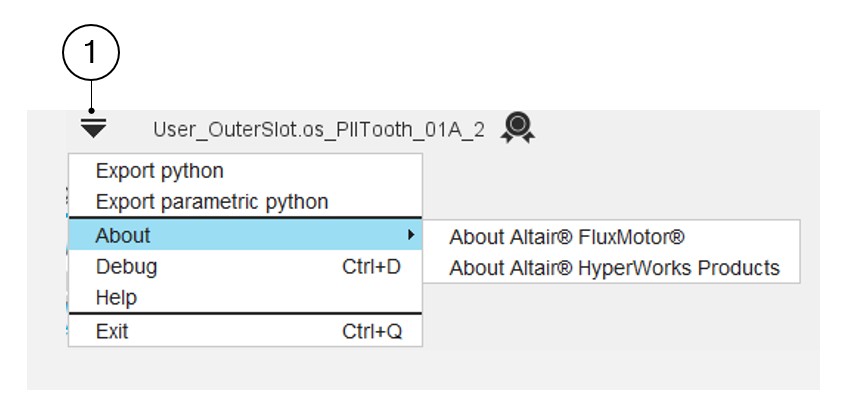
| 1 | Expand the menu on the left top part of Part Factory in both
areas: Design or Test List of actions available:
Note: Close the Part Factory is also
possible by using the icon × on the top right part of the
Part Library panel. Close the Part Factory is also possible by using the shortcut CTRL+Q defined in the user preferences. |
From Part Factory, it is possible to export a python file that allows the user to build the Flux model of the considered part.
To do that, FluxMotor provides a python file that must be used in the Flux environment.
Two models are proposed to be exported: one without user parameters, in which all dimensions are fixed and another one with all the parameters needed to build the part available for the users.
In both cases the resulting Flux model (parameterized or not) is ready to be used in the Flux 2D environment.