A section cut dialog is opened with a default section cut added. If the
section cut is selected, a microdialog to modify the
section cut properties is displayed in the modeling window.
The section cut dialog has a few additional options:
To create additional sections, click
to create a new section cut in the dialog.
To delete any section, select it from the list and click .
To set feature lines or transparency on the clipped elements, click
.
Note: This is a
global option for all sections cuts.
Right-click on a section cut in the dialog to display a context menu with the following options:Figure 1.
Create (Planar or
Spherical)
Edit
Delete
Rename
Show
Hide
Isolate
Show Manipulator
Hide Manipulator
Align View *Available only for planar section
cuts. Clicking this option makes the model view orientation normal to the
selected section cut.
Click of the left
side of the microdialog to update it to either a planar
or spherical section cut.
Change the display and position of the section cut using the other microdialog options.
Change the type to deformable by clicking .
Display only the section cut by clicking .
Reverse the part of the model that is hidden by clicking .
Trim elements along the plane/sphere to create a smooth section cut by
clicking .
Translate or rotate the section cut using graphical manipulators by
clicking . For
spherical section cuts, the yellow manipulator can be used to adjust the
radius of the sphere.
Tip: You can also click and drag the frame directly. For
planar section cuts, click and drag the center of the frame to
translate. Click and drag a corner or an edge to rotate.
Align the section plane to the x, y, or z-axis by clicking .
Note: Only available for planar section cuts.
Align the section plane using advanced options such as N1/N2/N3, Normal
to Screen by clicking .
Note: Only available for
planar section cuts.
Figure 2. Planar Section Cut
Figure 3. Spherical Section Cut
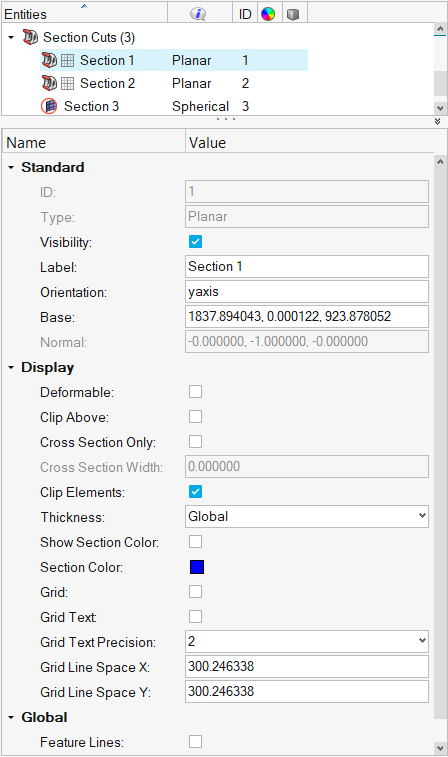
After creating a section cut, it is added to the Results Browser
as a Section Cut entity. Its basic parameters can then be changed in the Entity Editor. Figure 4. To edit and adjust a section cut in the tool, right-click on it in the
Section Cuts dialog and select
Edit.
Note: Section cuts can also be
created using the Results Browser right-click context menu
option Create > Section Cut. However, it is recommended to use the Section Cut tool instead
and not switch between the two methods.
The display of the section cut frame can be changed at any time using standard
Show/Hide operations. Note that
this does not make the section cut inactive.
 .
A section cut dialog is opened with a default section cut added. If the section cut is selected, a microdialog to modify the section cut properties is displayed in the modeling window.The section cut dialog has a few additional options:
.
A section cut dialog is opened with a default section cut added. If the section cut is selected, a microdialog to modify the section cut properties is displayed in the modeling window.The section cut dialog has a few additional options: to create a new section cut in the dialog.
 .
. . Note: This is a global option for all sections cuts.
 of the left
side of the microdialog to update it to either a planar
or spherical section cut.
of the left
side of the microdialog to update it to either a planar
or spherical section cut.
 .
.  .
. .
. .
. . For
spherical section cuts, the yellow manipulator can be used to adjust the
radius of the sphere.Tip: You can also click and drag the frame directly. For planar section cuts, click and drag the center of the frame to translate. Click and drag a corner or an edge to rotate.
. For
spherical section cuts, the yellow manipulator can be used to adjust the
radius of the sphere.Tip: You can also click and drag the frame directly. For planar section cuts, click and drag the center of the frame to translate. Click and drag a corner or an edge to rotate. .Note: Only available for planar section cuts.
 .Note: Only available for planar section cuts.