PhysicsAI-T: 1010 Custom Outputs/KPIs
Tutorial Level: Beginner
In this tutorial, you will learn the procedure for using your own knowledge point indicators (KPIs) as responses in PhysicsAI.
The KPIs need to be supplied through .json files in addition to the solver result files (.h3d, .odb, and so on) or solver input decks (.fem, .rad, and so on) in the same subdirectory and have the same name (for example, A.h3d and A.json, B.h3d and B.json, and so on). These .json files should be created prior to creating a dataset inside PhysicsAI and the user is free to use the method of their choice.
See the PhysicsAI-T: 2010 Create JSON Data from CSV tutorial for more information on generating .json files.
Before you begin, copy the file(s) used in this tutorial to your working directory.
Unzip the project Custom_Outputs_PhysicsAI.zip and inspect the contents:
- run_000XX_beam.h3d files provided in different locations within the attached folder.
- run_000XX_beam.json files provided in the same subdirectory as the matching .h3d files.
In this tutorial, you will train a PhysicsAI model to predict a KPI using vector predictions.
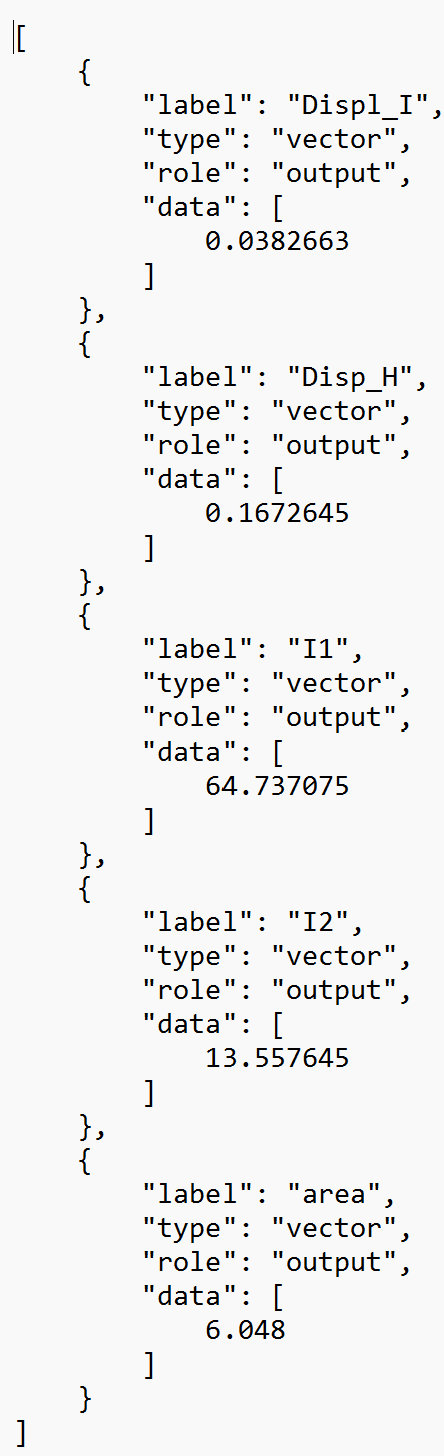
Example .json file and role attribute is not mandatory
Step 1 .Train a PhysicsAI Model for KPIs
- Open SimLab.
- From the menu bar, click File > Extension > PhysicsAI to open the PhysicsAI ribbon.
- Create a new project called KPI_Tutorial
- From the PhysicsAI ribbon, select the Create Project
tool.

The Create Project dialog opens.
-
For Project Name, enter KPI_Tutorial.
-
For Location, click Choose and select a save location for the project.
Note:The save location for the project contains all files created by PhysicsAI, but the original files used for training do not need to reside in the project folder.
- Click OK.
- From the PhysicsAI ribbon, select the Create Project
tool.
- Create a new database called
Beam40using all the .h3d files in the .json creation files folder.- From the PhysicsAI ribbon, select the Create Dataset
tool.

The Create Dataset dialog opens.
- For Dataset Name, enter
Beam40. -
For File System, click
 and navigate to the
folder.
and navigate to the
folder. - Select and transfer all of the .h3d files.
-
Enable the 80:20 split by selecting Enable train test split.
This will generate two datasets; Beam40_train with 32 files and Beam40_test with eight files.
- Click OK.
The dataset is extracted and the Datasets dialog opens.
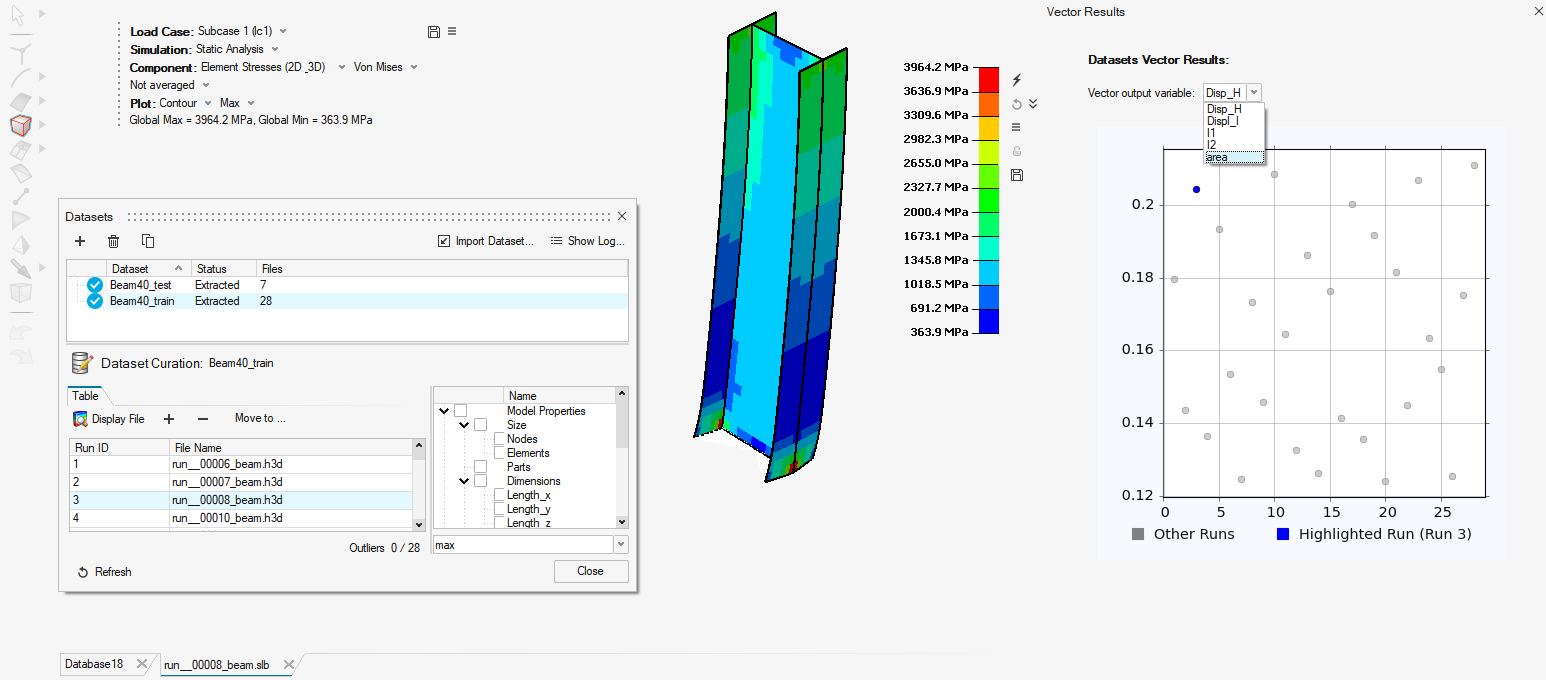
Display Data and KPIs
-
In Datasets, select an item and click Display File. The selected model loads in the modeling window.
- If KPIs were extracted from the .json, they are shown in the plot window automatically.
-
Since all the .h3d files used in the Beam40_train database have a corresponding .json file, the KPIs from these files are displayed in the Vector Outputs drop-down menu.
-
- Click Close.
- From the PhysicsAI ribbon, select the Create Dataset
tool.
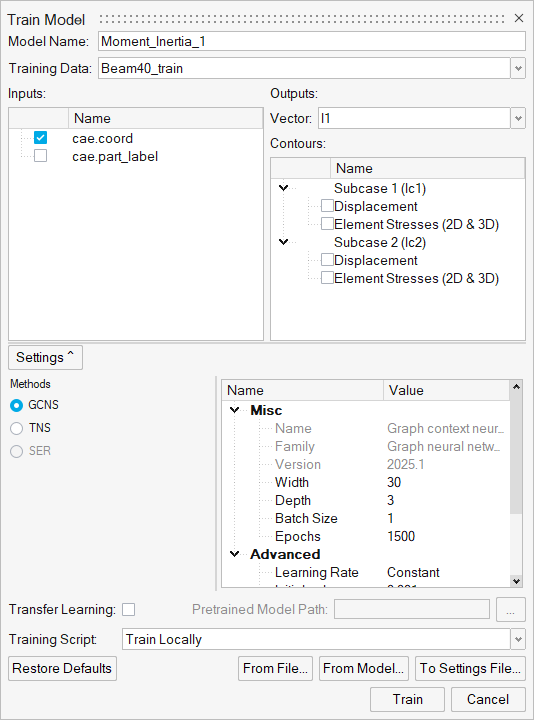
- Create a new model called Moment_Inertia1.
-
From the PhysicsAI ribbon, select the Train an ML Model tool.

The Train Model dialog opens.
- For Model Name, enter Moment_Inertia_1.
- For Training Data, select Beam40_train.
- For Vector, select I1 which is the response of interest
corresponding to the Moment of Inertia for the I beam.
-
- Click Train.
Step 2. Review Results
In this step, you will visualize and review the results.
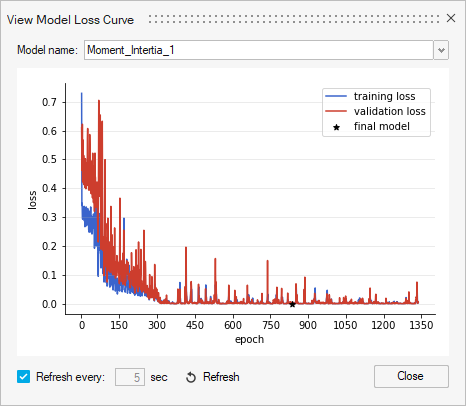
- Click on the Loss Curve.
The overlap between the training and validation loss indicates a well trained model.
Loss Curve for the KPI Training
- From the PhysicsAI ribbon, select the Test ML Model
tool.

The Test Model dialog opens.
- For Models, select Moment_interia1.
-
For Datasets, select Beam40_test.
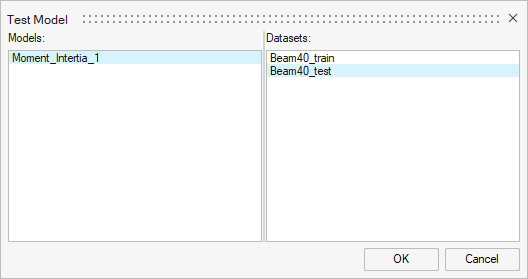
- Click OK.
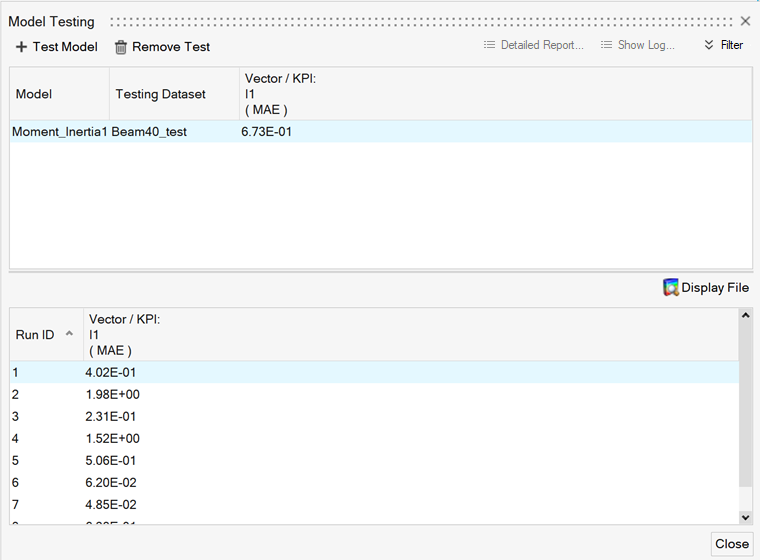
The Model Testing dialog opens.
-
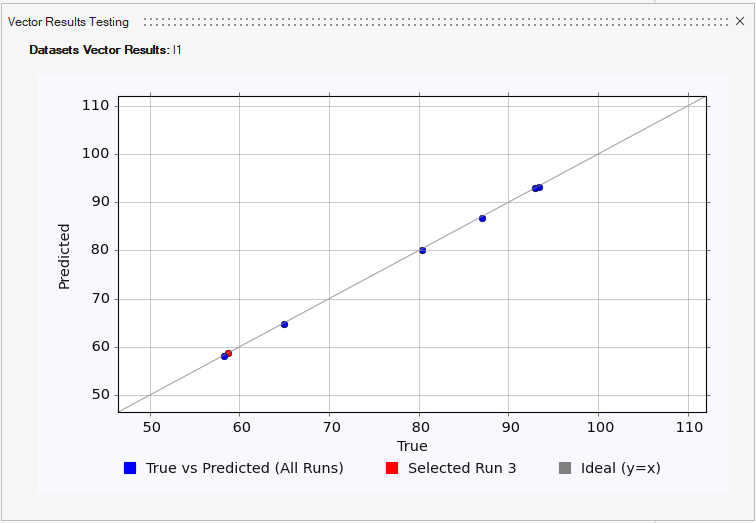
Select a single data point and click Display File.
The true and predicted responses are shown on the graph.
 Note:
Note:Example prediction for a vector KPI

-
Proceed with the same procedure to make predictions on new data.