
Helix Curve
Create a helix (or a spiral if the top and bottom radii are different).
-
On the Geometry ribbon, select the Helix Curve
tool.

Note: The tool may be hidden in the dropdown menu. To access the dropdown menu, you can do one of the following:- Select
 at the lower right corner of the
currently displayed tool.
at the lower right corner of the
currently displayed tool. - Click and hold the currently displayed tool.
The guide panel appears.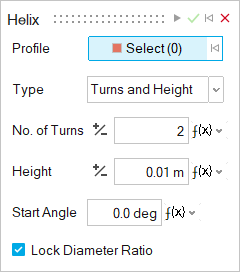
- Select
- Select a circular sketch profile.
-
Choose a helix Type. Note that modifying the height,
pitch, or turn is type dependent.
- Turns and Height (default): Modify the number of turns and the height, while keeping the pitch constant.
- Turns and Pitch: Modify the number of turns and the pitch, while keeping the height constant.
- Height and Pitch: Modify the height and the pitch, while keeping the number of turns constant.
-
Modify the parameters.
To Do this Note Change the height - In the guide panel, for Type, select Height and Pitch or Turns and Height.
- Enter the Height.
Change the pitch - In the guide panel, for Type, select Height and Pitch or Turns and Pitch.
- Enter the Pitch.
Figure 1. Pitch. The pitch is the height between each turn. It is inversely proportional to the number of turns. The greater the pitch, the fewer the number of turns. 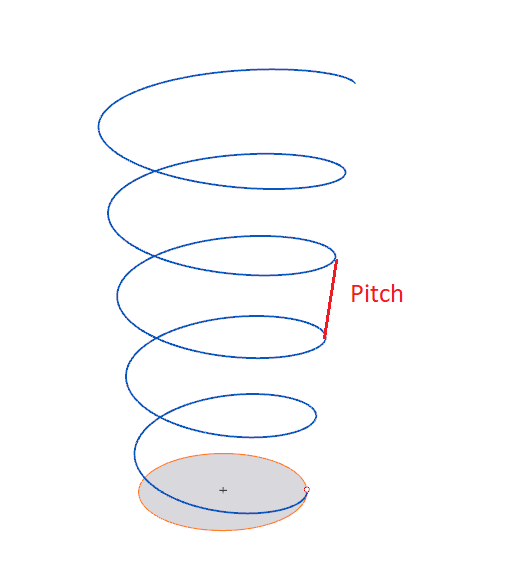
Change the number of turns - In the guide panel, for Type, select Turns and Height or Turns and Pitch.
- Enter the No. of Turns.
Create a spiral You can turn the helix into a spiral by making the top and bottom diameters different. - In the guide panel, turn off Lock Diameter Ratio.
- Enter the Top Diameter.
Change the direction of the helix (clockwise or counterclockwise) - In the guide panel, for Type, select Turns and Height or Turns and Pitch.
- Next to No. of Turns, select
 Reverse Direction.
Enter the point where the first turn starts In the guide panel, enter a Start Angle. Move the helix Use the Move tool, exit editing mode first and make sure the helix is selected. When using the Move tool, the center corresponds to the center of the bounding box instead of the axis origin. - Right-click and mouse through the check mark to exit, or double-right-click.