Classify Parts
Tutorial Level: Intermediate In this tutorial, you will learn how to train a machine learning (ML) model and use it to classify parts by grouping them into part sets.
Create a Classifier
-
From the Assembly ribbon, click the tool (see Create or Update Classifiers and Labels
for more information on this tool).
Figure 1. 
-
From the guide bar, select the
Classifier drop-down menu and select
Create New to create a new classifier.
Figure 2. 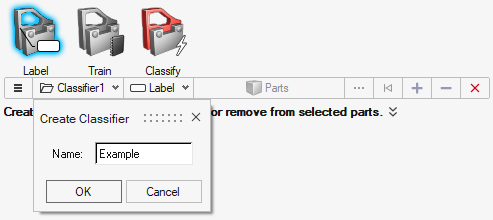
A new folder, named after the classifier, is created in the following directory: C:\<user_profile>\Documents\Altair\Altair_AI\Classify. All files related to the classifier are stored in this folder.
Create Labels and Assign to Parts
- Click Ctrl+O to open the yaris.hm model.
-
From the
guide bar, select the Label
drop-down menu to create a new label named Panels.
Figure 3. 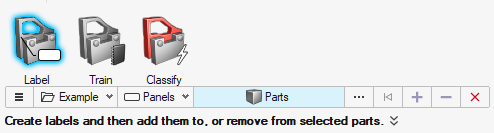
-
From the guide bar, click Parts Advanced
Selection,
 , to select the following parts to be labeled using
one of the following methods:
, to select the following parts to be labeled using
one of the following methods:
- By ID (copy and paste the following part IDs: 206, 212, 310, 312, 352, 386, 388, 402, 412, 484, 508, 518, 644, 650, 652, 660, 696, 702, 710)
- By Part Set: Select the Panels part set.
Figure 4. 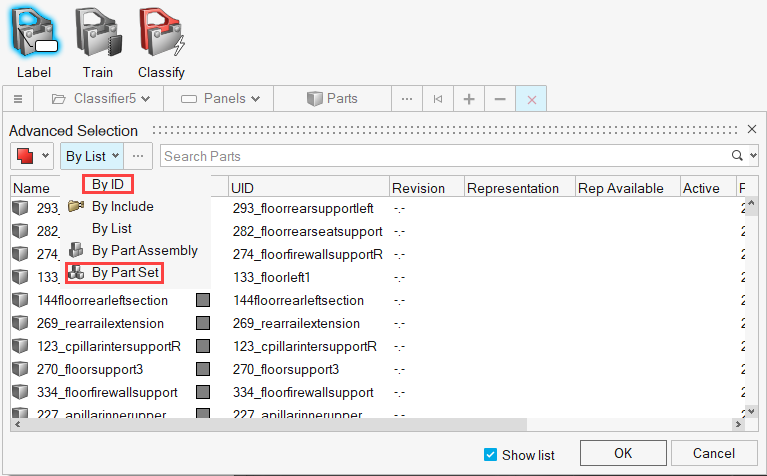
-
After selecting the parts, from the guide bar, click
 to
label them as Panels.
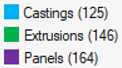
After assigning labels to parts, a legend is displayed and colors the part based on the labels. The legend indicates the number of parts from the current model that have been labeled.
to
label them as Panels.
After assigning labels to parts, a legend is displayed and colors the part based on the labels. The legend indicates the number of parts from the current model that have been labeled.If you have labeled additional parts by mistake, select them and click
 to remove the label.
 - Repeat steps 2-4 to create two new labels named Extrusions (part IDs: 128, 334, 338, 404, 418, 420, 422, 454, 466, 470, 488, 492, 504, 506, 562, 600, 604, 630, 640, 712; part set: Extrusions) and Castings (part IDs: 142, 144, 146, 158, 672, 676, 750, 752, 756, 780, 800, 806, 808, 832, 836, 1000, 1006, 1008, 1016, 1018, 1020; part set: Castings).
-
Hide all the parts in the model. Right-click on a label’s name in the legend
and select Show All to view the labeled parts only.
Figure 5. 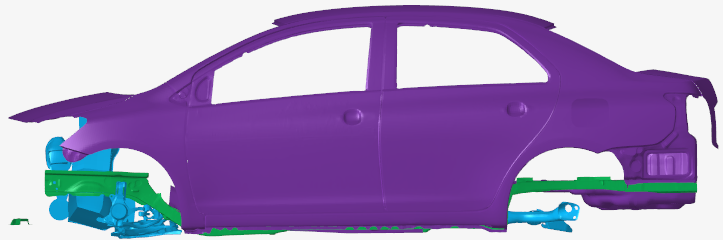
Figure 6. 
Figure 7. 
Train a Machine Learning Model
-
From the Assembly ribbon, click the tool (see Train a Machine Learning Model for more information on this tool).
Figure 8. 
-
From the guide bar, select the
Classifier drop-down menu to select the classifier
you created in the previous step and click Train.
A new (.aic) file is created under the Classifier folder directory, which contains all the training information. You can use this file to share your trained model with other users (see Add Trained Model File for more information on this feature).
-
After training, the Confusion Matrix is displayed:
Figure 9. 
Notice that the Overall Accuracy value is equal to 0.95.
The model predicted there to be 22 extrusions. The 20 parts labeled as extrusions were predicted correctly, but the model additionally labeled two parts as extrusions which were labeled as castings. Therefore, the precision for extrusions is 91%. To understand more about “Precision”, “Support” and “Overall Accuracy”, see Train a Machine Learning Model.Note: The training results you will get might be slightly different from the ones presented in this tutorial. Training can be affected by the order that parts are labeled, which is not always the same (even if you select them in the same order before clicking), as the labeling process takes place
across multiple CPU threads. This effect is much less pronounced as the
number of parts manually assigned to each label increases. - The accuracy of the trained model can be further improved by adding data. Assign each label to a larger number of parts, across multiple models. It is recommended to add as much data as possible to the classifier.
Improve the Prediction Accuracy of the Machine Learning Model
- Open the F250.hm model.
-
From the
guide bar:
- From the Label drop-down menu, select the Panels label and assign it to the parts with the following IDs: 302, 320, 404, 454, 466, 470, 476, 772, 828, 896, 940, 1006, 1008, 1026, 1030, 1058, 1060, 1204, 1206.
- From the Label drop-down menu, select the Extrusions label and assign it to the parts with the following IDs: 298, 430, 500, 502, 504, 576, 580, 586, 588, 598, 602, 604, 614, 618, 622, 624, 630, 1004, 1010, 1012, 1014, 1022, 1242, 1244.
- From the Label drop-down menu, select the Castings label and assign it to the parts with the following IDs: 380, 428, 638, 640, 642, 650, 652, 688, 718, 720, 722, 760, 764, 766, 864, 886, 1002, 1134, 1182, 1598.
Figure 10. 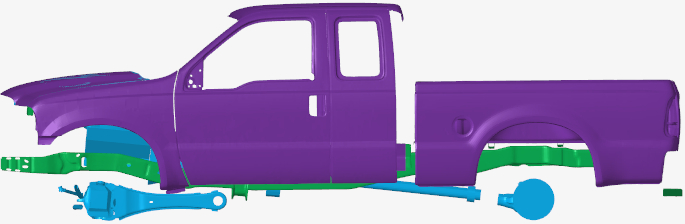
Figure 11. 
Figure 12. 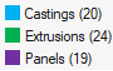
-
Retrain the machine learning model with the added labels.
- From the Assembly ribbon, click the tool.
- From the guide bar, select the Classifier drop-down menu to select the classifier you updated and click Train.
-
After the classifier has been trained, a new Confusion Matrix is
displayed:
Figure 13. 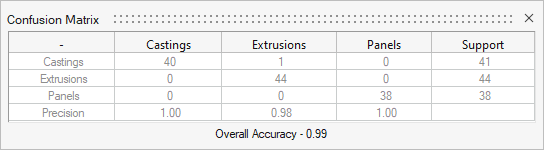
Notice that the Overall Accuracy value is now equal to 0.99.Note: The training results you’ll get might be slightly different from the ones presented in this tutorial. Training can be affected by the order that parts are labeled, which is not always the same (even if you select them in the same order before clicking),
as the labeling process takes place across multiple CPU threads. This
effect is much less pronounced as the number of parts manually assigned
to each label increases.Note: The number of parts with each label is approximately equal. This is recommended and helps avoid biasing in the predictions.
Add a Trained Model File
This step is optional.
- If you didn’t complete the previous steps, you can still perform a classification run by adding an already trained model (.aic) file (see Add Trained Model File for more information on this feature).
-
From the Assembly ribbon, click the tool.
Figure 14. 
-
From the guide bar, click
 to display additional options. For the Add Existing .aic
File option, select the
ClassifyTutorial_1.aic file.
to display additional options. For the Add Existing .aic
File option, select the
ClassifyTutorial_1.aic file.
-
A new classifier folder is created in the project directory and a duplicate of
the trained model file is saved in it, which you can use for classification in
the final step.
Note: This classifier can be used for classification, but you cannot update it by adding new labels and retraining.
Classify Parts by Predicting Their Label and Creating Part Sets
- Open the silverado.hm model.
-
From the Assembly ribbon, click the tool.
Figure 15.
- From the guide bar, select the Classifier drop-down menu to select the classifier you trained in the previous steps.
-
From the guide bar, select the
Files drop-down menu to select a trained machine
learning model file from the selected classifier’s folder.
Select the file that has “_1” as a suffix appended to its name. This is the file created after training the model for the second time. The Parts selector activates.
- With the Parts selector active, select all parts to classify under the labels of the selected classifier/trained model.
-
From the guide bar, click to review the Certainty Ratio value that will be used for the classification
run. Set the Certainty Ratio to
0.8 (see Certainty Ratio, Unclear Predictions, and Unrecognized Parts for more information on this feature).
-
Click Classify to classify the selected parts. The parts
are color-coded based on the predicted labels. Part sets are created for review
and traceability after exiting the Classify tool.
Figure 16. 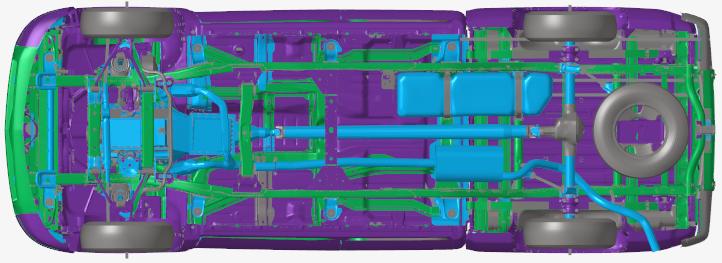
Figure 17. 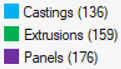
-
Change the Certainty Ratio value to
0.6 and perform a new classification run:
Figure 18. 
Notice how the Certainty Ratio value affects the classification results (the number of parts under each label). (See Certainty Ratio, Unclear Predictions, and Unrecognized Parts for more information on this feature).
Figure 19.