Review Results
In this tutorial, you will analyze and query results.
Before you begin, copy the file(s) used in this tutorial to your
working directory.
In this tutorial, you will:
- Analyze results with an .h3d file
- Query results
Analyze Results
In this step, you will analyze results with a .h3d file.
-
From the Post ribbon, select the Import Results tool
from the Result tool group.

Figure 1. -
From the Post ribbon, select the Contour tool.

Figure 2. -
From the Post ribbon, select the Create Contour tool
from the Contour tool group.

Figure 3. -
From the guide bar, click
Plot.
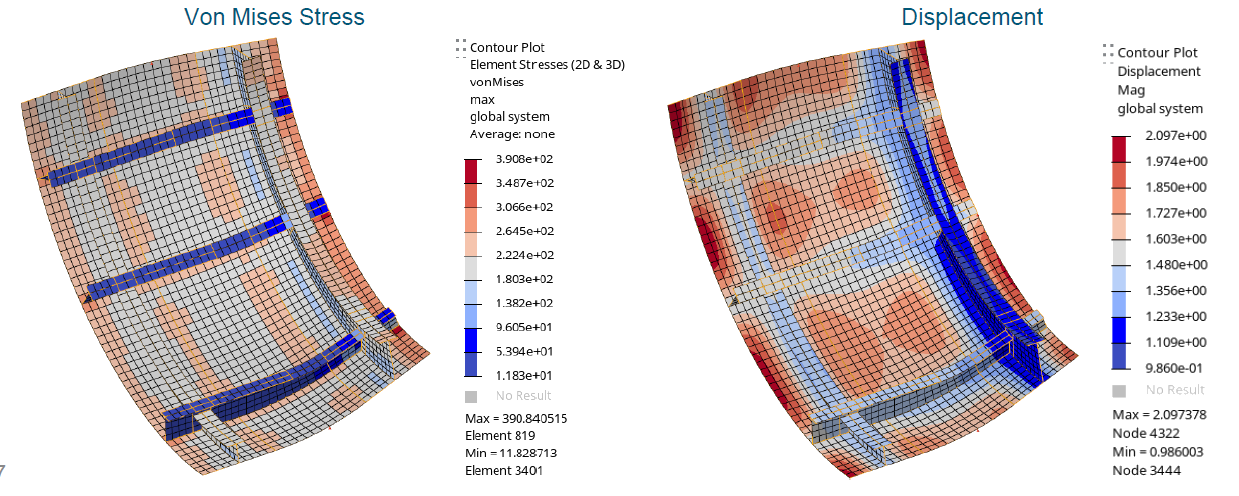
Figure 4. -
From the Post ribbon, select the Deformed tool.

Figure 5. -
From the guide bar, click
Plot.
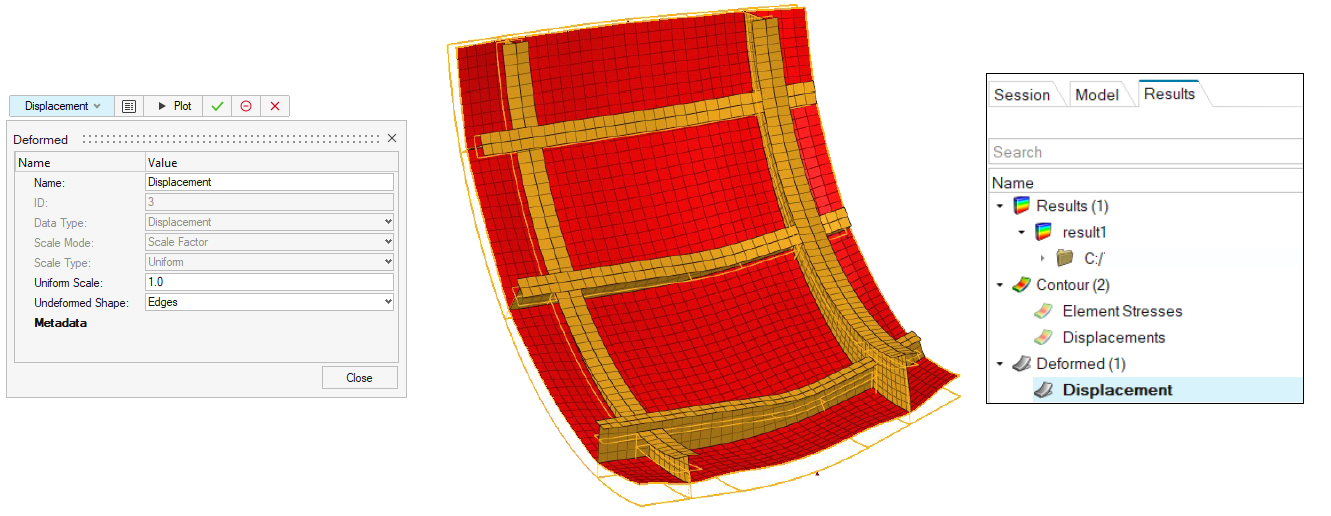
Figure 6.
Query Results
-
From the Post ribbon, select the Tools tool.

Figure 7. -
In the Results Query and MinMax/Ranking/Envelope dialog,
select MinMax/Ranking/Envelope for Report Mode and click
Start.
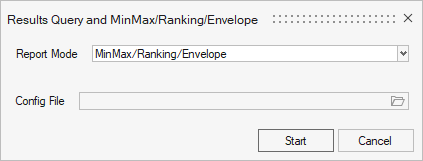
Figure 8. -
Set the other parameters to match Figure 9 and click Set.
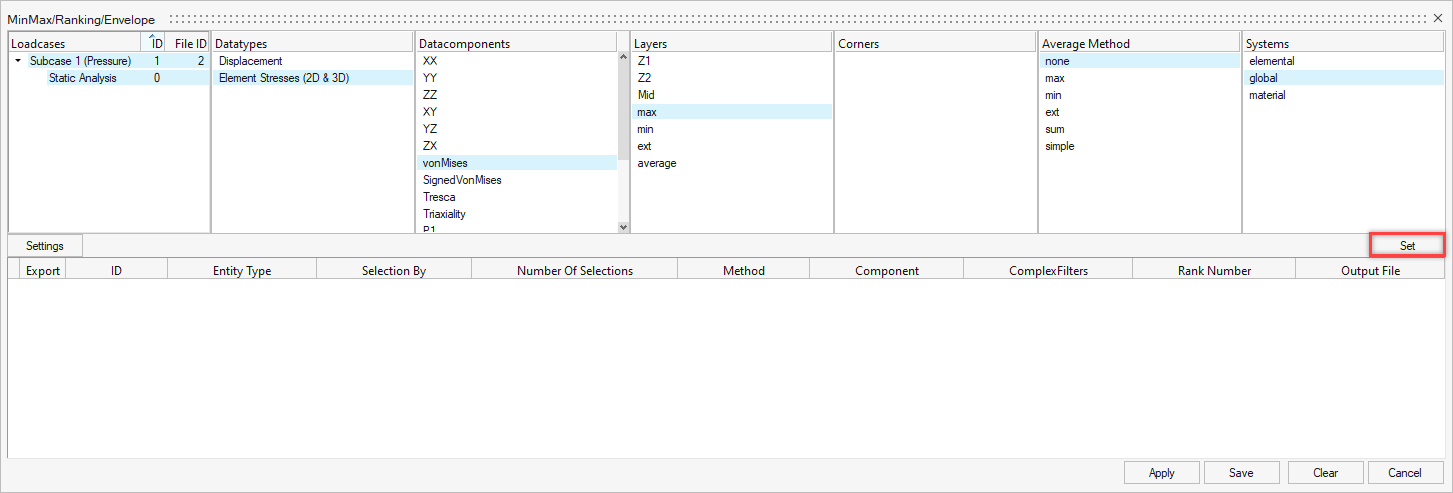
Figure 9. -
Set the other parameters to match and click Set.
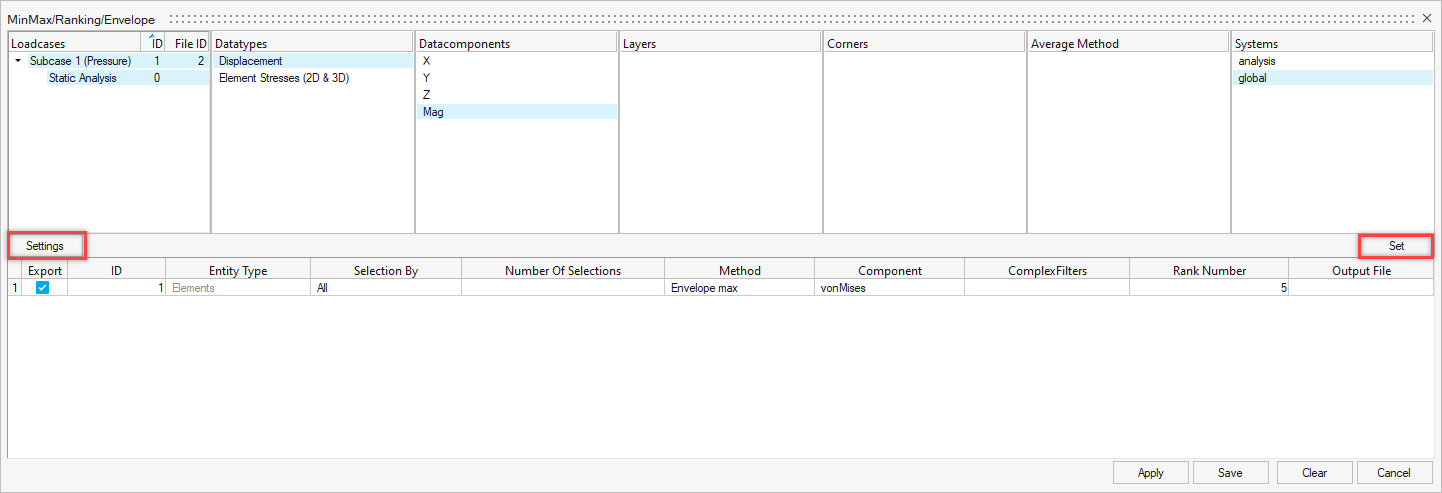
Figure 10. -
For each query, click
 in the Output File
field.
in the Output File
field.
-
Open the exported .csv files and review the queried
results.
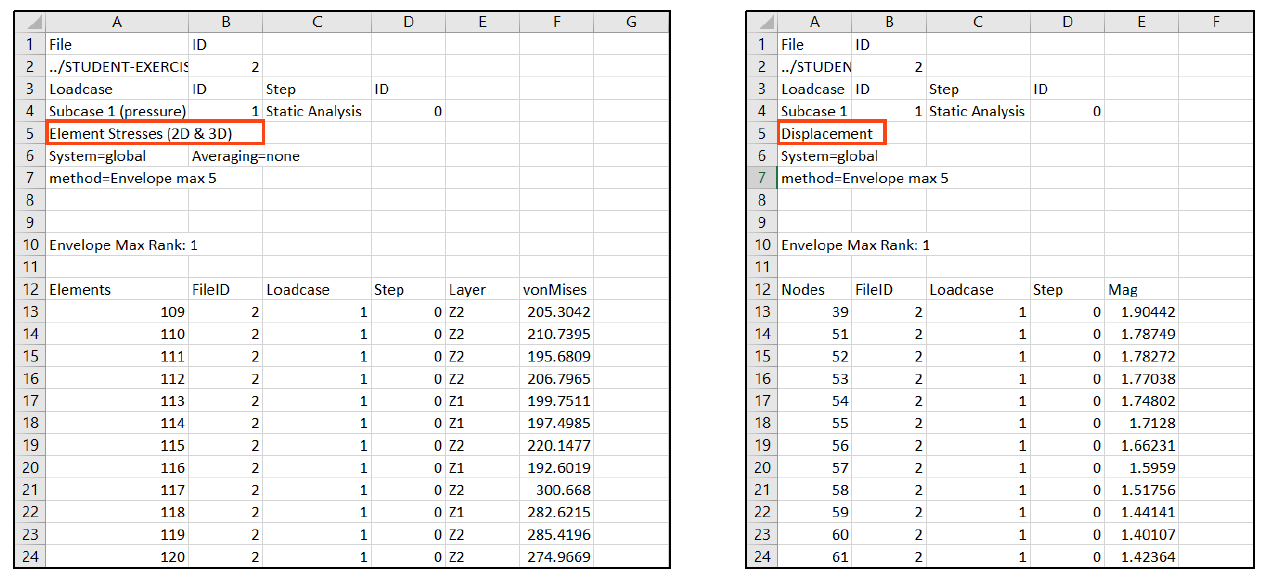
Figure 11.