Edit Design Spaces
Use the Edit tool to increase or decrease a design space by selecting and dragging faces.

- To gain maximum benefit from the voxel functionality, it is imperative that the voxels are grid aligned to 0,0,0. This is especially true when editing or updating an existing voxel mesh. If the voxels are generated from a legacy version of HyperMesh or from elsewhere, ensure the voxels are grid aligned to 0,0,0 by translating the whole model.
- If one or more of the voxel elements has been edited in anyway, that is split, node moved, size altered, then the voxel editing capability will be disabled. The functionality will be enabled once all grids are of a uniform size.
- The +/- tool can only edit up to x10 the model size.
-
From the Design Space ribbon, click the
Edit tool.
Figure 2. 
- Select a design space.
- Select faces to drag.
-
Click-and-drag graphical manipulators to reposition the faces in the selected
direction(s), or enter a precise value in the microdialog.
- Translate along an axis by dragging arrows.
- Translate within a plane by dragging squares.
- Specify a precise magnitude to translate or rotate by clicking a graphic manipulator and modifying the value(s) in the microdialog that opens. Press Enter to execute the move.
Dragging in the positive direction changes the preview of the selected faces orange, whereas dragging in the negative direction changes the preview red.
If the voxels are dragged and overlap with a pre-existing voxel, they are not duplicated and all voxels will be equivalenced correctly.Figure 3. 
Example: Edit Voxel Meshes
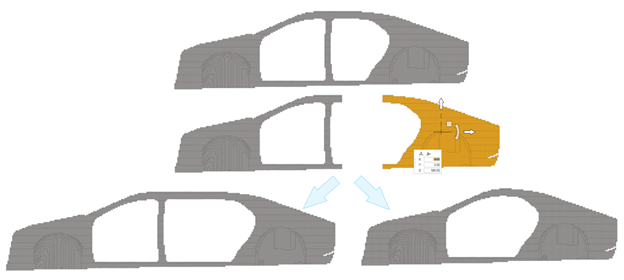
Example of an original voxel output being altered to become a long or short wheelbase using a combination of HyperMesh tools.
Editing voxels outside of the Voxel tool is possible; however, this is only possible when the distance is a multiple of the voxel size. For example, if the voxel size is 10, then the distance to drag the faces must be 10, 20, 30, and so on. If large scale changes are required it is possible to delete, move and then edit the voxels.
