Import
How to import a part? - Introduction
Three ways are possible for importing a part in a user’s library:
- Import of parts from another library
- Import of parts from a folder
- Import of parts from a zip file
Note: Importing parts is possible only in a user’s
library. Whatever the selected import mode, if you select a reference library,
the icon "Import" is disabled.
Clicking on the icon "Import" opens a dialog box, allowing selection of one way for importing the parts.
 |
|
|---|---|
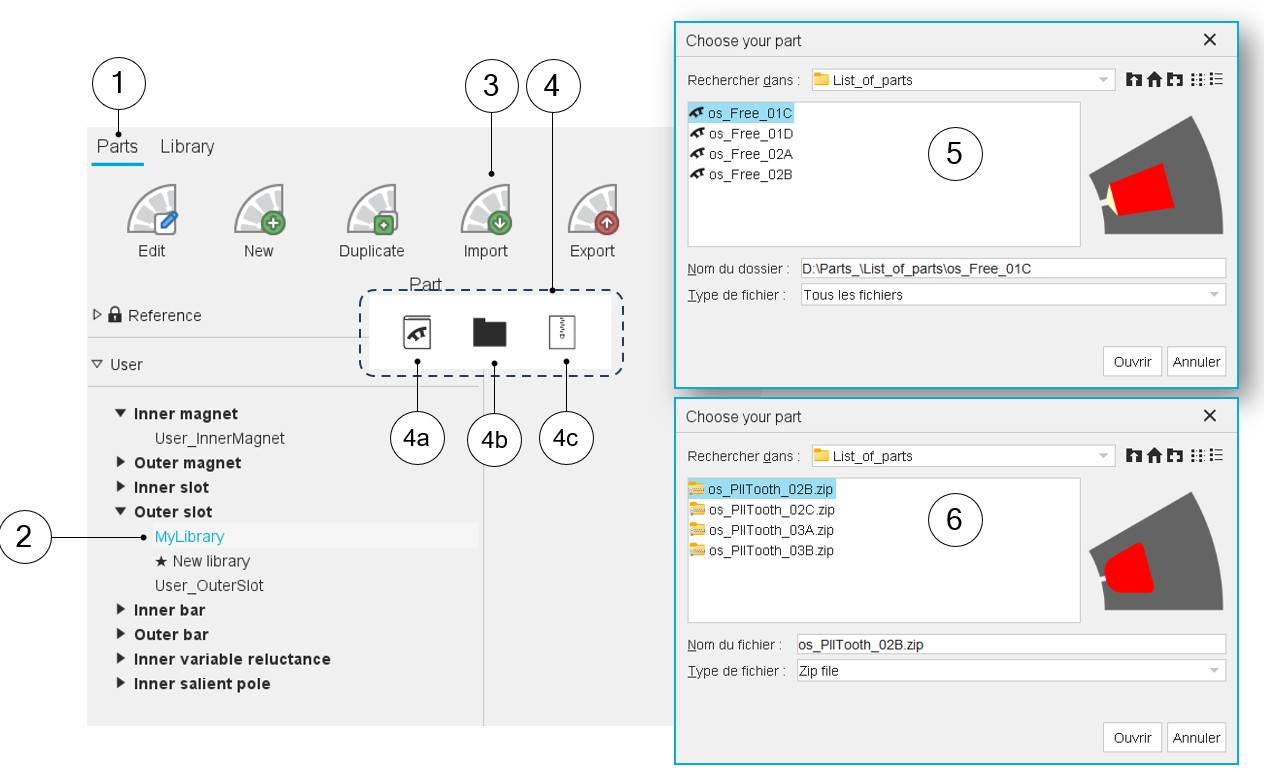
| 1 | Selection of the parts area of the Part Library application. |
| 2 | Selection of a user’s library in which the parts to import will be stored. |
| 3 | Click on the button “Import”. |
| 4 | Clicking on the icon "Import" opens a dialog box, allowing three ways for importing parts. |
| 4a | 1st solution: Import parts from another catalog. Clicking on this icon allows access to the Part Library via a dialog box to navigate through the various libraries - reference and users - to select the part to import. |
| 4b | 2nd solution: Import parts from a folder. |
| 4c | 3rd solution: Import parts from a zip file. |
| 5 | Dialog box when importing parts from folders for visualizing the
folder content. Comments:
|
| 6 | Dialog box when importing parts from zip files for visualizing
the folder content. Comments:
|
Note: Whatever the way for importing parts is, the rules for
importing a part into a library are like those for creating a new part. The name of
the imported part must not already exist. If this is not the case, a procedure
allows you to change it before importing it.
Cases where importation is not possible
 |
|
|---|---|
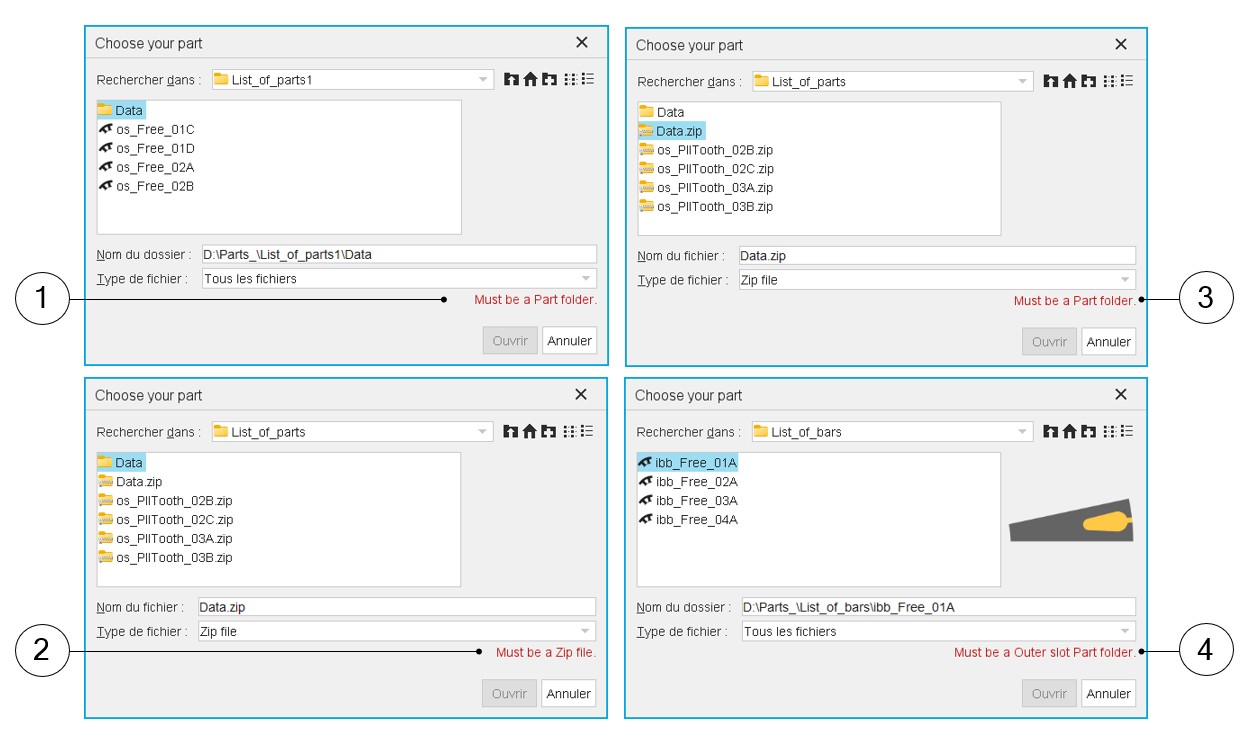
| 1 | When the selected folder is not identified as a part, a warning message is written in red (Must be a Part folder). |
| 2 | When the selected folder is not a zip file, a warning message is written in red (Must be a Zip file). |
| 3 | When the selected zip file is not identified as a zipped part, a warning message is written in red (Must be a Part folder). |
| 4 | When the selected user’s library and the part to be imported are
not compatible. In our example above, one wants to import bars into
an outer slot library. In that case an error message is written in red to explain why it is not possible to finalize the operation. |
Note: In all these cases where importation is not possible, the
“Open” button is disabled.
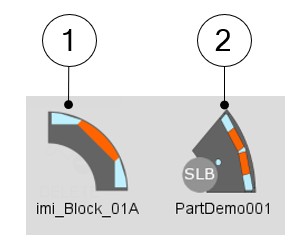
Import parts from SimLab
Starting from the 2025 version, one can import inner magnet parts created in SimLab. Please refer to the SimLab help documentation for detailed instructions on preparing the part.
Once imported, parts created using the Excel template and those created via SimLab
can be distinguished by their thumbnail images:
- SimLab parts: Display a circle with the letters SLB inside.
- Excel template parts: Retain their standard thumbnail design.
 |
|
|---|---|
| 1 | Excel template part with standard thumbnail design |
| 2 | SimLab part with a circle with the letters SLB inside |