Create Sheets
Create a sheet from an imported surface by applying thickness.
- On the Project Tree, click on the Assembly workbench.
-
On the toolbar, click
 Create Sheets.
The Create Sheets dialog opens.
Create Sheets.
The Create Sheets dialog opens. -
For Inflating Direction, select from any of the three types:
- Top and bottom: Inflate the skins along both sides of its reference plane by considering the thickness half in each direction.
- Top: Inflate the selected skin along one direction based on its reference plane.
- Bottom: Same as Top but on the other direction of its reference plane.
-
If every skin in the modeling window has the same
thickness, select Apply to all skins.
- Enter a value for Sheet thickness, and then click OK.
-
If the imported skins in the assembly have varying thickness, select
Apply to specific skins.
- Select skin parts in the modeling window or from the Project Tree, and then click Apply to selected.
- Click OK.
-
To apply the sheet thickness via a CSV file, select Import from a
.csv.
- Click Import.
- Browse to the desired .csv file in the File Explorer and click Open.
- Click OK.
- Optional:
Click
 Zoom to magnify the selected parts.
- Optional:
Click
 Remove to remove the selected skin part from the
dialog.
Remove to remove the selected skin part from the
dialog.
- Optional:
To edit the applied thickness of a sheet, in the Project Tree do either of the following:
- Double-click on a sheet.
- Right-click on a sheet, and then click Edit sheet thickness.
-
If you delete a sheet that was created by inflating skins with thickness, the
following warning is given.
Figure 1. 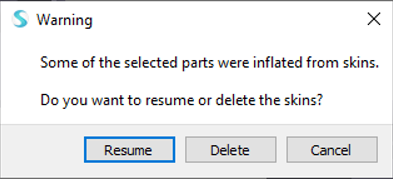
- Click Resume to retain the skins or select Delete to delete the sheets along with the skins.
Edit Sheet Thickness
Edit sheet thickness of the inflated skins from the Project Tree.
-
To edit applied thickness, double-click on the sheet(s) or right-click from the
Project Tree and select Edit sheet
thickness.
Note: Single or multiple selection of inflated skins can be made from the Project Tree.
-
If required, Inflating direction can be changed from any of the three
types:
- Top and bottom: Inflate the skins along both sides of its reference plane by considering the thickness half in each direction.
- Top: Inflate the selected skin along one direction based on its reference plane.
- Bottom: Same as Top but on the other direction of its reference plane.
-
By default, Apply to specific skins option is active.
Input the desired thickness value, select Apply to
selected, and then click OK.
Note: When there are multiple inflated skins, Zoom in on selection is automatically activated for this dialog when you select an inflated skin.
Imported Sheet Thickness CSV File Format
CSV file format fields
The CSV file contains one header row and one or more additional data rows. Data
values are as follows:
- Part_name – Alpha-numerical values
- Thickness - Numerical values
Example CSV file
Part_name,thickness
Support,2
Handle,1.5
Note: Partial part names are also supported. For example, if an assembly has
multiple parts that have support in the name of parts (such as
support_left, support_right) all those
instances where support is present are recognized. Defining individual names
support_left and support_right
separately in a CSV file with different thickness value will map correctly as
per the names defined.