PhysicsAI-T: 2020 Read Vector Data
In this tutorial, you will directly parse vector results contained in .out or .pch files accompanying the .h3d during dataset creation.
The .out/.pch files should have the same name and be located in the same subdirectory.
Before you begin, copy the file(s) used in this tutorial to your working directory.
Unzip the project doe_1.zip and inspect the contents. This should result in a directory containing 25 run_000XX folders. Each folder should have a subdirectory called m_1 containing beam.h3d and beam.out files. If a beam.out file is queried in HyperGraph, the available vector responses can be seen.
Step 1. Create Project
- Open SimLab.
-
From the menu bar, click File > Extension > PhysicsAI to open the PhysicsAI ribbon.
-
From the PhysicsAI ribbon, select the Create Project tool.

The Create Project dialog opens.
- For Project Name, enter Vector_reading.
- For Location, click Choose and select a save location for the project.Note:
The save location for the project contains all files created by PhysicsAI, but the original files used for training do not need to reside in the project folder.
-
Click OK.
Step 2. Create a Dataset
-
From the PhysicsAI ribbon, select the Create Dataset tool.

The Create Dataset dialog opens.
- For Dataset Name, enter Beam_data.
- For File System, click and navigate to the doe_1 folder.
- Select and transfer all of the .h3d files.
- Select the Enable train test split check box and enter 80 for the Train %.
-
Select the Extract time-history vectors check box.
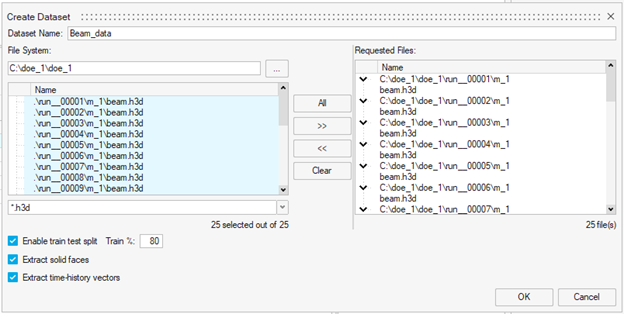
- Click OK.
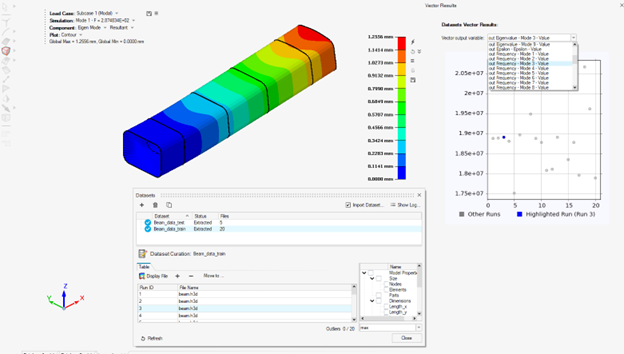
The dataset is extracted, and the Datasets dialog opens.
- Visualize Dataset Results
-
Select data from the Train or Test dataset
- Click "Display file"
- The .h3d model and Vector results will load in the modeling
window for the selected run ID
-
- Click Close.
Step 3. Train Model
- From the PhysicsAI ribbon, select the Train an ML Model
tool.

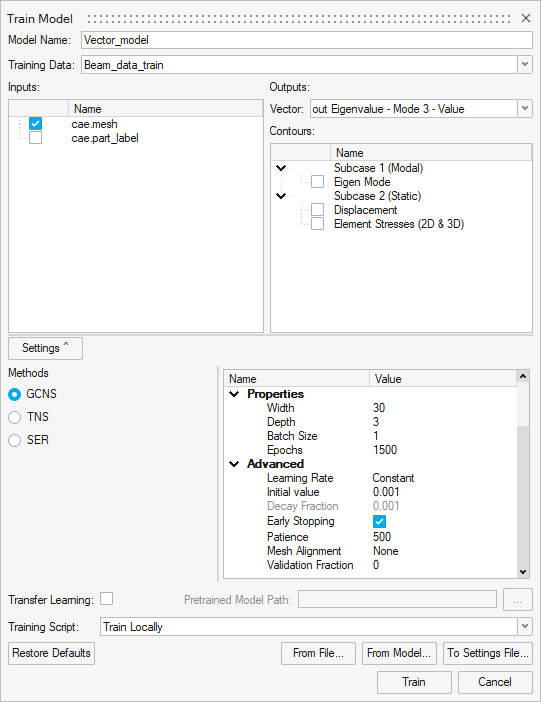
The Train Model dialog opens.
-
Define the following details and click Train.
- For Model Name, enter Vector_model.
- For Inputs, select cae.mesh.
- For Vector, select out Eigenvalue - Mode 3 – ValueNote: The vectors are names in the following format: out {Type} – {Requests}-{Components}.
- Under Method, select GCNS.
The Model Training dialog opens.
Tip:Once the status changes to Running, you can click Show Log view the training logs.