Method Manager
Use the Method Manager dialog to create new methods and populate libraries or import existing libraries from .xml files, as explained in previous chapters.
Settings
When the Method Manager is invoked for the first time, it is populated only with the default library and no resource. An empty library called Session is added to the list; it aims to contain temporary method definitions used in the live session only.
When you exit the HyperMesh session, a settings file is saved. The settings file contains the list of libraries and resources loaded before exit; the content of the Session library is removed. The settings file is saved in user/.altair/StressTool/settings.xml for Windows and /home/.altair/StressTool/settings.xml for Linux.
When starting a new instance of HyperMesh, without deleting the settings file, all previously loaded libraries and resources are scanned; hence, they are available in the Method Manager and are up-to-date.
Features
When the Method Manager is invoked from other tools such as Assign Method or Run Method, you can only review method definitions and create designpointmethod entities in the database from the selected methods in the browser.
- Import or delete resources (OML, Python, Tcl files)
- Import an existing library (from an .xml file)
- Create a new library (empty)
- Delete a library
- Edit a library (except the default library)
- Add or delete methods in a library
- Define method inputs/outputs
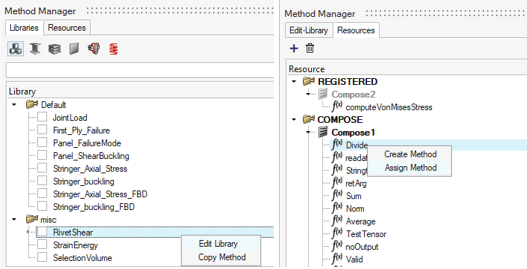
Manage Resources
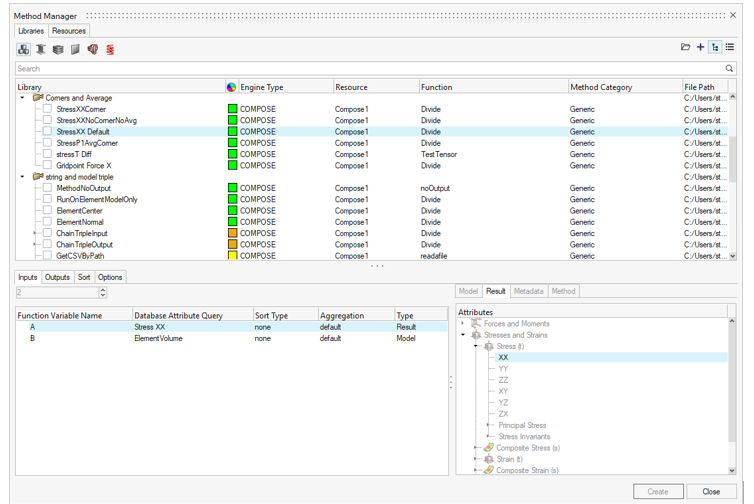
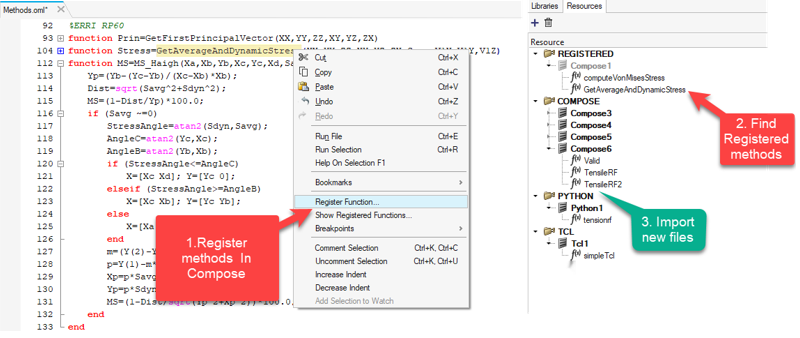
Functions defined in files (OML, Python, Tcl) are considered as resources that can be used to create a method. These can be managed in the Resources tab (Figure 3).
Context menu options are:
- Add Resource
- Folder level (Compose, Python, Tcl) or empty area.
- You can also click
 to add a resource.
 - Delete
- Resource level
- You can also click
 to delete a resource.
 - Edit
- Resource level
- Create Method & Assign Method
- Function level
Manage Libraries
- Input argument list and mapping
- Output argument list
- Sort block
- Options
- Undefined
- Parameter unresolved
- Status color red
- Method selection is disabled (cannot be created from the template)
- User
- Parameter defined locally inside the library file
- Value shown as a tooltip only
- Takes precedence over any built-in parameter
- Model
- Parameter found in pre-defined list of model attributes
- Populates the Model tab
- Not overwritten locally in the library file
- Result
- Parameter found in pre-defined list of result attributes
- Populates the Result tab
- Not overwritten locally in the library file
- Metadata
- User input
- Populates the Metadata tab
- Method
- Parameter coming from another method
- Implies that this method run along the selected method
- The status color is orange due to dependencies
- Independent methods are listed in hierarchy under caller
Figure 5. 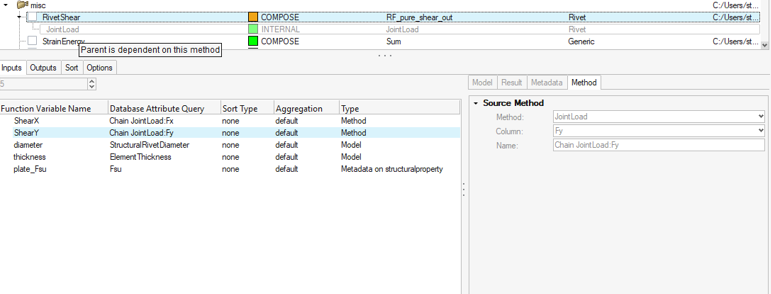
- Independent methods are listed in hierarchy under caller
Import/New/Delete Library
- Import Library

- Prompts you to import an *.xml file, which must follow the schema detailed in Author Custom Methods. If the selected file is malformed, nothing is added to the browser. If the import is successful, a new library folder is added to the browser with a list of methods available. Moreover, an automatic scan of functions used by new methods may result in new resources being added (available in the Resources tab).
- New Library
- Adds a new library to the list and brings it to edit mode to let you add methods.
- Delete Library
- Removes the library and its methods from the list, unless a designpointmethod entity in the database refers to a method defined in that library.
Scan/Open Library
- Scan Library
- Available on a library node. It re-scans the library file to check for updates. Such an operation is performed automatically each time you open the Library tab.
- Open Library
- Open the library .xml file calling its associated file editor.
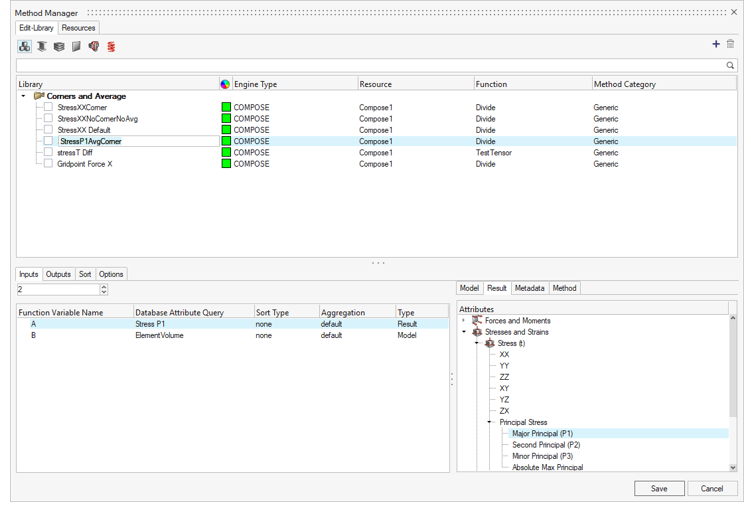
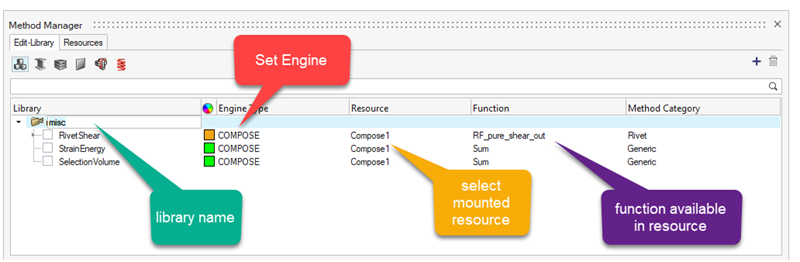
Edit Library
 .
.- Default engine is “COMPOSE”
- Default function is the first registered function if any exist
- Otherwise, it defaults to the first COMPOSE resource and points to its first function
If the current library is Session, using Save commits the changes in the session library and leaves edit mode. Using Save as gives a change to transform methods in Session onto a saved library; it results in an .xml file written and imported in the Library Manager. The Session library will be clean.
If the current library edited is a regular library, Save asks for confirmation to overwrite the original .xml file. If accepted, changes done to the library file are permanent (no Undo) and you are returned to the library view mode; otherwise, operations are cancelled. Using Save as saves a new .xml file and imports it as a new library. If method names from the newly imported library conflict with existing libraries, the methods are disabled from selection. To resolve the issue, you need to either rename the method display name in edit mode or delete the previous library from the list (where methods are duplicated). This is true for all libraries except Session. Using Save as from Session, the methods in Session are deleted when a newly saved library is imported.
Cancel will cancel all changes and leave library edit mode.
Edit Methods
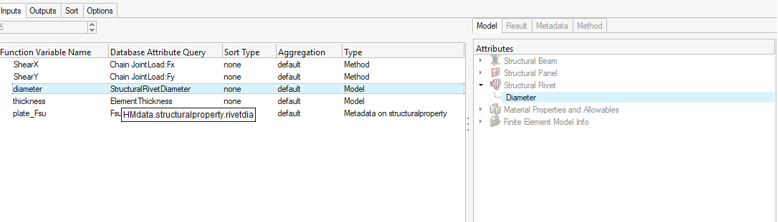
Input Argument Mapping
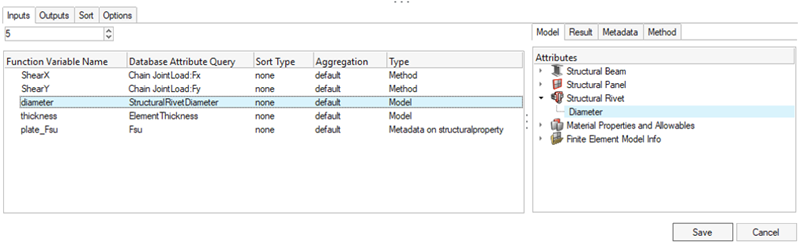
Each input argument listed in the input table has multiple columns where the first is the function’s variable name. It is filled by the variable name as read in function definition but can be overwritten without any impact. It is only for reference.
- Select an input row.
- Select a tab (Model/Result).
- Select an argument in the tree and double-click to map.
- For extended data:
- Select the Metadata tab.
- Select the entity type.
- Set data type.
- Change Show as, if applicable.
- Set to unspecified to remove allowables.
- Set to combo box to enable allowables and fill pre-defined by values separated by spaces.
- Set the Default value.
- For method chain select the Method tab.
- Select a Method in the available list.
- Select a Column value (populated from the selected method).
- Rename the argument (optional).
- Sort type
- Level of aggregation
The menu option on a row allows you to propagate the aggregation.
- Select the mapped argument, which populates the Model/Result tab.
- Select an argument to map (needs to be reset first).
- The attribute tree remains open in the previous state.
- It is helpful to define, like Stress YY from Stress XX.
Define Method Outputs
- Rename every output with meaningful names.
Define Post Evaluation Sorting
- Select the Sort tab.
- Change the Sorting value to any of the input/output of the method used as an aggregation metric. This value is used to compare entities altogether and retain min (resp max.)
- Select the Aggregation type.
- Select Envelope if a loadcase envelope is needed.
- If off results per loadcase are kept
- Only spatial aggregation occurs
- Select an Output location.
- Manage internally domains to finally retain value bounded to selection.
- Select a sub option, if applicable.
- Retain layers or aggregate across layers.
- Keep nodes/corners.
Figure 9. 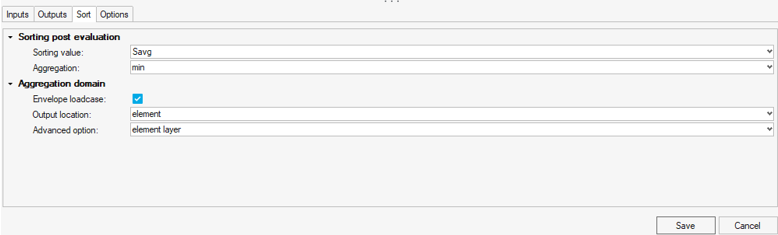
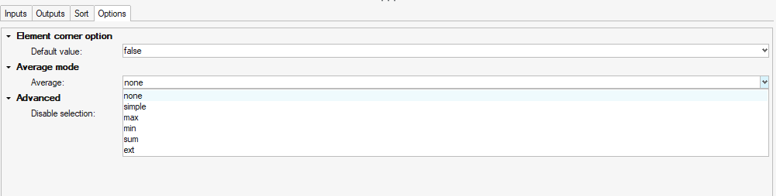
Define Options