SS-T: 2090 Cables
Tutorial Level: Intermediate Create cables in SimSolid.
- Purpose
- SimSolid performs meshless
structural analysis that works on full featured parts and assemblies, is
tolerant of geometric imperfections, and runs in seconds to minutes. In this
tutorial, you will do the following:
- Create cables and apply cable shortening
- Model Description
- The following model file is needed for this tutorial:
- cables.ssp
Open Project
- Start a new SimSolid session.
-
On the main window toolbar, click Open Project
 .
.
- In the Open project file dialog, choose cables.ssp
- Click OK.
Create Point Spots
- On the Project Tree, click on the Assembly workbench.
-
On the Assembly workbench toolbar, click
 ➔ Create
spot.
➔ Create
spot.
- In the Rectangle tab in the dialog, set the dimensions of A and B to [0,0]
- In the modeling window, select a face on one of the arms.
-
Set the X, Y, and Z coordinates as shown in Figure 1.
Figure 1. 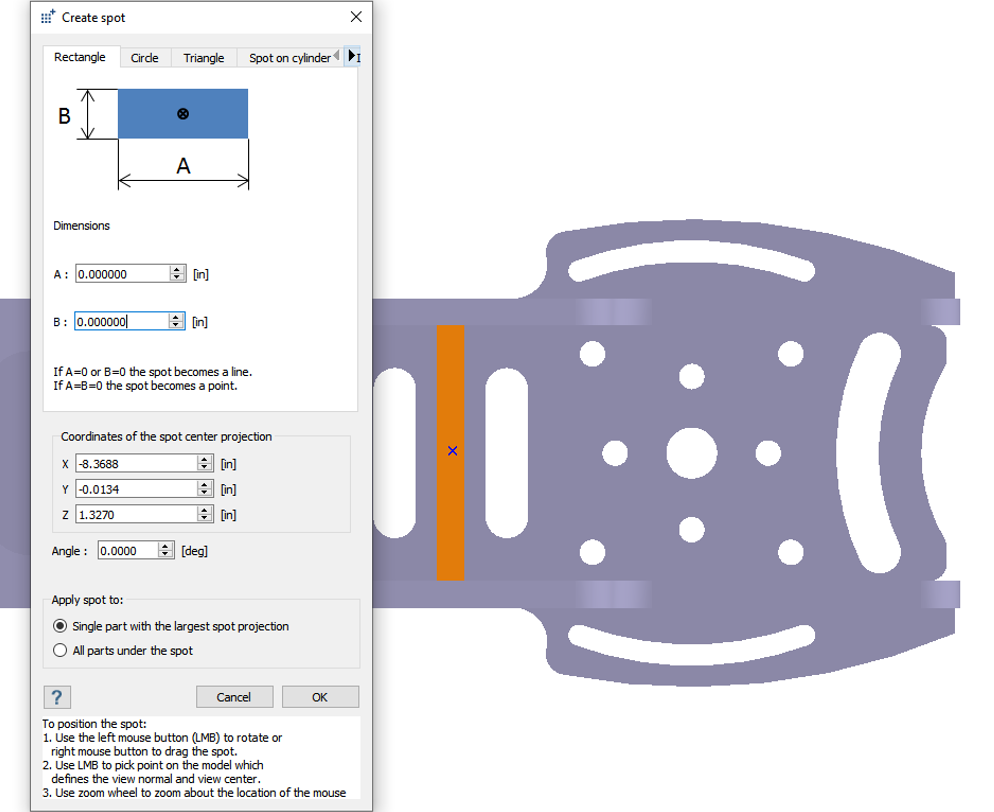
- Click OK.
-
Repeat steps 1 through 6 to create point spots on the other three arms as
shown in the following figures.
Figure 2. 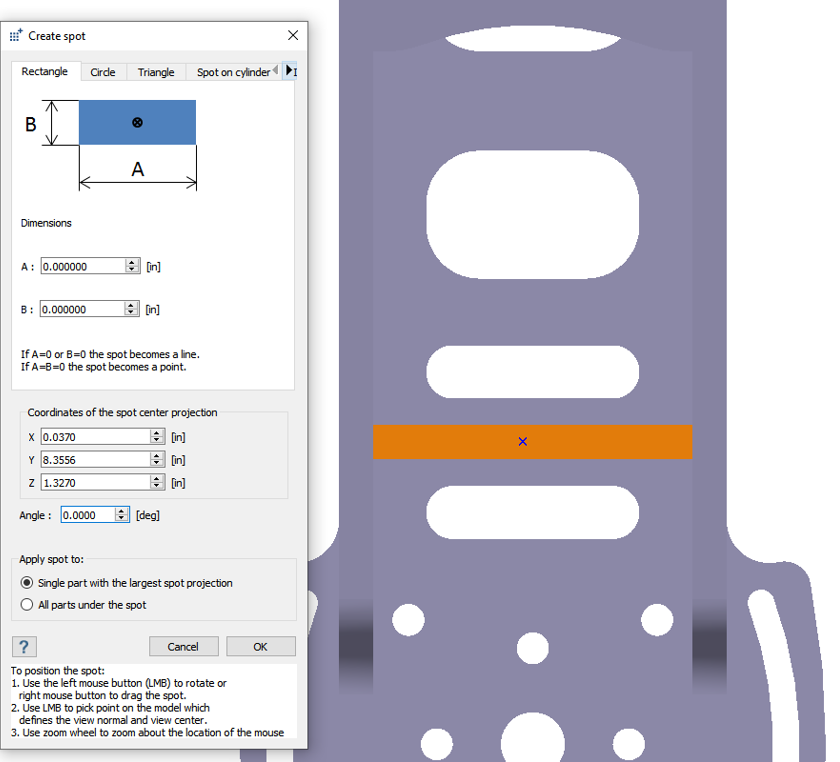
Figure 3. 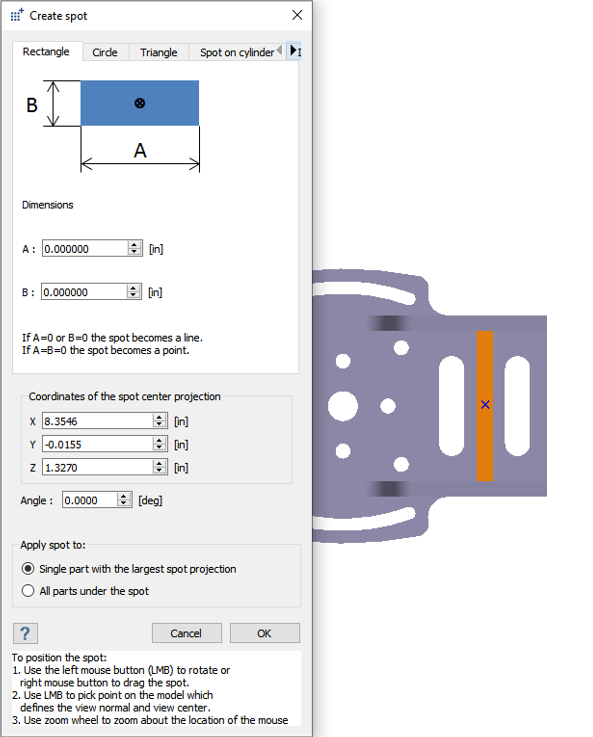
Figure 4. 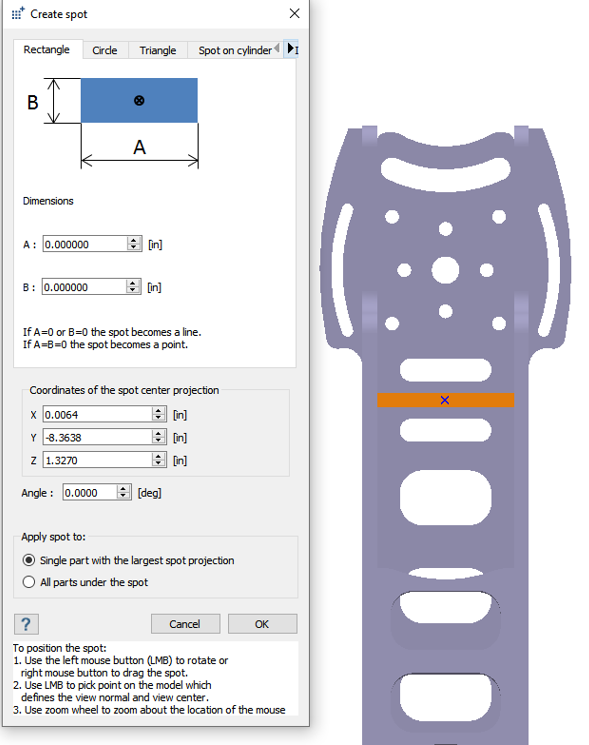
Create Ground Cable
- On the Project Tree, click on the Connections workbench
-
On the Connections workbench toolbar, click
 > Cable/rod.
-
Set Type to Ground cable.
Note:
- Ground cables are created between the point spot and ground location.
- Cables are created between two different point spots.
-
Click the radio button for End 1 and select point spots
on one of the arms as shown in Figure 5.
Figure 5. 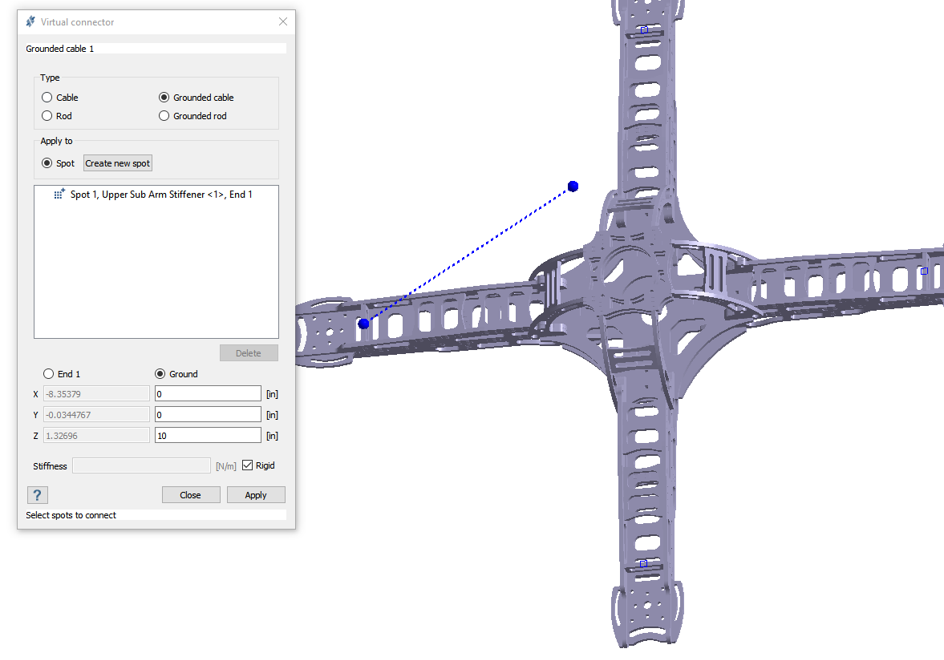
- Click the radio button for Ground and enter the values [0,0,10] for the ground location.
- For Stiffness, check the box for Rigid.
- Click OK.
-
Repeat steps 1 through 7 to create point spots and ground cables for the other
three arms as shown in Figure 6.
Figure 6. 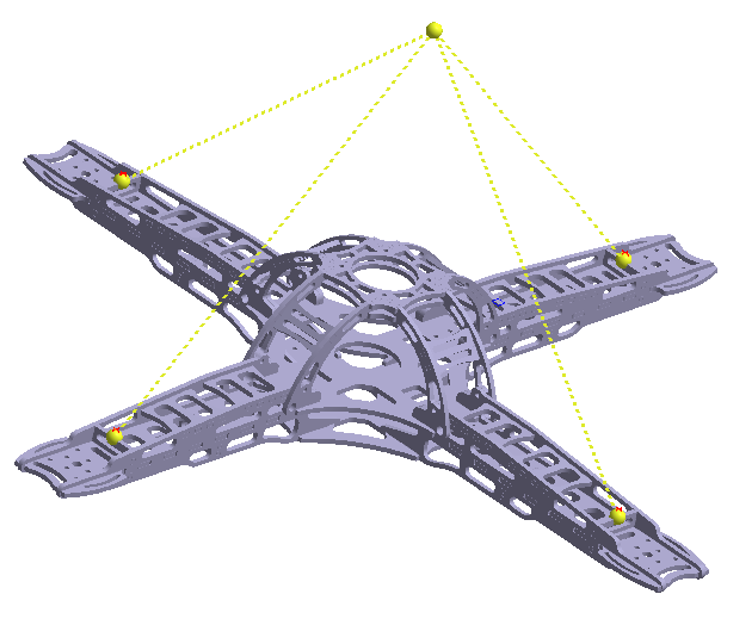
Create Cable Tightening
- In the Project Tree, click on Structural 1 analysis branch to open the Analysis Workbench.
-
On the Analysis Workbench toolbar, click
 Cable tightening/Rod preload.
- In the dialog, select all four cables from the Project Tree.
- Click the Cable relative shortening radio button.
- Enter 2.
- Click OK.
Run Analysis
- On the Project Tree, open the Analysis Workbench.
-
Click
 Solve.
Review Results
-
On the Analysis Workbench
toolbar, click
 Results plot.
-
In the menu, select Displacement Magnitude.
The Legend window appears showing the contour plot. The Results window appears. You can review the plot for different zones.
View Cable Reactions
-
On the Analysis Workbench,
click
 Cable/rod reactions.
- Select a cable to view the tension and shortening information.