Supports
Supports are used to hold a part so it doesn't displace when loads are applied to it. Use the Apply Support tool on the Loads icon to apply a support.
You can apply supports to a single point on the model, to an edge or a face, or at the center of a hole.

Apply a Support to a Solid
Select the Supports tool, click on a feature, and click the support cone to edit it.
-
On the Structure ribbon, select the Supports tool on
the Loads icon.

Tip: To find and open a tool, press Ctrl+F. For more information, see Find and Search for Tools. -
Click on a point, edge, face, or hole.
- Hold the Shift key as you click to create a concentrated point support.
- Hold the Ctrl key to apply the support to multiple features on the same part.
-
To allow translation in one or more directions for a particular support, click
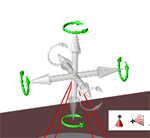
on a cone for that support. A transparent axis trident appears.
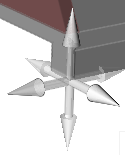
-
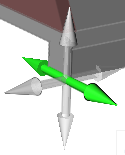
Click on the arrows to toggle the locks on and off in those directions.
A green arrow indicates that translation is allowed in that direction, while a gray arrow indicates that it is locked.
- Right-click and mouse through the check mark to exit, or double-right-click.
- You can edit individual supports to allow translation or rotation in one or more directions. Double-click on a support to enter editing mode.
- A distributed support acts in a single direction across the extent of an edge or face. You can change whether a support is distributed or not in the Property Editor.
- Once a support is created, you can move it away from the model to create a support at a distance by using the Move tool on the microdialog.
- Use the Property Editor to change the name, connection type (rigid or flexible), and appearance of the support, and whether it rotates with the part.
Apply a Support to a Cylindrical Hole
Supports applied to a cylindrical hole are a special case, and have different properties from supports applied to a point, edge, or face.
-
On the Structure ribbon, select the Supports tool on
the Loads icon.

Tip: To find and open a tool, press Ctrl+F. For more information, see Find and Search for Tools. -
Click on the interior of a cylindrical hole.
- Hold the Shift key as you click to create a concentrated point support.
- Hold the Ctrl key to apply the support to multiple features.
-
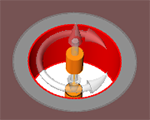
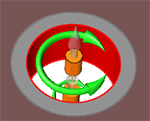
To allow translation or rotation, click on the red support cylinder.
Transparent graphical handles appear.
-
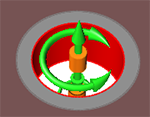
Click on the arrows to toggle the locks on and off in those directions.
A green arrow indicates that translation or rotation is allowed in that direction, while a gray arrow indicates that it is locked.
- Right-click and mouse through the check mark to exit, or double-right-click.
- Use the Property Editor to change the name, connection type (rigid or flexible), and appearance of the support, and whether it rotates with the part.
- A distributed support acts in a single direction across the extent of an edge or face. You can change whether a support is distributed or not in the Property Editor.
- You can enable optimization for cylindrical supports in the Property Editor.
- You can change how connection stiffness is defined for cylindrical supports in the Property Editor.
Translate or Rotate Supports
When you create a support, translation is locked in all directions by default; but you can edit individual supports to allow translation in one or more directions.
- Double-click on a support to enter editing mode.
-
Click the clear axis arrows to enable translation for that axis.
A green arrow indicates translation or rotation is enabled.

Place Supports at a Distance
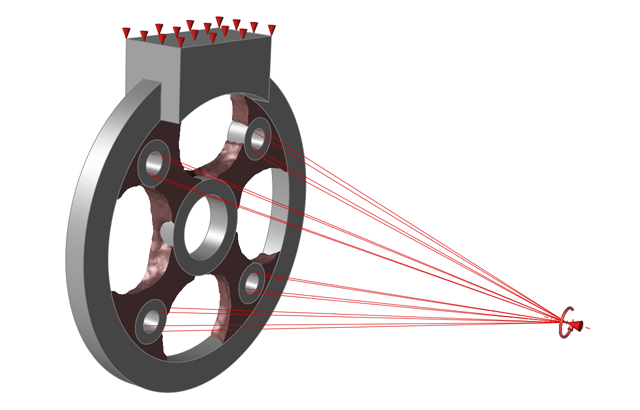
Move a support away from the model to create a support at a distance.
- Double-click on a support to enter editing mode.
-
Use the Move
 tool on the microdialog to translate the
support.
When the support is moved away, connections are automatically created.
Microdialog Options
Double-click a support to enter editing mode, which opens the Support microdialog.

|
Use the drop-down menu to select which type of feature to apply the support to, such as a point or face. When using the SimSolid solver there are additional options for Fixed, Sliding, and Hinged. Fixed and sliding options can be applied to holes or surfaces, while the hinged option can only be applied to holes |
|
|
Click the icon to enter/exit Multi-Selection mode. In this mode, you can click a feature to add/remove it from the selection. Outside of this mode, you need to hold down Ctrl while clicking. |
|
|
Translate or rotate the support using the Move tool. Use to place a support at a distance. |
|
|
Align the support normal (perpendicular) to the face. |
|
|
Align the support to the global axes. |
Mouse Controls and Keyboard Shortcuts
| Ctrl | Apply the support to multiple features on the same part. |
| Shift | Create a concentrated support at a point on an edge, face, or hole. |
| Right-click and mouse through the check mark to exit, or double-right-click. | Exit the tool. |


