Replace a Flexible Body
Replace a flexible body with an OptiStruct-generated .h3d file.
-
On the Motion ribbon, under Profile, select
Analyst.

-
Under Flex Body, select the Flex Body Replace
tool.

Tip: To find and open a tool, press Ctrl+F. For more information, see Find and Search for Tools.A dialog opens noting changes that will result from the Replace operation. - Click Continue in the dialog.
-
Browse and select the flex body .h3d file.
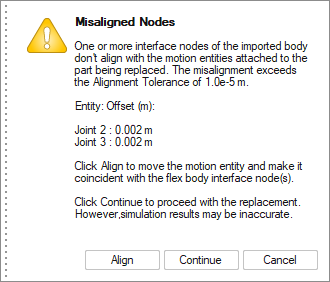
If there are interface nodes on the flex body whose coordinate offsets are greater than what is specified in , a dialog opens warning of the misalignment.
There are two options in the dialog:
- Align – Move the motion entity attachment locations to match the locations of the interface nodes.
- Continue – Do not move the motion entity attachment locations and accept the misalignment with the interface node.

Note: When a part is replaced with a flexible body using the Replace option, existing Motion-Designer joint types will be automatically converted to Motion-Analyst joint types. This conversion is permanent. A part cannot be replaced with a flex body more than once. A flexible part introduced using Replace cannot be re-created using Flex Body Create.