Use SER Architecture for Training on KPIs
Tutorial Level: Advanced In this tutorial, you will use the Shape Encoding Regressor (SER) architecture to predict KPIs.
The SER architecture operates on shape encodings of input samples and can only predict KPI/vectors (no contour or field results).
In this tutorial, you will:
- Create and curate a dataset to remove outliers.
- Train a PhysicsAI model to predict a KPI using the SER architecture.
Before you begin, copy the file(s) used in this tutorial to your
working directory.
Note: Unzip the project IBeam_dataset.zip and inspect the contents.
- run_000XX_Ibeam.h3d files
- run_000XX_Ibeam.json files containing the KPIs
Create and Curate a Data Set
- Open HyperMesh.
- From the menu bar, click to open the PhysicsAI ribbon.
-
Create a project.
-
From the PhysicsAI ribbon, select the
Create Project tool.
Figure 1. 
The Create Project dialog opens.
-
From the PhysicsAI ribbon, select the
Create Project tool.
-
Create a database called Ibeam_full using all the
.h3d files.
-
From the PhysicsAI ribbon, select the
Create Dataset tool.
Figure 2. 
The Create Dataset dialog opens. -
For File System, click
 and navigate to
the IBeam_dataset folder.
and navigate to
the IBeam_dataset folder.
-
Click OK.
Figure 3. 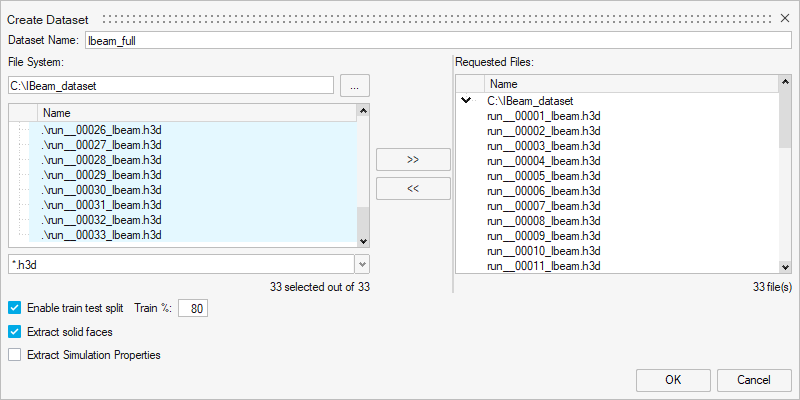
The dataset is extracted and the Datasets dialog opens.Figure 4. 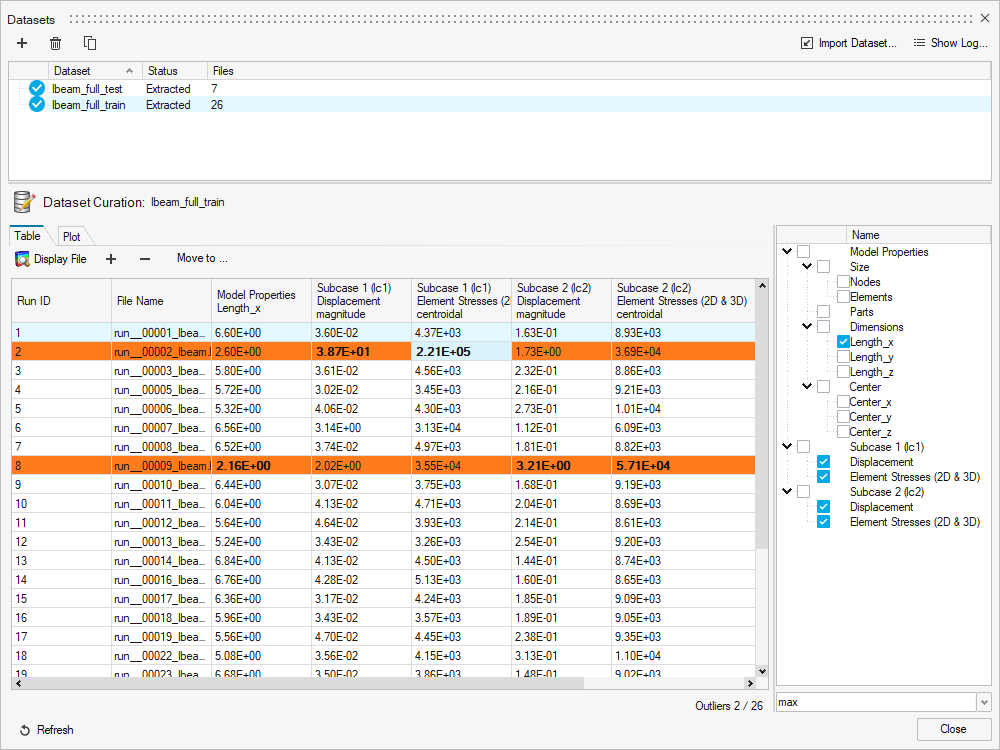
-
From the PhysicsAI ribbon, select the
Create Dataset tool.
-
Remove outliers in the training dataset.
- Select Ibeam_full_train.
-
Select the first orange highlighted row, row two, and click
 to
remove the row from the dataset.
to
remove the row from the dataset.
- Repeat step 5.b to remove all other rows that are outliers.
The curated dataset no longer has any outliers.Figure 5. 
Train Model Using SER Architecture
In this step, you will train a PhysicsAI model using the SER architecture.
-
Create a new model called Max_disp_SER.
-
From the PhysicsAI ribbon, select the
Train an ML Model tool.
Figure 6. 
The Train Model dialog opens.
Figure 7. 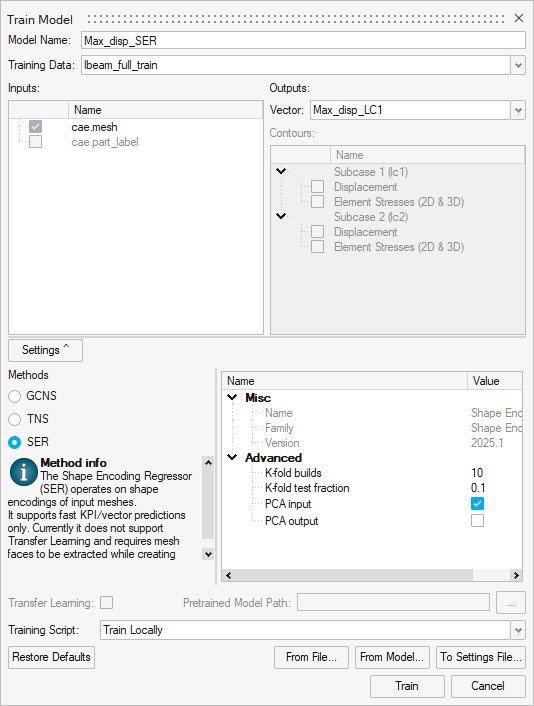
-
From the PhysicsAI ribbon, select the
Train an ML Model tool.
-
Test the model.
Note: SER is much faster than GCNS and TNS. Only the training loss is available for SER and there is no loss curve.
-
From the PhysicsAI ribbon, select the
Test ML Model tool.
Figure 8. 
The Test Model dialog opens. -
For Datasets, select Ibeam_full_test.
Figure 9. 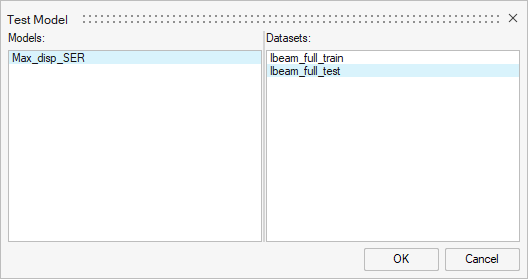
-
From the PhysicsAI ribbon, select the
Test ML Model tool.
-
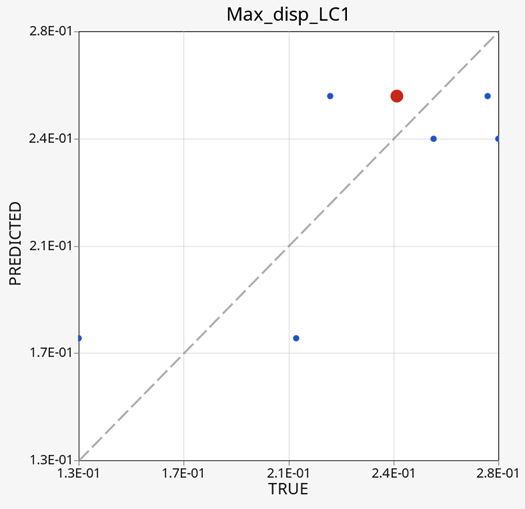
Select a single data point and click Display File.
Figure 10.