PhysicsAI-T: 1000 Simple Project Overview
Tutorial Level: Beginner In this tutorial, you will use PhysicsAI to train your own model.
Before you begin, copy the file(s) used in this tutorial to your
working directory.
Note: Unzip the project hvac.zip and inspect the contents:
- inputDataRecomp contains seven results in h3d format (Training files)
- testDataRecomp contains two results in h3d format (Testing files)
- newDesigns contains two files (for Prediction)
In this tutorial you will:
- Open HyperMesh and create a project using the PhysicsAI toolbar.
- Create two datasets separately for training and testing.
- Train the ML model using the training dataset and view the logs.
- Test the ML model on HVAC_Test_2 and view the results and detailed score report.
- Predict the results on new designs HVAC_concept2_rnd.fem, HVAC_Duct_v3.x_b.
Create Project
In this step, you will open HyperMesh and create a project using the PhysicsAI toolbar.
- Open HyperMesh.
- From the menu bar, click to open the PhysicsAI ribbon.
-
From the
PhysicsAI ribbon, select the Create
Project tool.
Figure 1. 
The Create Project dialog opens. - For Project Name, enter Traintestdemo.
-
For Location, click
Choose and select a save location for the
project.
Note: The save location for the project contains all files created by PhysicsAI, but the original files used for training do not need to reside in the project folder.
- Click OK.
Create Datasets
In this step, you will create two datasets for training and testing.
-
From the
PhysicsAI ribbon, select the Create
Dataset tool.
Figure 2. 
The Create Dataset dialog opens. - For Dataset Name, enter HVAC_Train_7.
-
For File System, click
 and navigate to the
inputDataRecomp folder.
and navigate to the
inputDataRecomp folder.
-
Select and transfer all of the
.h3d
files.
Figure 3. 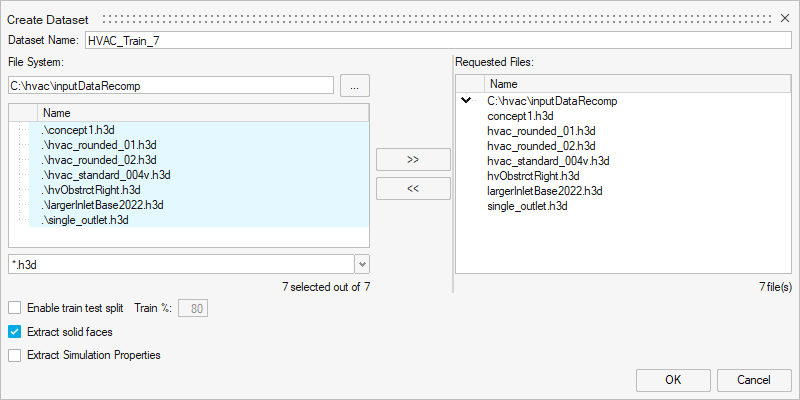
-
Click OK.
The dataset is extracted and the Datasets dialog opens.
-
Create a second dataset.
-
Click
 to reopen the
Create Dataset dialog.
to reopen the
Create Dataset dialog.
-
For File System, click and navigate to
the testDataRecomp folder.
-
Select and transfer all of the
.h3d
files.
Figure 4. 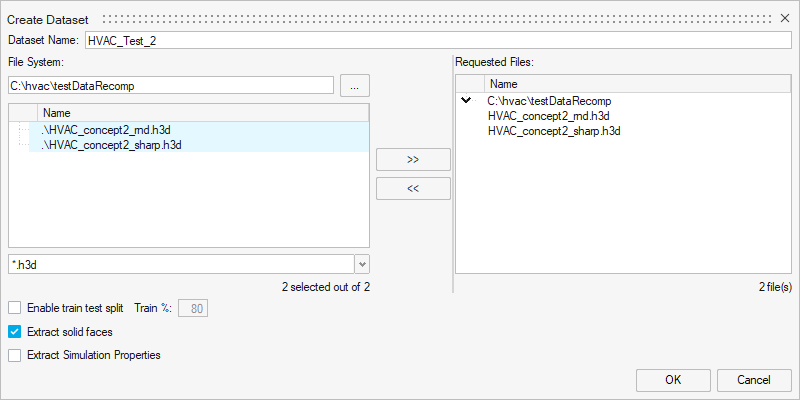
-
Click
-
Select datasets to see the extracted datasets.
Figure 5. 
- Click Close.
Train Machine Learning ML Model
In this step, you will train a Machine Learning (ML) model on the training dataset and view the logs.
-
From the
PhysicsAI ribbon, select the Train an
ML Model tool.
Figure 6. 
The Train Model dialog opens. -
Define the following details and
click Train.
- For Model Name, enter HVAC_Pred.
- For Training Data, select HVAC_Train_7.
- For Inputs, select cae.coord and cae.part_label.
- For Outputs, select pressure.
Figure 7. 
The Model Training dialog opens.Figure 8. 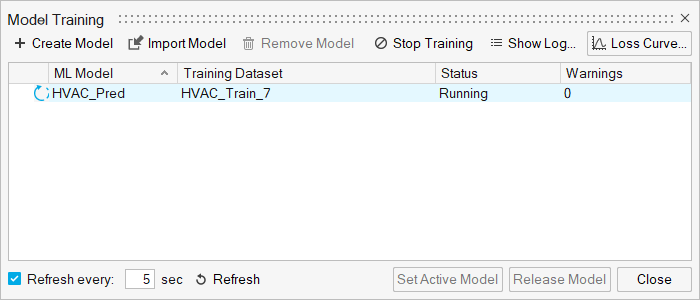
Tip: Once the status changes to Running, you can click Show Log view the training logs.
Test ML Models
In this step, you will use the trained model and test this ML models on HVAC_Test_2. You will also view the results and detailed score report.
-
From the
PhysicsAI ribbon, select the Test ML
Model tool.
Figure 9. 
The Test Model dialog opens. - In the Models area, select HVAC_Pred.
-
In the Datasets area, select HVAC_Test_2 and click
OK.
Figure 10. 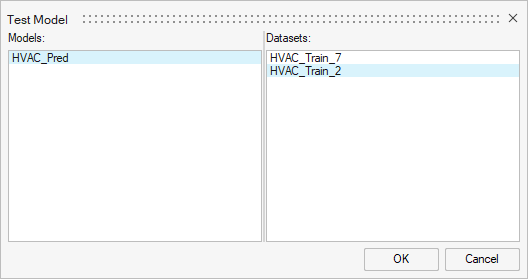
The Model Testing dialog opens. - In the Model Testing dialog, select a Run ID and click Display File to view the results in the modeling window.
- Close the Model Testing dialog.
Set Model as Active
In this step you will set the model as active.
Important: Setting a
model as active will checkout a stacking license until the model is
deactivated.
-
From the
PhysicsAI ribbon, select the Manage ML
Models tool.
Figure 11. 
The Model Training dialog opens. - Click Set Active Model.
Use Models
In this step, you will predict the results using HVAC_concept2_rnd.fem and HVAC_Duct_v3.x_b.
- From the newDesigns folder, drag-and-drop the HVAC_Duct_v3.x_b file into the modeling window.
-
In the Load File dialog, verify New
model is selected and click OK.
Figure 12. 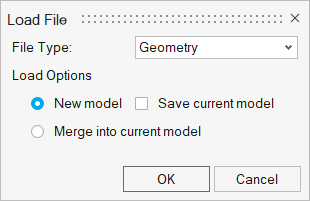
Note: Selecting New model ensures -
In the Import Options dialog, click
Open.
The model opens in the modeling window.
-
From the
PhysicsAI ribbon, select the
Predict tool.
Figure 13. 
Figure 14. 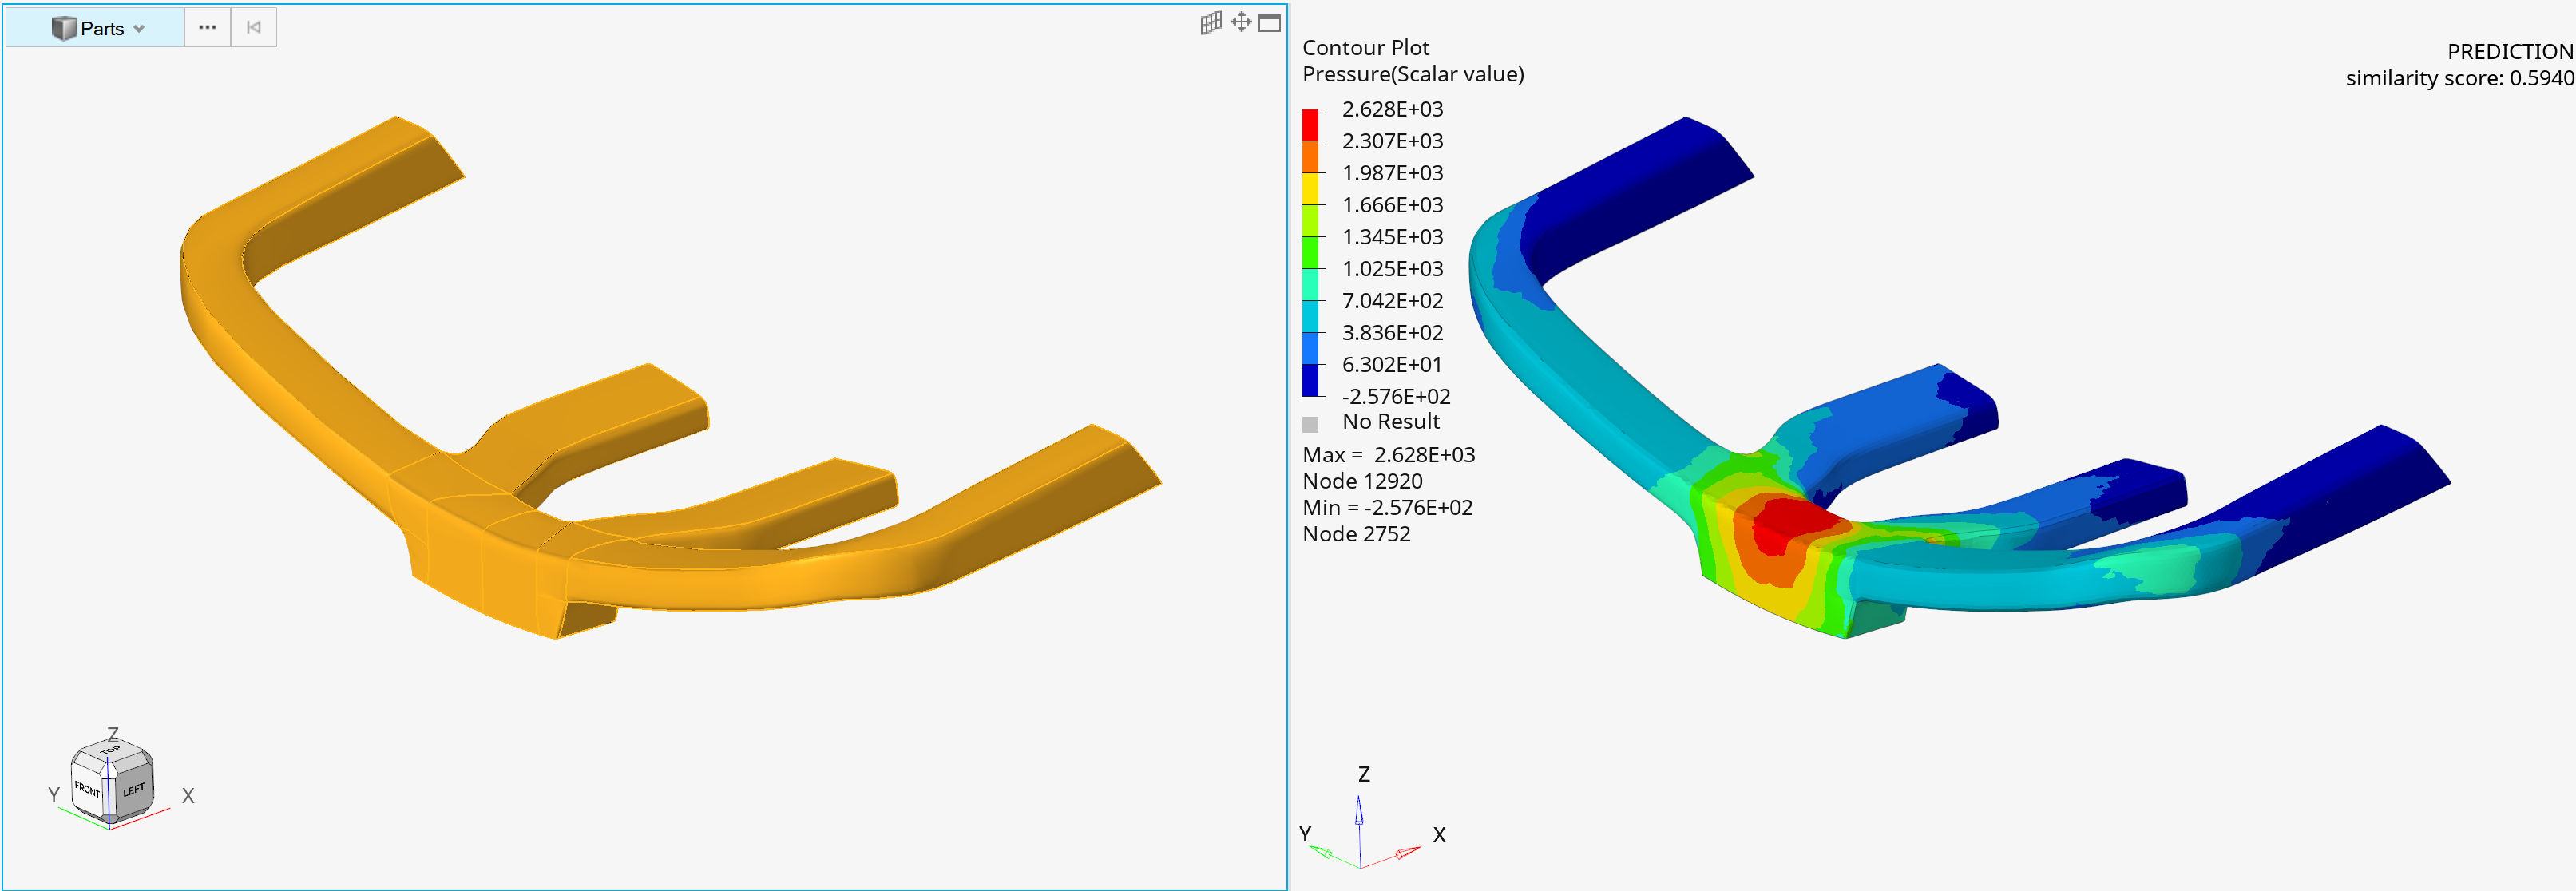
-
Repeat steps 1 - 3 for the HVAC_concept2_rnd.fem
file.
Important: Verify the model isn't loaded on the previously existing geometry by deleting the previous model or by selecting New model in the Load File dialog in step 2.