PhysicsAI-T: 3030 Learn from Experimental Test Data
Tutorial Level: Advanced In this tutorial, you will train a PhysicsAI model without simulation results.
As inputs, PhysicsAI will use meshes (supplied using solver decks) and it can train to predict experimentally measured KPIs (supplied using .json files).
This tutorial uses 50 .fem files and corresponding .json files containing the KPIs. The KPIs can be experimentally derived and can be read from a .csv file. For additional details, refer to the Custom Outputs section. The original CAD models are also provided. These have been meshed to generate the .fem files.
Before you begin, copy the file(s) used in this tutorial to your
working directory.
Warning: In this tutorial, you will train the model. If possible,
it is recommended that you train the model using a GPU. Without a GPU, expect
the training portion of this tutorial to take a long time. Learn more about
training a model using a GPU here.
Create Project
- Open HyperMesh.
- From the menu bar, click to open the PhysicsAI ribbon.
-
From the
PhysicsAI ribbon, select the Create
Project tool.
Figure 1. 
The Create Project dialog opens. - For Project Name, enter Mesh_only.
-
For Location, click
Choose and select a save location for the
project.
Note: The save location for the project contains all files created by PhysicsAI, but the original files used for training do not need to reside in the project folder.
- Click OK.
Create a Dataset
-
From the
PhysicsAI ribbon, select the Create
Dataset tool.
Figure 2. 
The Create Dataset dialog opens. - For Dataset Name, enter Ibeam_mesh.
-
For File System, click
 and navigate to the
Mesh_only_data folder.
and navigate to the
Mesh_only_data folder.
- Change the filter from *.h3d to *.fem.
- Select and transfer all of the .fem files.
- Select the Enable train test split check box and enter 90 for the Train %.
-
Clear the Extract solid faces and Extract
Simulation Properties check boxes.
Figure 3. 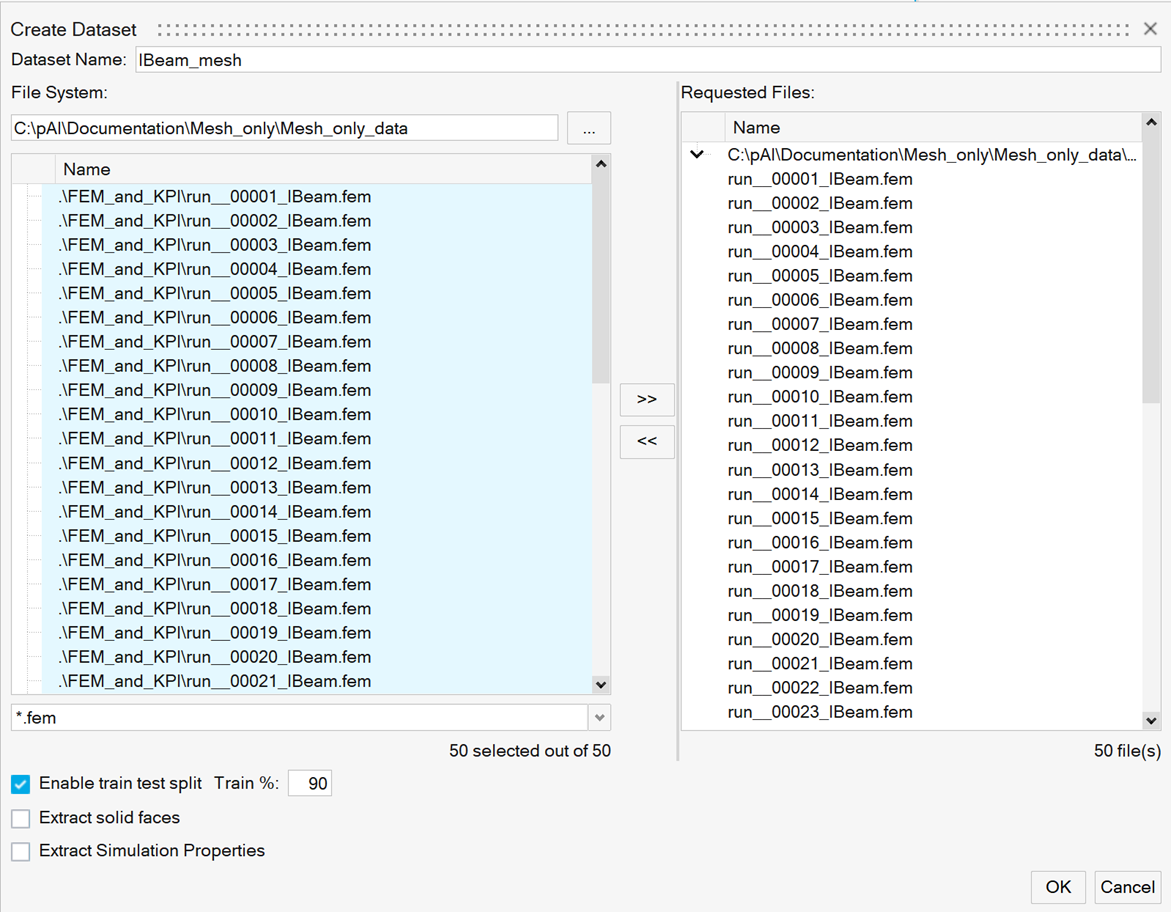
-
Click OK.
The dataset is extracted and the Datasets dialog opens.
- Click Close.
Train Model
-
From the
PhysicsAI ribbon, select the Train an
ML Model tool.
Figure 4. 
The Train Model dialog opens. -
Define the following details and
click Train.
- For Model Name, enter Max_displacement.
- For Inputs, select cae.coord.
- For Vector, select max_displacement
- Under Method, select TNS.
- Change the number of Epochs to 500.
Figure 5. 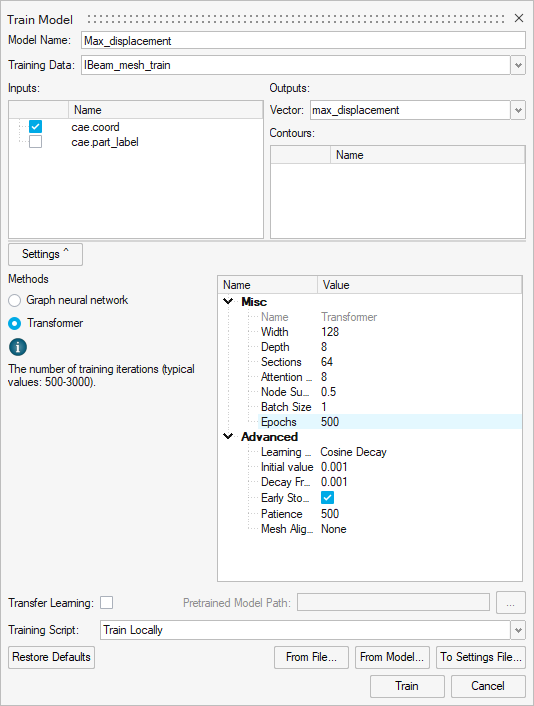
The Model Training dialog opens.Tip: Once the status changes to Running, you can click Show Log view the training logs. -
Once the training is complete, click Loss Curve to see
if the model has converged after 500 curves.
Figure 6. 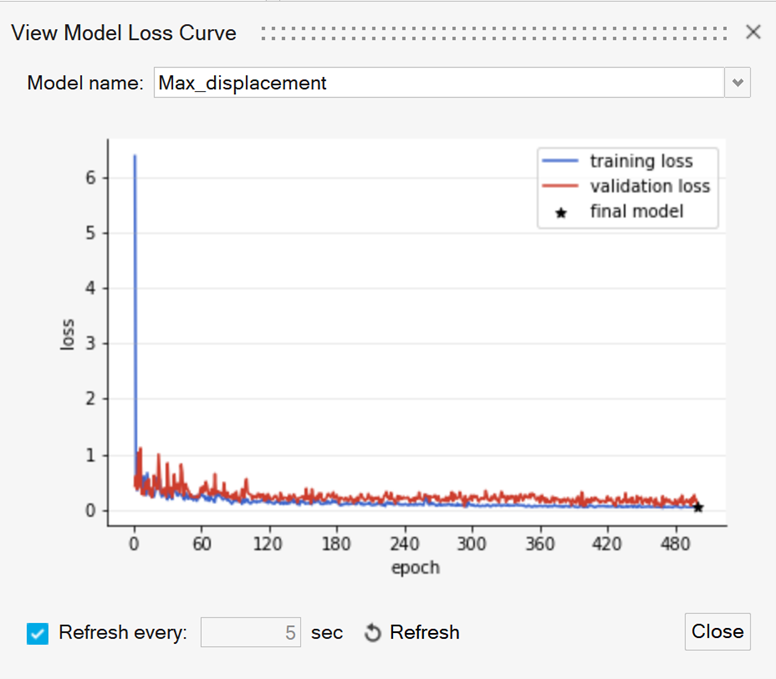
Test Model
-
From the
PhysicsAI ribbon, select the Test ML
Model tool.
Figure 7. 
The Test Model dialog opens. - In the Models area, select Max_displacement.
-
In the Datasets area, select IBeam_mesh_test and click
OK.
The Model Testing dialog opens.
-
In the Model
Testing dialog, select a Run ID and click Display
File to view the results in the modeling window.
The closer the points are to the 45-degree diagonal, the better the fit. This models shows a good fit.
Figure 8. 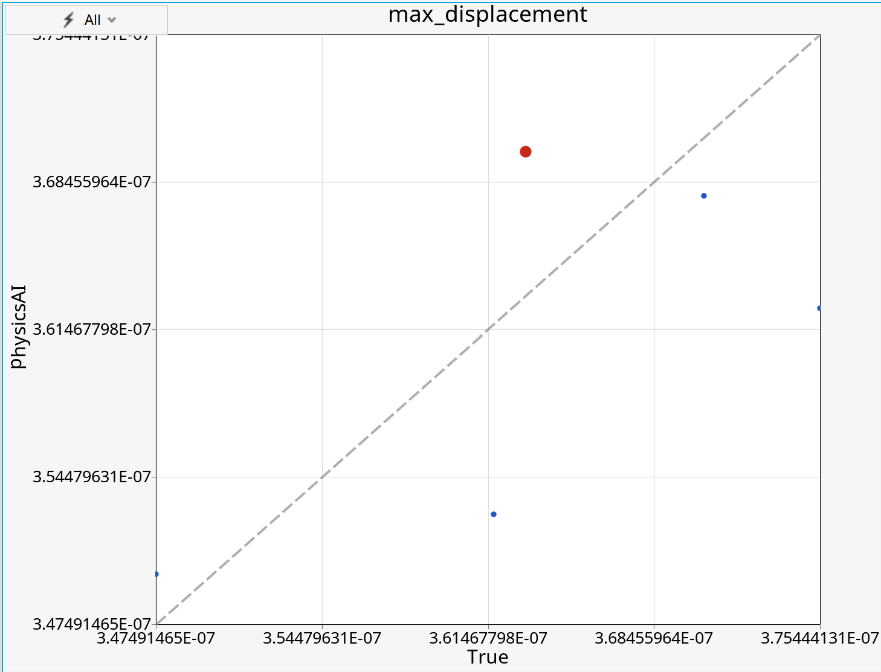
- Close the Model Testing dialog.