
Define the Blank Type and Material
Identify the blank type in your model as single or tailor-welded, and assign a material to the blank.
-
From the Tryout ribbon, click the Blank icon.
 Tip: To find and open a tool, press Ctrl+F. For more information, see Find and Search for Tools.
 -
On the guide bar, choose a blank type:
- Choose Single Blank if the blank consists of one part, material and thickness.
- Choose Tailor Welded Blank if the blank consists of multiple parts, materials and thicknesses.
Note: Tailor-welded is not supported for solids, only shells. A solid must be a single blank. - If you chose Single Blank, on the model, select the blank.
- If you chose Tailor Welded Blank, on the model, select all of the parts of the blank.
- Click to confirm the selection(s).
-
In the microdialog, enter a thickness and material for the blank.
-
To edit the material or select a different material, click the Material
Library button.
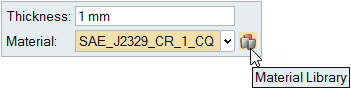
The defined blank turns gray as indicated in the legend. -
To edit the material or select a different material, click the Material
Library button.
Create User-Defined Materials
Create a material that is based on user-specified values.
-
From the Tryout ribbon, Define
Blank tools, click the Materials
icon.

- In the Materials dialog, select the My Materials tab.
-
Click the Create Material button:
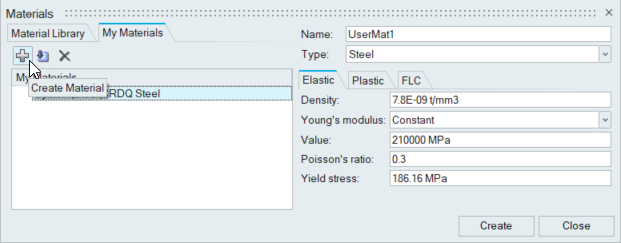
- In the Name field, enter a name for your material.
- In the Type field, select the material on which you would like to base your new material, or enter your own type.
- For each tab, Elastic, Plastic and FLC, enter the properties required for your material. If you have material properties defined in a spreadsheet, you can can copy and paste the values directly into the Materials dialog.
-
Click Create.
The new material is created and stored in My Materials.
Import Materials
Import materials in the My Materials tab.
-
From the Tryout ribbon, Setup tools, click the Materials tool.
- In the Materials dialog, click the My Materials tab.
-
Click the Import Materials
 icon.
icon.
- Browse to the downloaded material file and click Open.
- Right-click on the imported material and select Add to User Material Library from the context menu to save to the user library.
Create and Assign a Material Based on Test Data
Create a new material with test data from a .xlsx file.
-
In Microsoft Excel, open and review the file
<installation_directory>\InspireForm2026\tutorials\Material_Data.xlsx. The data
should look something like this:
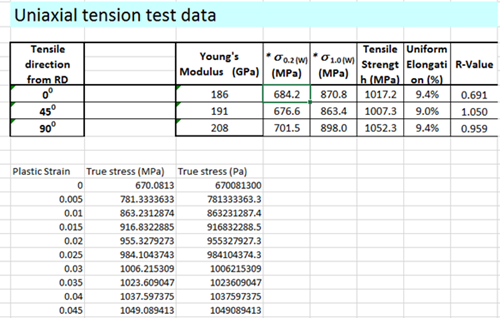
Note: You can copy data from an .xls file and paste it directly into the relevant property fields of the Materials dialog in Inspire Form. -
From Inspire Form, on the Tryout tab,
click the Materials icon.
- In the Materials dialog, select the My Materials tab.
-
Click the Create Material button:
- In the Name field, enter DP780.
- In the Type field, select Steel.
-
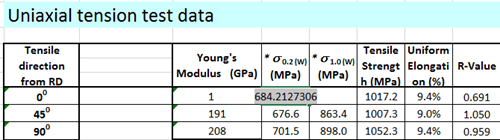
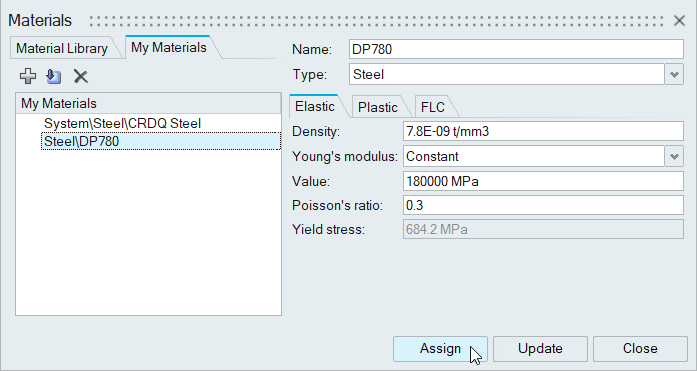
Select the Elastic tab.

-
For Yield stress, enter the value from the .xlsx
file: 684.2MPa
-
For Yield stress, enter the value from the .xlsx
file: 684.2MPa
-
Select the Plastic tab.

-
In the first cell of the True Strain column, right-click
and select Clear All.
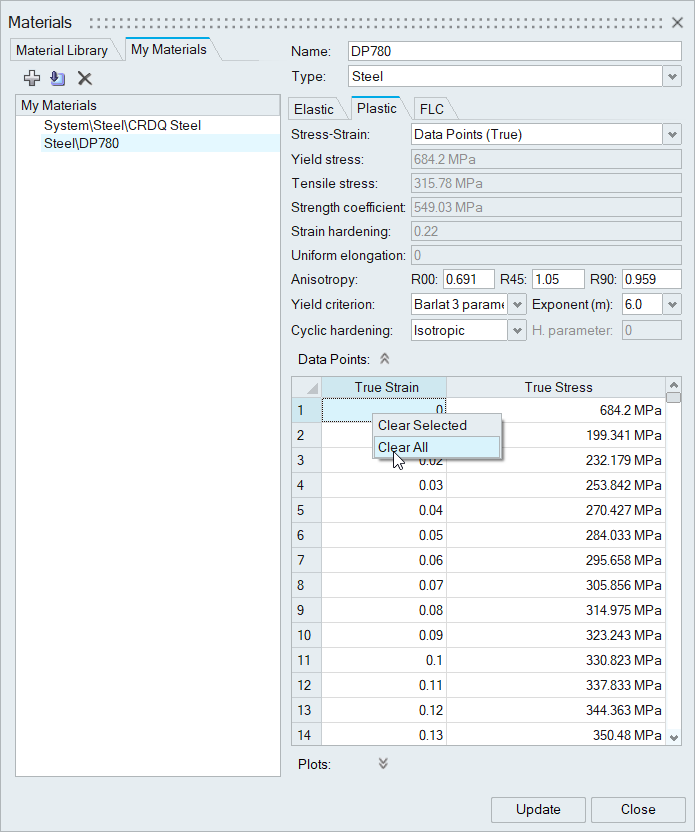
The existing data points are removed.
-
In the first cell of the True Strain column, right-click
and select Clear All.
-
Click the FLC tab.

-
Click Create.
Steel DP780 is added to My Materials.
- Click Close.
-
To assign the new material, right-click a part on the model and select
Material Library from the context menu.
The Materials dialog appears.
- Click the tab, My Materials.
- Select Steel DP780.
-
Click Assign.
- Click Close.
Keyboard Shortcuts & Mouse Controls
| To | Do this |
|---|---|
| Add/remove from selection | Ctrl+click |
| Reverse selection | Ctrl+R |