
Compensate Die for Springback
Adjust the die to counter the known springback in a formed shape.
- From the Run History, select a run that includes a springback analysis.
-
From the Tryout ribbon, select Compensate.

-
On the model, select a reference part, then click to confirm. If you do not
select a reference part, the die of the preceding forming operation is selected
by default. In the Analysis Results, view
Compensate Distance, which shows the magnitude of
deviation of the springback part from the reference part.
Note: Compensate Distance gives a preview of the amount of compensation that will be applied on the tools in the reverse direction during springback compensation.
- Optional:
On the model, select fixture points to calculate compensation.
- To select the fixture points manually, click the points you want to use
to create the reference, and then click Create Tracking
System
 on the guide bar.
You can click a single point or multiple points as needed.
on the guide bar.
You can click a single point or multiple points as needed.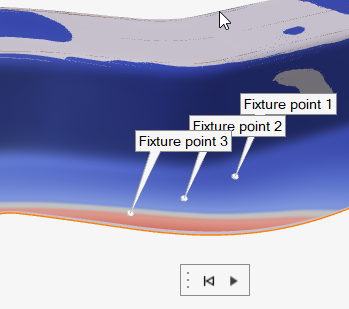
- To calculate compensation automatically using all the points in the
model, click Springback stages
 and then deselect the
Use Fixture Points checkbox.
and then deselect the
Use Fixture Points checkbox.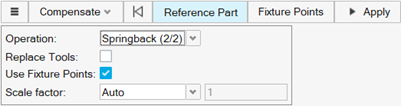
- To automatically scale the amount of compensation, select Auto from the Scale factor dropdown. To use a specific scaling value, choose Custom and enter a value.
- To select the fixture points manually, click the points you want to use
to create the reference, and then click Create Tracking
System
-
On the guide bar, click Apply
.
The software generates a mesh-based stl file of the compensated die and loads it into the current session. The existing tools are replaced with the compensated tools.
Tip: Die Compensation is generally an iterative process. For best results,
each time you apply the die compensation process, review the results of the
compensated die for negative draft.