
3D Sketching
Create a 3D sketch.
-
On the Sketching ribbon, select the New 3D
Sketch icon.
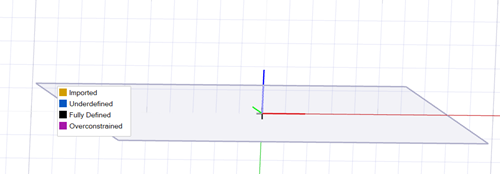
 The sketch plane selection appears.
 -
Set the sketch plane.
- In the guide bar, choose from Sliding, Centered, or Centered and Aligned.
- Choose the sketch plane directly in the modeling window by clicking the
red, blue, or green plane. You can also select the
Front, Right, or
Top icon in the guide bar.

-
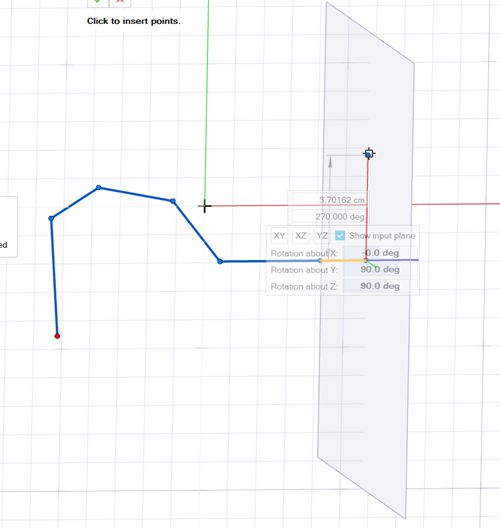
On the Sketching ribbon, select to sketch a polyline,
spline, or to add a dimension.
Note: Currently, you cannot sketch arcs with polylines for 3D sketching.Note: In order to add a dimension, you need to have existing geometry.
-
If you would like to sketch a polyline or spline:
- Select a type of polyline or spline to sketch.
An input plane appears to help visualize the current sketch plane while you place points.

- Click to insert points. Use the red, blue, and green line references to
snap to specific angles while sketching.
- To change sketch planes, select
 ,
,  , or
, or  in the microdialog.
The input plane appears in the direction of the selected sketch plane.
- Select a type of polyline or spline to sketch.
-
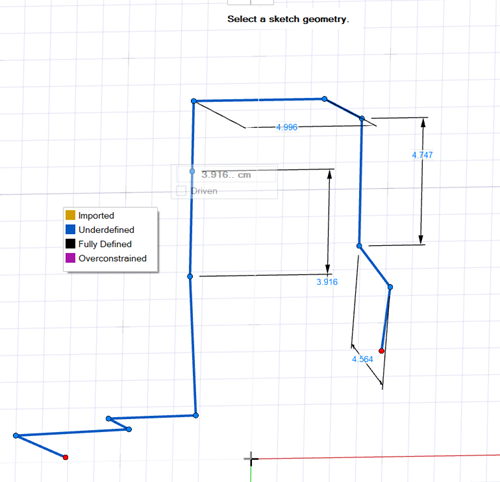
If you would like to sketch a dimension:
- On the Sketching ribbon, select Dimension.
- Select the geometry where you would like to add the dimension.
To Do this Change the axis of rotation In the microdialog, enter a value for Rotation about X, Rotation about Y, or Rotation about Z. Note: This option is only available for polylines and splines.Hide the input plane In the microdialog, turn off Show input plane. - Right-click and mouse through the check mark to exit, or double-right-click.