Squeak and Rattle
Identify squeak and rattle issues at various points along the contact surface of neighboring parts.
Terminology
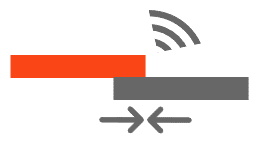
- Rattle
- Rattle is caused when there is a relative motion between components that
come in contact for a short duration of time, due to impact forces.
Rattle generally occurs when the components are loose or overly
flexible.
Figure 1. 
- Squeak
- Squeak is an undesirable sound that occurs when two surfaces interact
under stick-slip phenomenon, and friction induces is caused by a
relative motion between the surfaces. The frictional energy is stored in
the contact surfaces and is released when it exceeds the kinetic
friction, which in turn produces an audible squeak.
Figure 2. 
Setup
-
On the main window toolbar, click Squeak and Rattle
 .
.
- In the pop-up dialog, choose the transient subcase to link the Squeak and Rattle Workbench.
- Enter the failure criteria for Gap tolerance (Open close) and Gap tolerances (Stick slip).
-
Define a set of points at the contact surface of neighboring parts to identity
squeak and rattle.
-
In the Squeak and Rattle Workbench tab, click
 (Add/edit).
- Define the sampling points using one of the following approaches.
-
In the Squeak and Rattle Workbench tab, click
-
Click
 to run the
analysis.
-
When complete, the analysis provides the following results:
- Final status
- Squeak and rattle: The normal gap is below the open-close tolerance and the tangential distance is above the stick-slip tolerance.
- Rattle: The normal gap is below the open-close tolerance and the tangential distance is below the stick-slip tolerance.
- NA: The normal gap is above the open-close tolerance.
- Initial Gap: Lists the initial gap between the parts at various sampling points before applying the load.
- Minimal gap: Lists the closest normal distance between the parts at various sampling points along the total time span when the parts are loaded.
- Maximum tangential displacement: Lists the maximum displacement tangentially at various sampling points along the total time span when the parts are loaded.
- Final status
Examples
- Squeak and rattle if the normal gap is below the open-close tolerance and the tangential distance is above the stick-slip tolerance.
- Rattle if the normal gap is below the open-close tolerance and the tangential distance is below the stick-slip tolerance.
- NA if the normal gap is above the open-close tolerance.
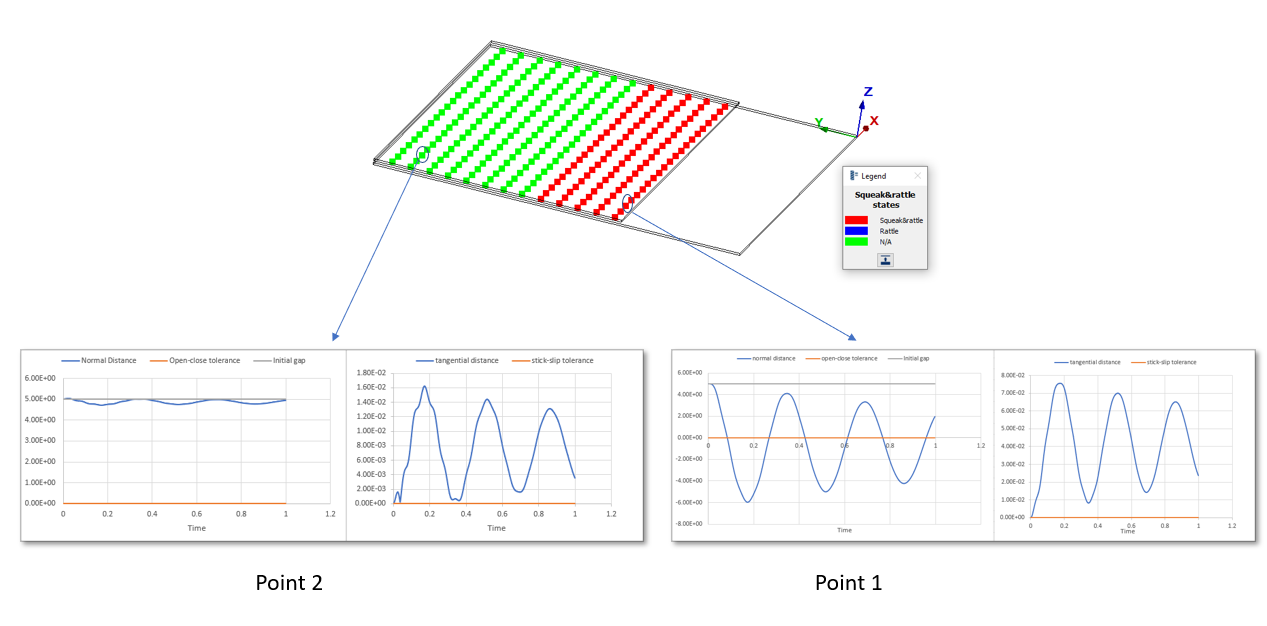
Example 1

Open-close tolerance = 0
Stick-slip tolerance = 0
Initial gap between the plates = 5mm
Point 1 has both squeak and rattle as the normal gap is below the open-close tolerance and tangential displacement is above the stick-slip tolerance.
Point 2 is green as it has a normal gap much higher than the open-close tolerance. The parts are always separated, so it neither rattles nor squeaks.
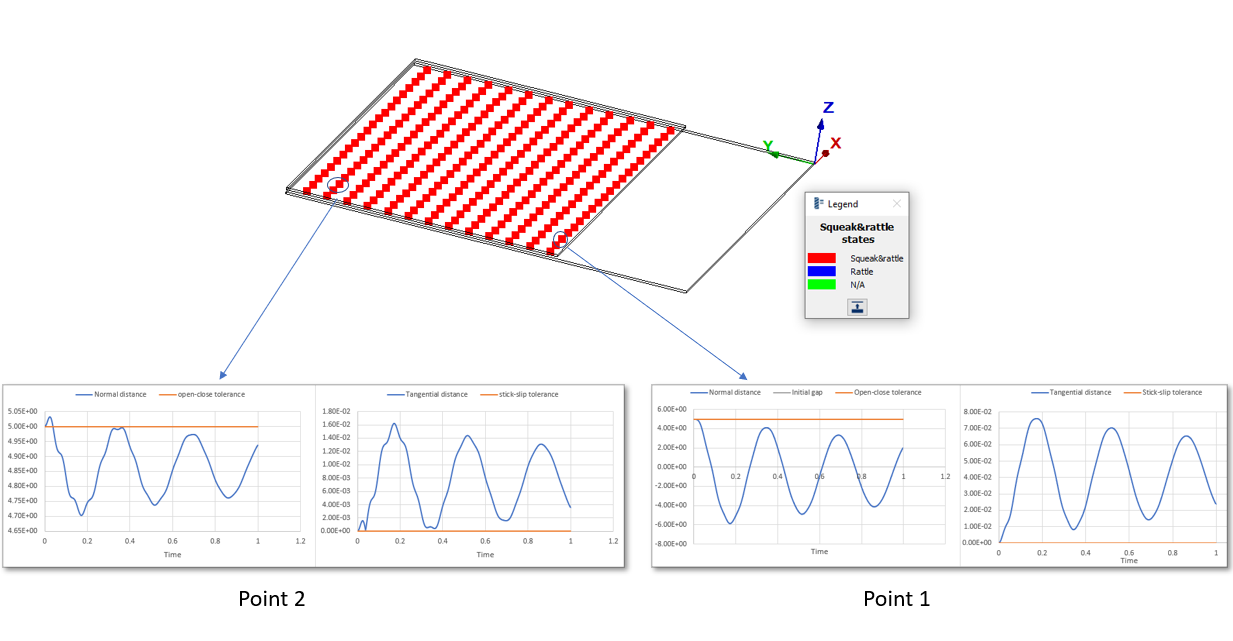
Example 2

Open-close tolerance = 5 mm
Stick-slip tolerance = 0
Initial gap between the plates = 5mm
Point 1 and Point 2 are identified to squeak and rattle as the normal gap is below the open-close tolerance and tangential displacement is above the stick-slip tolerance.
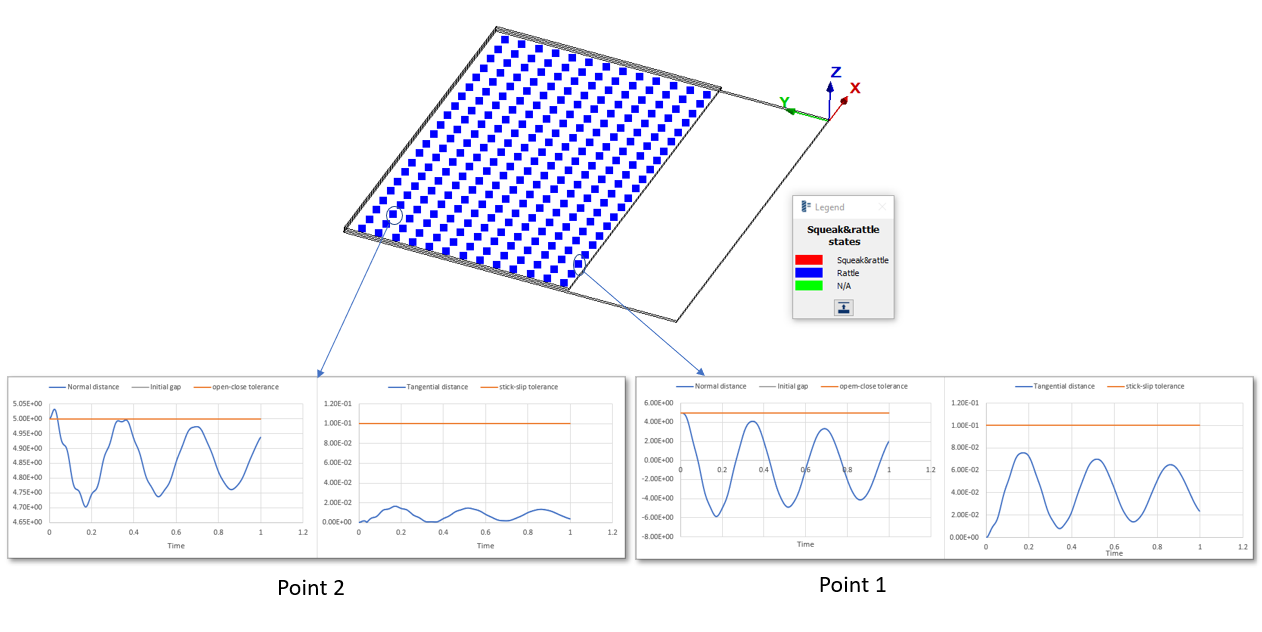
Example 3

Open-close tolerance = 5
Stick-slip tolerance = 0.1
Initial gap between the plates = 5mm
Point 1 and Point 2 are identified to rattle only as the normal gap is below the open-close tolerance and tangential displacement is below the stick-slip tolerance.
Hence no squeak and the points' final state is set to Rattle only.