
Move Bodies
Use the Move Bodies tool to translate, rotate, scale, or align PolyNURBS bodies.
The Move Bodies tool allows you translate PolyNURBS bodies in one, two, or three dimensions, scale them, or rotate them about an axis or a center point. This tool can be repositioned along an axis, within a plane, about its center point, or in 3D space to change the center of rotation, or to align one of the tool’s axes with a point. You can also snap PolyNURBS bodies to snap points.
Move Bodies tool works for PolyNURBS bodies in much the same way the Move tool works for Geometry features, with the following exceptions:
- Move Bodies does not create a Construction Feature in the construction history.
- You can select and move multiple PolyNURBS bodies that are part of the same PolyNURBS part, but you may not select more than one PolyNURBS part at a time.
- When you exit the Move Bodies tool, you will still be in PolyNURBS edit mode.
Translate Bodies
Translate PolyNURBS bodies along an axis, along a plane, or in 3D space.
-
On the PolyNURBS ribbon, select the Move Bodies
tool.

Tip: To find and open a tool, press Ctrl+F. For more information, see Find and Search for Tools. - Select one or more PolyNURBS bodies on the same part.
-
Choose from the following options:
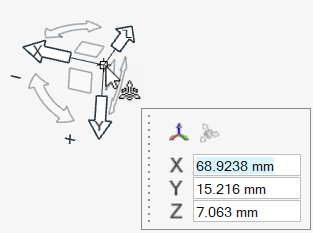
- Drag the objects.Tip: Grab and release bodies by their snap points (end points, midpoints, center points, etc.) to align them precisely. You can temporarily disable snapping by holding down the Alt key.
- For more precision, click a graphic manipulator, and then drag the
graphic manipulator or type a distance in the microdialog.
To Do this Translate along an axis Click the X, Y, or Z arrow. 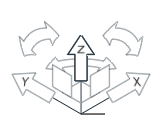
Translate along a plane Click the XY, XZ, or YZ plane. 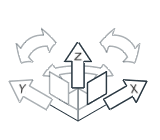
Translate in 3D space Click the origin. 
- Drag the objects.
- Right-click and mouse through the check mark to exit, or double-right-click.
Rotate Bodies
Rotate objects around the x-, y-, or z-axis.
-
On the PolyNURBS ribbon, select the Move Bodies
tool.
Tip: To find and open a tool, press Ctrl+F. For more information, see Find and Search for Tools. - Select one or more PolyNURBS bodies on the same part.
-
Choose from the following options:
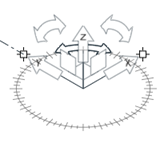
- Drag a curved arrow.
- Click a curved arrow, and then enter an angle in the microdialog.
- Click a curved arrow, and then drag the object.
Tip: Grab and release bodies by their snap points (end points, midpoints, center points, etc.) to align them precisely. You can temporarily disable snapping by holding down the Alt key. - Right-click and mouse through the check mark to exit, or double-right-click.
Scale Bodies
Scale objects using any axis or rotation handle in the Move Bodies tool.
-
On the PolyNURBS ribbon, select the Move Bodies
tool.
Tip: To find and open a tool, press Ctrl+F. For more information, see Find and Search for Tools. - Select one or more PolyNURBS bodies on the same part.
- Press S to display scaling handles on the Move Bodies tool.
-
Choose from the following options:

- Drag a scaling handle.
- Click a scaling handle, and then enter a scale factor.
- Click a scaling handle on a curved arrow, and then enter a scale factor
for each axis:

Tip: Press S again to hide scaling handles. - Right-click and mouse through the check mark to exit, or double-right-click.