
Splines
Sketch and edit a spline.
Sketch a Spline
Sketch two types of splines: (1) a smooth curve that passes through the fit points or (2) a smooth curve that passes near, but not through, the control points.
-
On the Sketch ribbon, select one of the
Spline tools.
Figure 1. 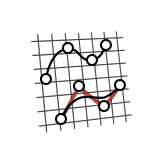
- Select a face or plane as the sketch plane.
- Optional:
In the guide bar, select a curve degree. This controls the placement of the
points to determine the shape of the curve.
Figure 2. 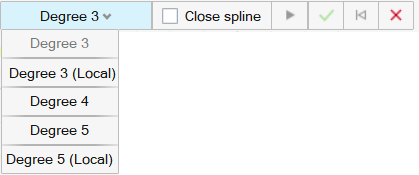
- Degree 3: Create a degree 3 curve. Modifying a point on the curve can affect the entire curve.
- Degree 3 (Local): Create a degree 3 curve with local interpolation. Modifying a point on the curve affects only the sections of the curve adjacent to that point.
- Degree 5: Create a degree 5 curve. In general, select this option to produce a smoother curve. Modifying a point on the curve can affect the entire curve.
- Degree 5 (Local): Create a degree 5 curve with local interpolation. In general, select this option to produce a smoother curve. Modifying a point on the curve affects only the sections of the curve adjacent to that point.
- Optional:
In the guide bar, select a Close spline to close the
spline when it is created. In the following example, the top spline was created
with Close spline unselected, and the bottom spline was
created with Close spline selected.
Figure 3. 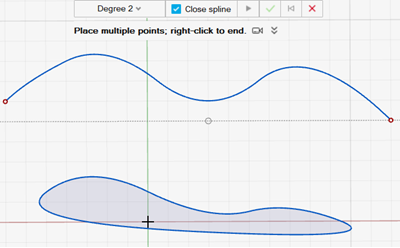
-
To sketch a spline:
To sketch this Do this Spline Through Points Figure 4. 
Click to place each fit point of the spline. To change the magnitude of a spline, click the point and enter a Magnitude value in the microdialog.
Spline Using Control Points Figure 5. 
Click to place each control point of the spline. - Right-click and mouse through the check mark to exit, or double-right-click.
Edit a Spline
Reposition, resize, or apply a sketch constraint.
- Double-click the spline to enter edit mode.
- Right-click the sketch and verify Show Points is selected so you can see the spline points.
-
Edit the spline:
To Do this Define the degree In the guide bar, select from: - Degree 2
- Degree 3
- Degree 3 (Local)
- Degree 4
- Degree 5
- Degree 5 (Local)
Note: Higher degree settings result in smoother curves.Tip: The Local settings create curves with local interpolation: modifying a point on the curve affects only the sections of the curve adjacent to that point. When editing a global curve, modifying a point on the curve can affect the entire curve.Close the spline on creation In the guide bar, turn on Close spline. Add a point Select the spline, then hover over the curve between two points until you see a reference point with a + icon. Click on the reference point to add an additional point. Reposition a point - Drag the point, or
- Select the point, then enter coordinates to specify the position.
Change the tangency Drag the diamond control to adjust the tangent curve: Figure 6. 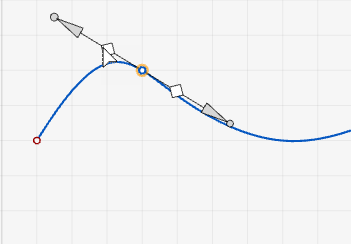
Note: Available only for splines created with the Spline Through Points tool.
Change the magnitude Drag from the arrowhead at either end of the tangent line: Figure 7. 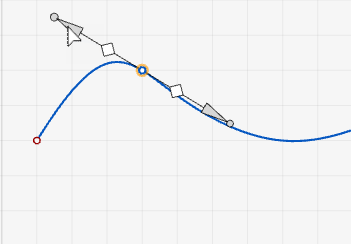
Note: Available only for splines created with the Spline Through Points tool.
Change the tangency and magnitude simultaneously Drag the point at either end of the tangent line: Figure 8. 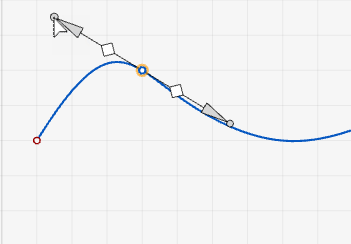
Note: Available only for splines created with the Spline Through Points tool.
Select a chain of segments Select a sketch segment, then double-click it to select the entire chain of segments. Cut, copy, or paste the sketch curve Right-click a sketch curve, then select Cut, Copy, or Paste on the context menu. Apply a sketch constraint Right-click a sketch curve, then select a sketch constraint on the context menu. Convert a sketch curve into construction geometry Right-click a sketch curve, then select Construction. Construction geometry is used as a reference to line up or define other geometry.
Hide dimensions Deselect Show dimensions in the Preferences. - Right-click and mouse through the check mark to exit, or double-right-click.