
Pattern
Create a linear or circular pattern of sketch entities.
Circular Pattern
Pattern sketch entities around a point.
-
On the Sketching ribbon, in the
Pattern tool group, select the Circular
Pattern tool.

Tip: To find and open a tool, press Ctrl+F. For more information, see Find and Search for Tools.The guide panel appears.
-
In the modeling window, select one or more Entities to
Pattern.
Note:
- To automatically select all connected sketch entities, turn on Chain Selection.
- To deselect a feature, hold down Ctrl while clicking.
- To clear all selected features, in the microdialog click Clear Selection.
- Select a point or vertex as the Center of the circular pattern.
-
Select a pattern method:
- Number of copies: Select this option to specify the Angle between each copy and the Number of Copies.
- Equal spacing: Select this option to equally space the copies within a specified Angle.
-
Adjust the pattern:
To Do this - Change the angle between each copy (Number of copies method)
- Specify the angle within which the copies are equally spaced (Equal spacing method)
In the guide panel, enter an Angle. Change the number of copies In the guide panel, enter the number of Copies. Pattern symmetrically about the selected center Turn on Symmetry. - Optional:
Select the copies to skip:
- Next to Copies to Skip, click the Select button.
- Select the copies to exclude from the pattern.
- Click Apply.
-
Re-adjust the pattern:
To Do this Change the spacing between each copy Click the dimension arrow, and then enter the Spacing. 
Change the number of copies Click on the sketch constraint glyph, and then enter the number of Copies. 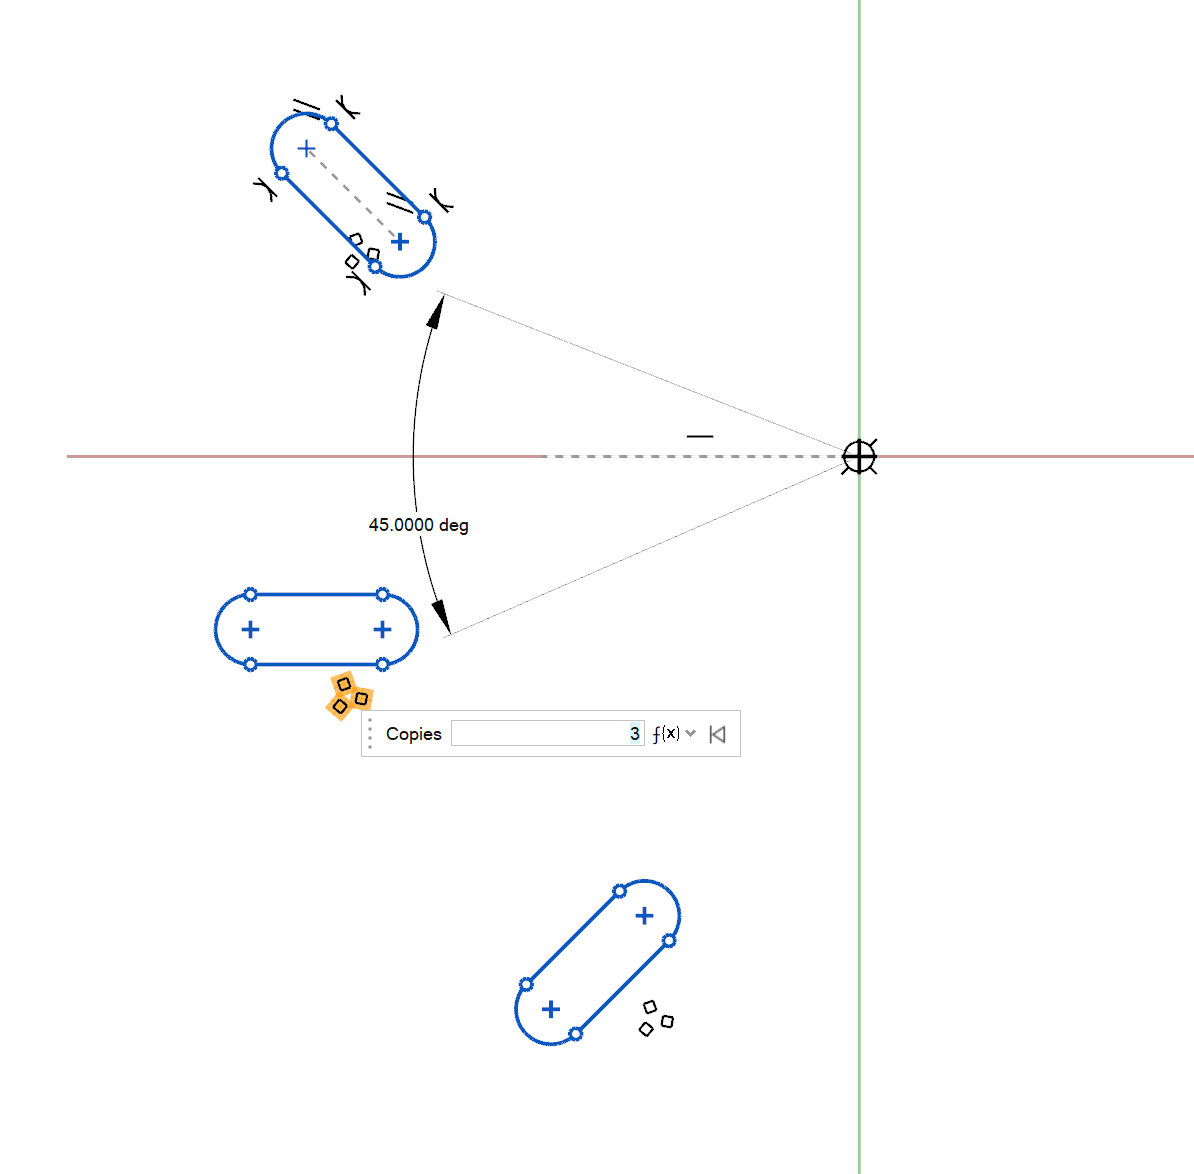
- Right-click and mouse through the check mark to exit, or double-right-click.
Linear Pattern
Pattern sketch entities in a linear direction.
-
On the Sketching ribbon, in the
Pattern tool group, select the Linear
Pattern tool.

Tip: To find and open a tool, press Ctrl+F. For more information, see Find and Search for Tools.The guide panel appears.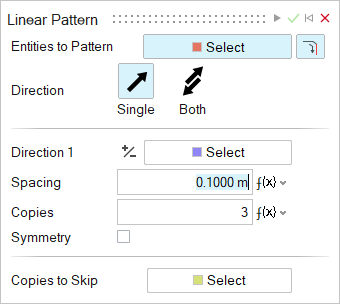
-
In the modeling window, select one or more Entities to
Pattern.
Note:
- To automatically select all connected sketch entities, turn on Chain Selection.
- To deselect a feature, hold down Ctrl while clicking.
- To clear all selected features, in the microdialog click Clear Selection.
-
Choose a Direction:
- Single (default): Create the pattern in one direction.
- Both: Create the pattern in both directions.
-
Define Direction 1 or Direction 2
of the pattern:
- In the guide panel, next to Direction 1 or Direction 2, click the Select button.
- In the modeling window, select a reference or reference edge
to which
the pattern will be parallel.Tip: You can select the red and green sketch axes to specify direction.
- (Optional): To reverse the direction, click
 in the microdialog.
-
Adjust the pattern along Direction 1 or
Direction 2:
To Do this Change the distance between two copies In the guide panel, select Type: Spacing and enter the distance between copies in the Spacing box. Tip: Enter the spacing in the Dir 1 or Dir 2 box in the microdialog.Change the number of copies In the guide panel, enter the number of Copies. Pattern symmetrically along direction 1 or 2 In the guide panel, for Direction 1 or 2, turn on Symmetry. - Optional:
Select the copies to skip:
- Next to Copies to Skip, click the Select button.
- Select the copies to exclude from the pattern.
- Click Apply.
-
Readjust the pattern:
To Do this Change the spacing between each copy Click the dimension arrow, and then enter the Spacing. 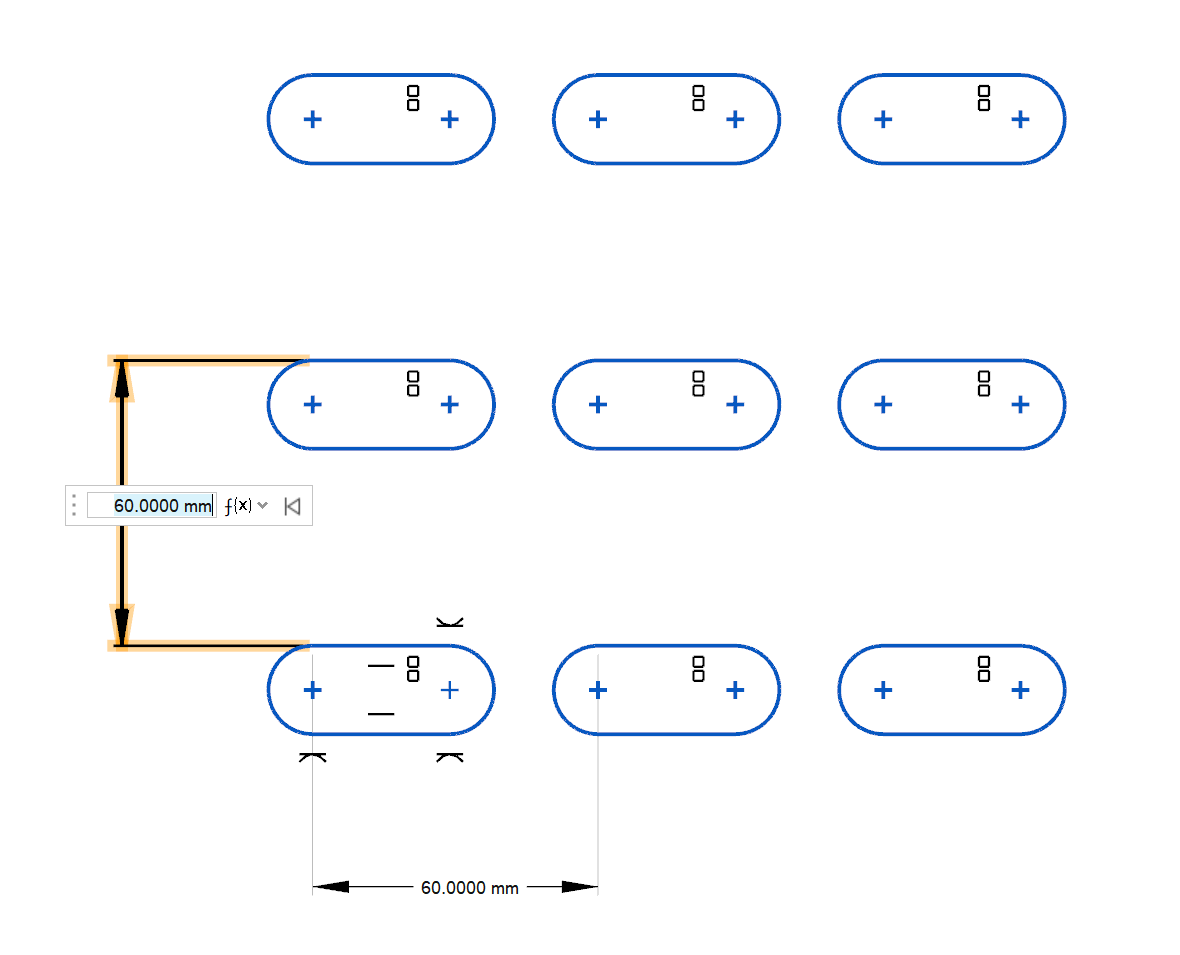
Change the number of copies Click on the sketch constraint glyph, and then enter the number of Copies. 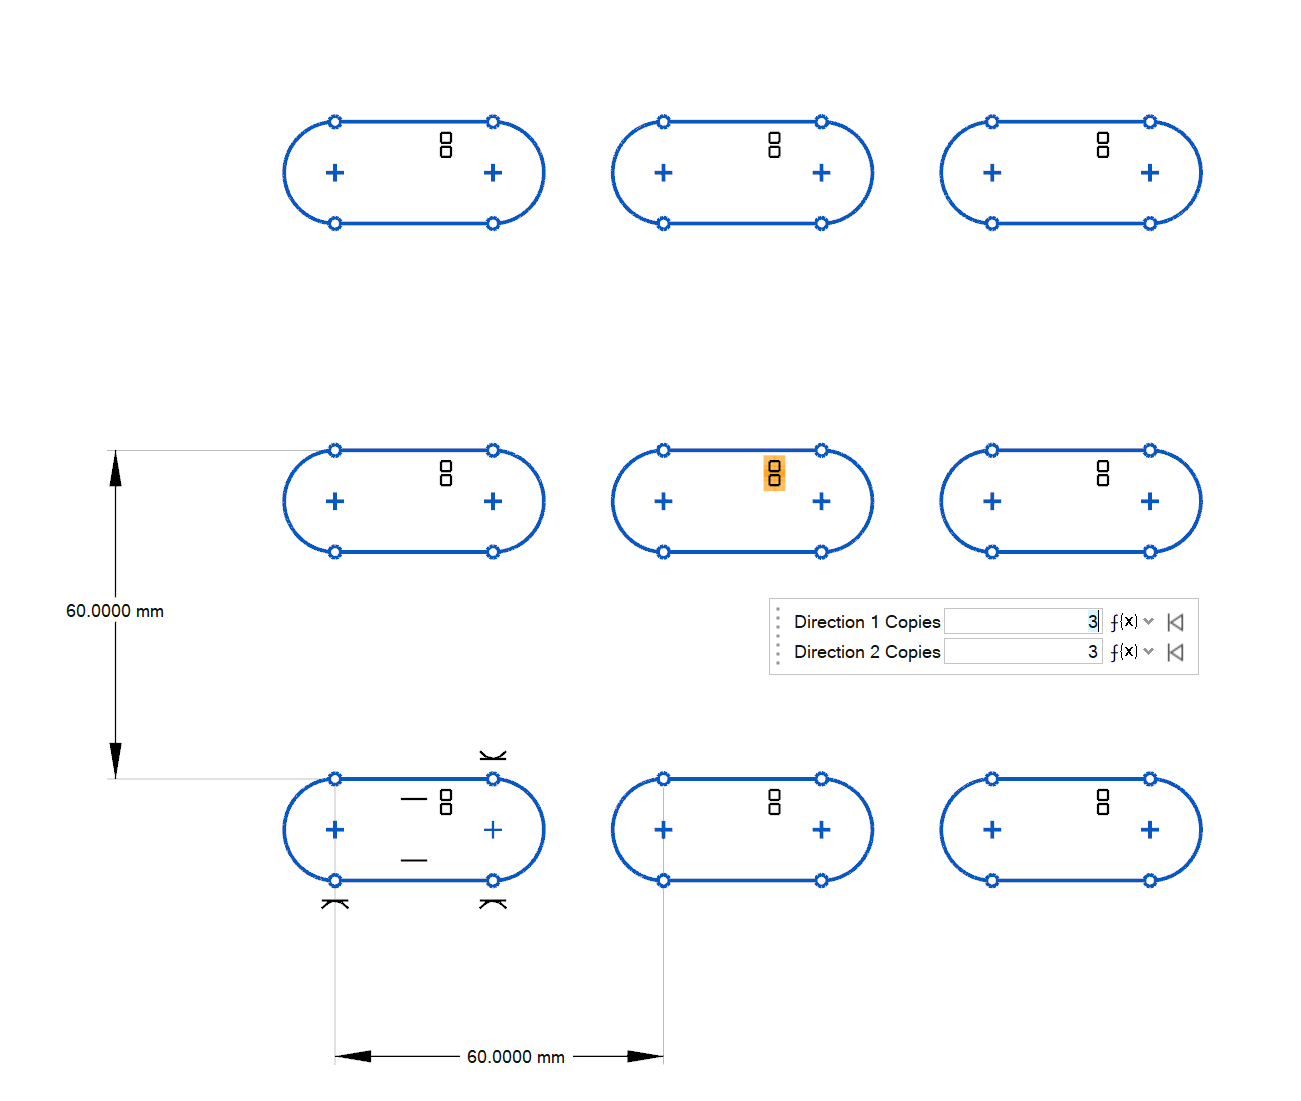
- Right-click and mouse through the check mark to exit, or double-right-click.