FMU format files
Compatibility
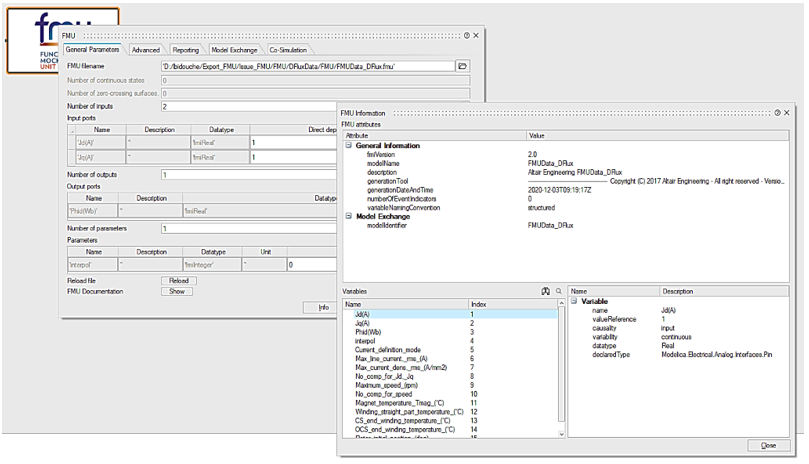
Two packages of FMU format files are automatically provided, one dedicated to Activate® and another one compatible with other system simulation tools.
Hence, the users will be able to select the required system simulation tool without any problem of compatibility. One of the main differences between the two files is how the units are managed in the name labels (See below illustrations).
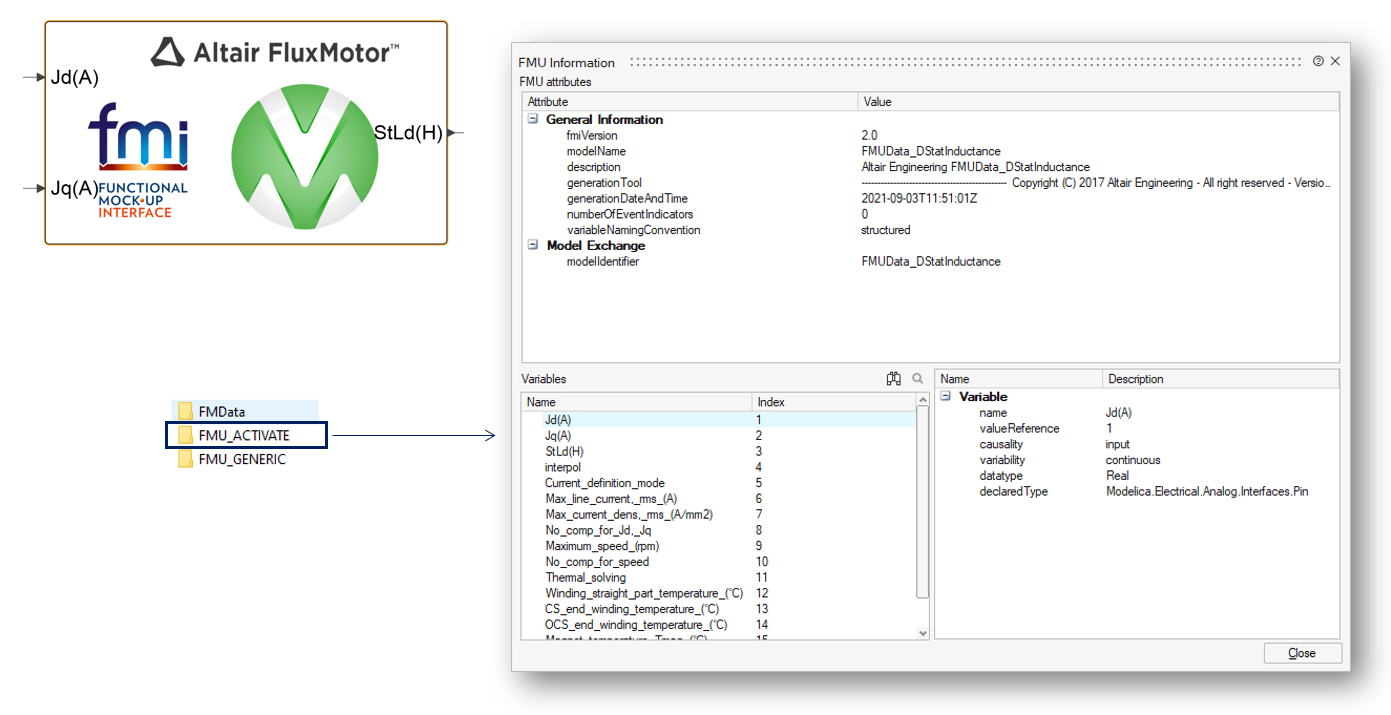 |
| Exported FMU format files dedicated to Activate® |
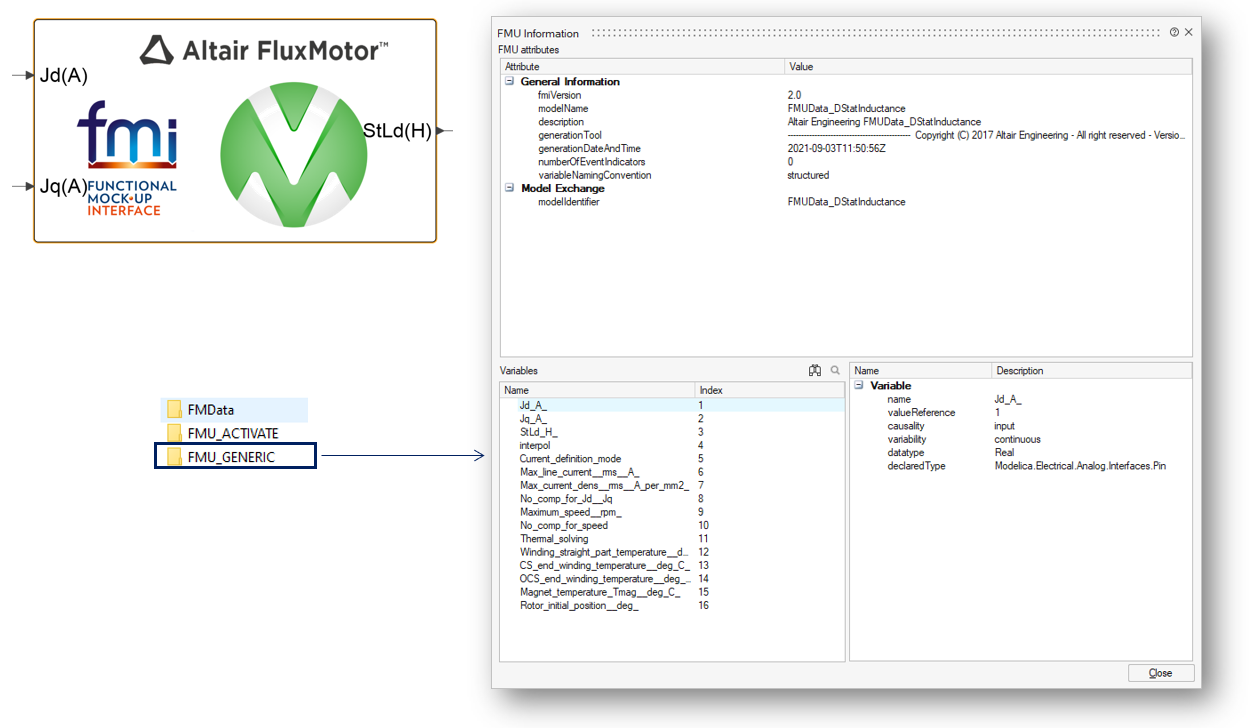 |
| Exported FMU format files (Generic) compatible with other system simulation tools |
A C/C++ compiler is needed
C/C++ compiler / System requirements
FluxMotor requires a C/C++ compiler to perform some operation for creating FMU blocks.
Here is the list of the Visual Studio compilers supported:
Microsoft® Visual Studio 2019, Community, Professional, Enterprise
Microsoft® Visual Studio 2017, Community, Professional, Enterprise
Microsoft® Visual Studio 2019/2017/2015: Build Tools
the option for Windows 10 SDK must be selected
Microsoft® Visual Studio C++ 2015 (VC 14.0 Express, Community and Professional)
Access path of the C/C++ Compiler
Once the C/C++ Compiler is installed on the computer, its access path must be specified in the user’s preferences.
Note: When opening FluxMotor®, if a C/C++ Compiler is already installed on the computer, the corresponding install path is automatically written in the user’s preferences.
 |
|
| FluxMotor / Supervisor / User’s preferences / Location of the C/C++ Compiler | |
| 1 | The Preferences dialog box is opened from the FluxMotor® supervisor. |
| 2 | Second tab is Path Preferences. |
| 3 | Define the location of the C/C++ Compiler on the computer |
Here is below a list of files to select in the installation directory (path) according to the Visual Studio version that you installed:
| Visual Studio 2019, Community | C:\Program Files (x86)\Microsoft Visual Studio\2019\Community\VC\Auxiliary\Build\vcvarsall.bat |
| Visual Studio 2019, Professional | C:\Program Files (x86)\Microsoft Visual Studio\2019\Professional\VC\Auxiliary\Build\vcvarsall.bat |
| Visual Studio 2019,Enterprise | C:\Program Files (x86)\Microsoft Visual Studio\2019\Enterprise\VC\Auxiliary\Build\vcvarsall.bat |
| Visual Studio 2017, Community | C:\Program Files (x86)\Microsoft Visual Studio\2017\Community\VC\Auxiliary\Build\vcvarsall.bat |
| Visual Studio 2017, Professional | C:\Program Files (x86)\Microsoft Visual Studio\2017\Professional\VC\Auxiliary\Build\vcvarsall.bat |
| Visual Studio 2017, Enterprise | C:\Program Files (x86)\Microsoft Visual Studio\2017\Enterprise\VC\Auxiliary\Build\vcvarsall.bat |
| Microsoft® Visual Studio C++ 2015 Express | C:\Program Files (x86)\Microsoft Visual Studio\14.0\VC\Build\vcvarsall.bat |
| Microsoft® Visual Studio C++ 2015 Community | C:\Program Files (x86)\Microsoft Visual Studio\14.0\VC\Build\vcvarsall.bat |
| Microsoft® Visual Studio C++ 2015 Professional | C:\Program Files (x86)\Microsoft Visual Studio\14.0\VC\Build\vcvarsall.bat |
| Microsoft® Visual Studio 2019, Build Tools | C:\Program Files (x86)\Microsoft Visual Studio\2019\BuildTools\VC\Auxiliary\Build\vcvarsall.bat |
| Microsoft® Visual Studio 2017, Build Tools | C:\Program Files (x86)\Microsoft Visual Studio\2017\BuildTools\VC\Auxiliary\Build\vcvarsall.bat |
Import FMU data in Altair® Activate® - Overview
Once FMU files are generated by FluxMotor®, these can be imported in environments like Activate®.
This section explains how FMU files generated from FluxMotor are used in Activate®.
The FMU file of the D-axis flux is taken as an example.
First, Activate is opened.
Either start creating a new project via a new modeling window or open an existing scm file.
To use FMU files from FluxMotor®, locate the FMU block in the palettes of the System library.
SelectView> Palette Browser
- SelectView> Palette Browser
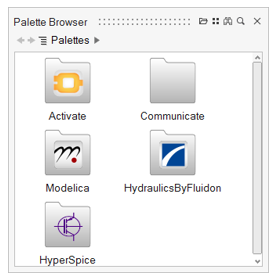
The Palette Browser displays the installed library palettes.
- Double-click Activate >CoSimulation.
The Palette Browser displays the blocks available in the CoSimulation palette.
- Select theFMUblock, then drag and drop it into the modeling window.
One can also write down “FMU” in the quick search field.
- Double-clickon the FMU dragged in the modeling window, or right-click, and from the
context menu, select Parameters.
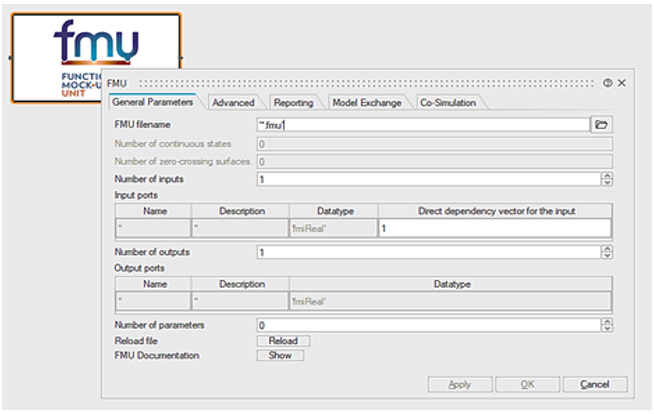
Then:
- In General parameters > FMU filename, indicates the path to the D-axis flux FMU (the directory in which the FMU file is located).
- All the information regarding the D-axis flux FMU appears along with a new content under the name parameters appears.
In this area, you can set the boundaries of the quadrant by choosing a value from 0 to 3.
These boundaries reflect the FMU response when the user is outside the quadrant in which the calculations were made.
The meaning of each value is listed in the table that follows:
| Value | Meaning |
| 0 | NAN |
| 1 | Zero |
| 2 | Hold |
| 3 | Linear extrapolation |
All the information related to the resolution of the test map can be seen by clicking on the info tab.
 |
The FMU generated will have its inputs and output. The D-axis flux FMU in Activate will look like this:
 |
Along with FMU files, an .oml file, that contains important constant values of the test map is generated. These values can be loaded and used in the Activate model by executing the oml file.
This .oml file could be read in Activate diagram home by indicating its path, and using the function execution as follow:
run('D:\UserFolder\Export_FMU\FMU_AD\oml\constants.oml')