Use the markup tools to share an annotated image of a model file.
You can mention specific shared user name in your comments. A notification is sent
to the specific user to take the required action. All your conversations are recorded
with the date and time that includes comments that were added, received, edited, deleted
and restored.
When you share the file to a user, all your conversations and
annotations are also shared to the user.
The preview of a section cut and
scene can be used for markup and attach as an image along with your
comments.
Click to view the file contents in 3D.
Prepare a view of the model using the 3D menu options.
Tip: Click to view the contents of the file in full screen
mode.
Click to add a new comment.
Click to add a new markup.
The markup options are displayed. Figure 1. Markup Options
Icon
Description
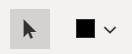
Click to change the cursor color. You may
select different color for each of your annotation while
marking up the model.
Note: By
default, it is set to black.
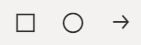
Click to select the shape, drag to draw the
shape to mark a part of a model. Drag the handles to change
the height and width of the shape.
Click to draw freehand lines. This helps in
marking the specific details on a model. You can also change
the width of the freehand lines by using the list box next
to the freehand option.
Click on the canvas to enter the text
referring to the model or specific to your annotation. Drag
the handles to change the height and width of the text box.
You can also change the size of the text by changing the
font size.
Click to save the annotations added for the
model as an image and it can be shared along with your
comments.
Click to clear all the annotations.
Note: If you wish to remove a particular
markup while marking the model, select the markup and
press delete in your keyboard.
Click to discard all your annotations and
close the markup window at once.
Figure 2. Model with Annotations
Enter your comment in the Type a new message field.
Figure 3. Add your comment
Click to add your comment.
Your comment is added along with the model annotations as an image. Figure 4. Comments with Markup
Click the image, a pop-window displays the contents of the image in an
expanded view.
Note: Hover over the comment box and click to edit, delete and restore your
comments.
 to view the file contents in 3D.
Prepare a view of the model using the 3D menu options.Tip: Click
to view the file contents in 3D.
Prepare a view of the model using the 3D menu options.Tip: Click to view the contents of the file in full screen
mode.
to view the contents of the file in full screen
mode. to add a new comment.
 to add a new markup.
The markup options are displayed.
to add a new markup.
The markup options are displayed.


 to add your comment.
Your comment is added along with the model annotations as an image.
to add your comment.
Your comment is added along with the model annotations as an image.
 to edit, delete and restore your
comments.
to edit, delete and restore your
comments.