SimSolid performs meshless structural
analysis that works on full featured parts and assemblies, is tolerant of
geometric imperfections, and runs in seconds to minutes. In this tutorial,
you will do the following:
Set general parts to bolt.
Model Description
The following model file is needed for this tutorial:
SetPartsToBolts.ssp
Figure 1.
This file has the following specifications:
Material is set to Steel for all parts.
Open Project
Start a new SimSolid session.
On the main window toolbar, click Open Project.
In the Open project file dialog, choose
SetPartsToBolts.ssp
Click OK.
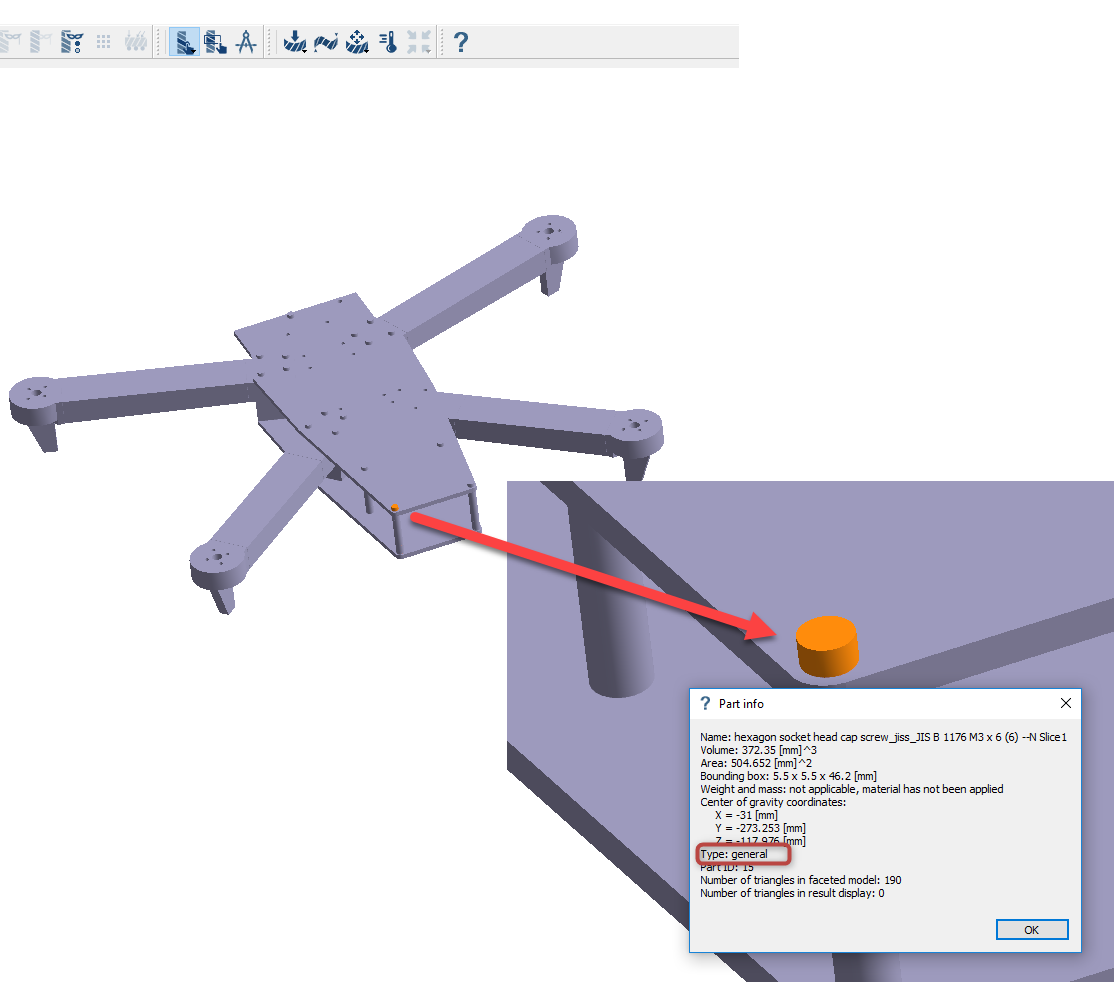
Review Model
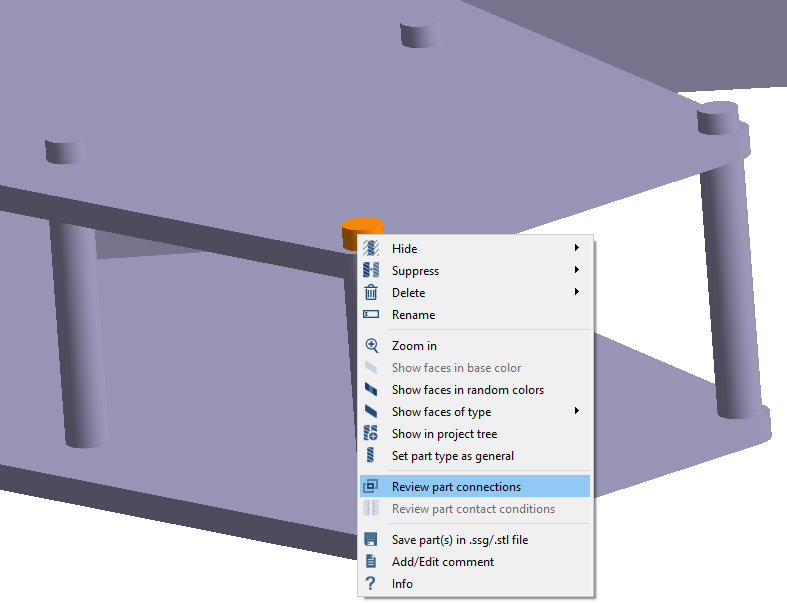
In the modeling window, right-click the part highlighted in orange in Figure 2, then select
Info from the context menu.
Figure 2.
Notice that this bolt-like part, and several others in the model, are currently
classified as General type.
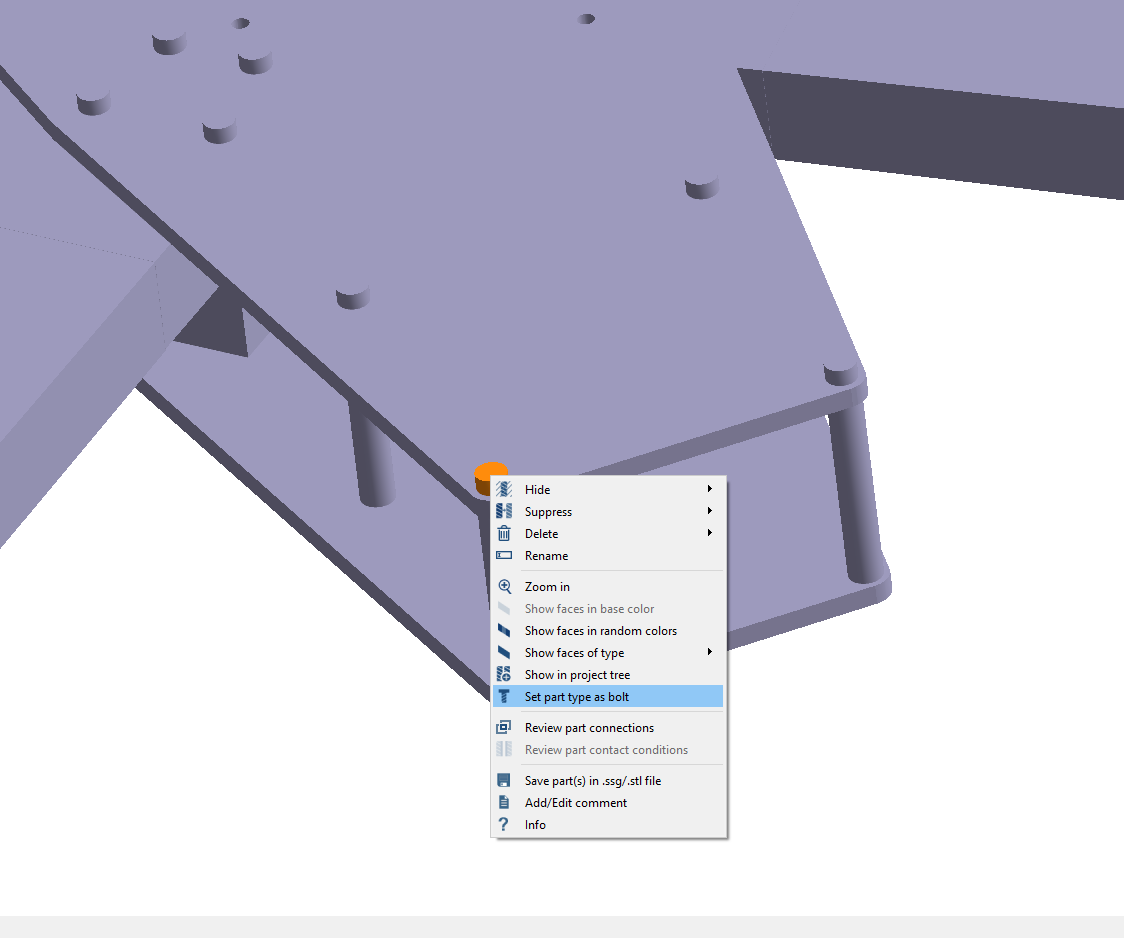
Set Part as Bolt
Select one of the bolt-like parts in the modeling window.
Right-click on the part and select Set part type as bolt
from the context menu.
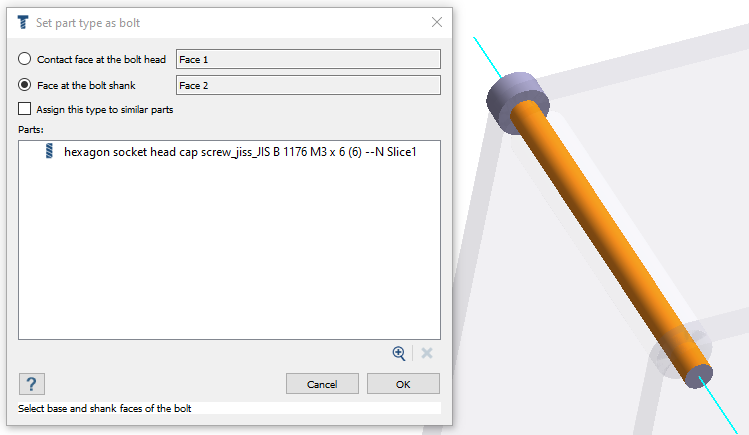
Figure 3. A dialog will opens and shows details for the selected part. The part is
isolated in the modeling window.Figure 4.
In the dialog, for Bolt head, select the highlighted face in Figure 5.
Figure 5.
For Face at bolt shank, select the highlighted face in Figure 6.
Figure 6.
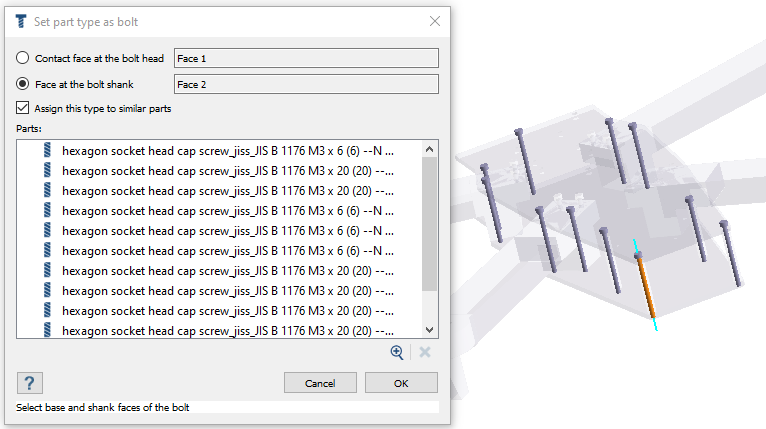
Click Assign type to similar parts.
SimSolid identifies all parts similar to the
selected part and lists them in the dialogue. The parts are also isolated in the
graphics area.Figure 7.
Click OK to assign the type
to bolt for all listed parts.
Review Connections and Contact Conditions
Connections are automatically created for all the parts that are set as bolts, with
their neighboring parts.
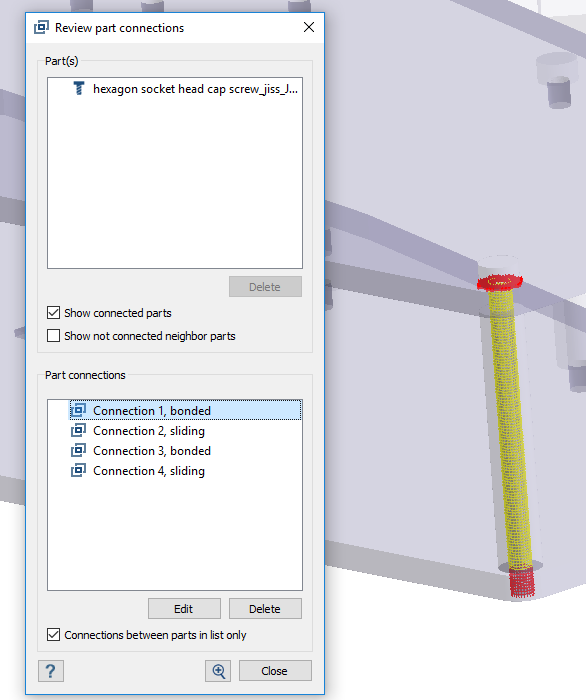
Right-click on a part with type set to Bolt, and select Review part
connections from the context menu.
Figure 8.
Connections are created at bolt head and shank. As desired, bonded
contact is assigned at bolt head and nut location and sliding contact at the
shank.
 .
.