SS-T: 1010 Material Database
Tutorial Level: Beginner Use Material Databases in SimSolid.
- Purpose
- SimSolid performs meshless
structural analysis that works on full featured parts and assemblies, is
tolerant of geometric imperfections, and runs in seconds to minutes. In this
tutorial, you will do the following:
- Learn how to edit the SimSolid Database.
- Add material using CSV import.
- Add material using the context menu.
- Add non-linear material using stress strain curve defined by n-k values.
- Add an orthotropic material.
- Add fatigue properties to an existing material.
- Open the Material Database.
- Create a new SimSolid Material Database.
- Learn how to edit the SimSolid Database.
- Model Description
- The following files are needed for this tutorial:
- ImportCSV.csv
- Stress_strain_curve.csv
- NewSimSolidMaterialDB.ssm
Import Material from CSV
-
In the main menu, click .
Figure 1. 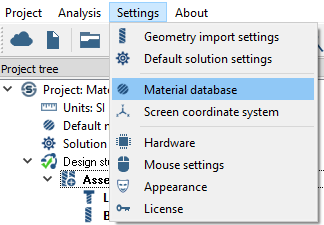
- Ensure View materials from option is set to Material database.
- Click Import CSV.
- In the Material import units pop-up window, click OK to accept default units (Pa, kg/m3…).
-
In the File explorer, browse to <install_directory>\SimSolid202X.X\Examples\Material
Database and choose ImportCSV.csv and click
Open.
Figure 2. 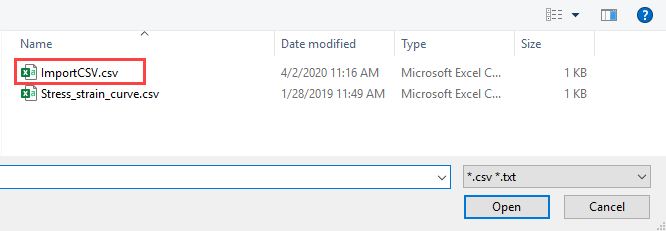
Figure 3. 
The new materials appear under the group names specified in the file (Generic Materials and Import Test).Figure 4. 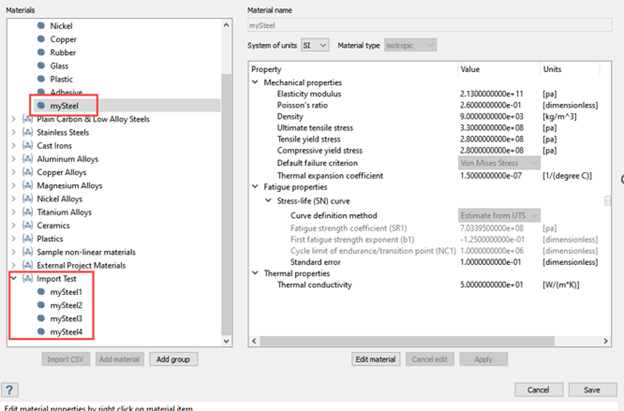
Add Material from Context Menu
-
In the main menu, click .
Figure 5.
- Ensure View materials from option is set to Material database.
-
Right-click on Generic Materials and choose
Add material in the context menu.
Figure 6. 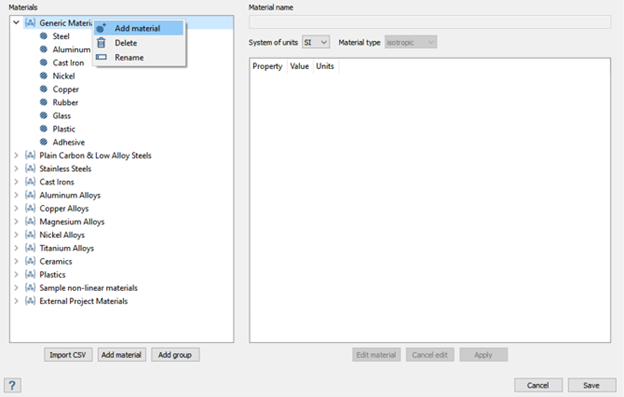
-
Enter the material name and values as shown in Figure 7.
Figure 7. 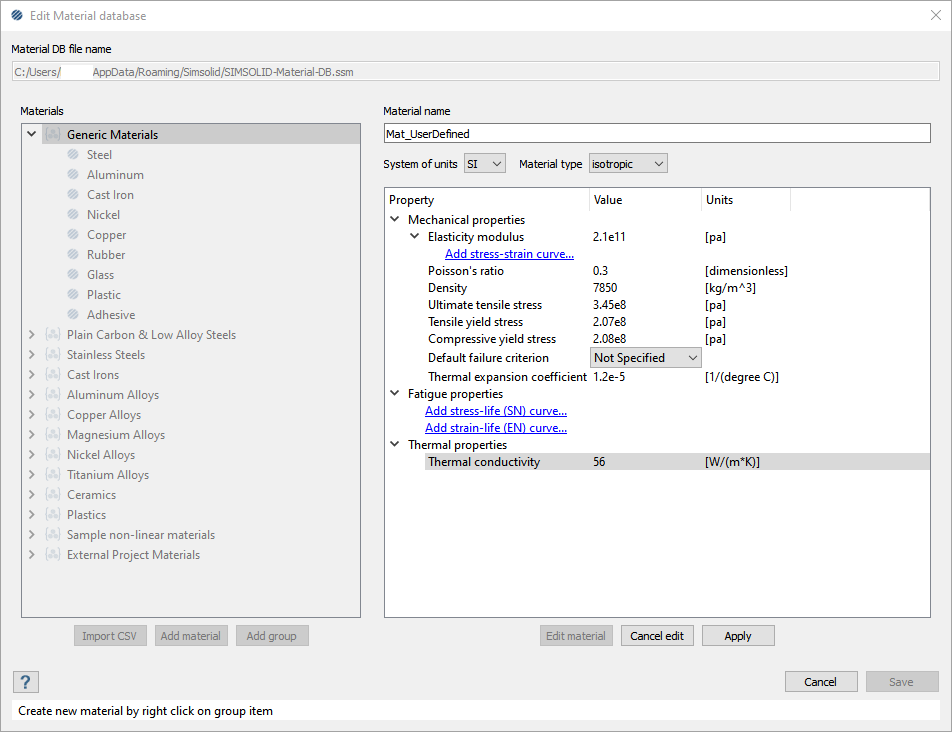
- Click Apply.
- Click Save.
Add Non-linear Material with Stress Strain Curve - Import from CSV
-
In the main menu, click .
Figure 8.
- Ensure View materials from option is set to Material database.
-
Right-click on Sample non-linear materials and choose
Add material in the context menu.
Figure 9. 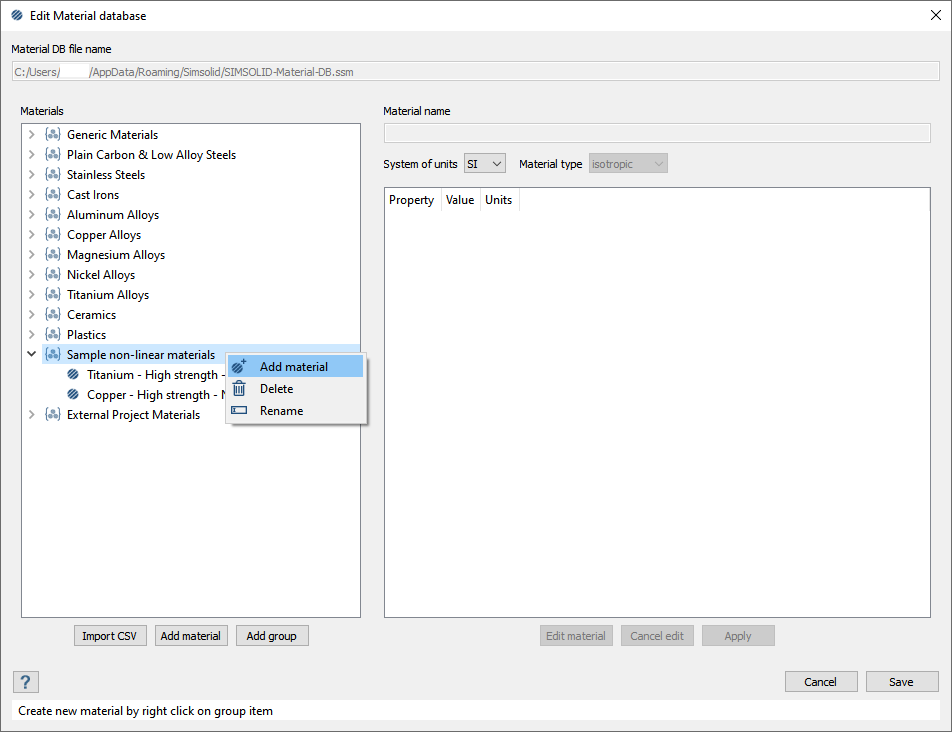
- Click Add stress-strain curve.
- Click Edit.
- In the Stress-strain curve dialog, click Import CSV.
- In the Stress-strain curve dialog, click OK to accept default units (Pa).
- In the File explorer, browse to Stress_strain_curve.csv and click Open.
-
Click OK.
Figure 10. 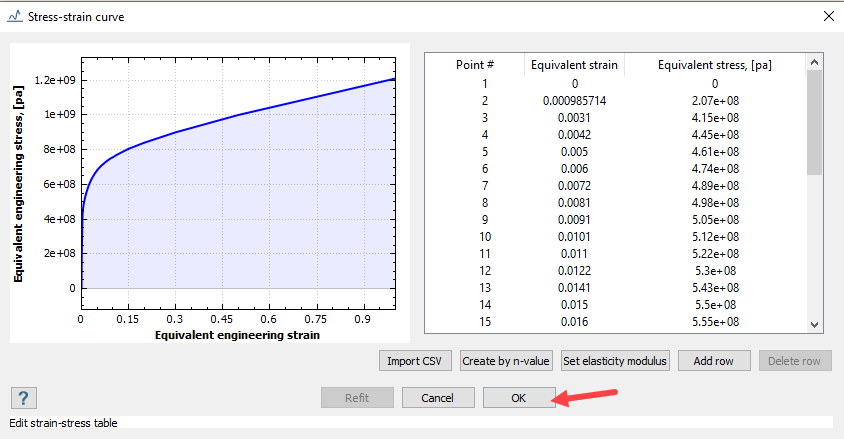
The Elasticity Modulus is calculated from the Stress-strain curve.
Figure 11. 
- For Material name, enter Steel NL. Enter other values for the material as seen in Figure 11.
- Click Apply.
- Click OK.
Add Non-linear Material with Stress Strain Curve - Create by n-values
-
In the main menu, click .
Figure 12.
- Ensure View materials from option is set to Material database.
-
Right-click on Sample non-linear materials and choose
Add material in the context menu.
Figure 13.
- Click Add stress-strain curve.
- Click Edit.
-
In the Stress-strain curve dialog, click Create
by n-values.
Figure 14. 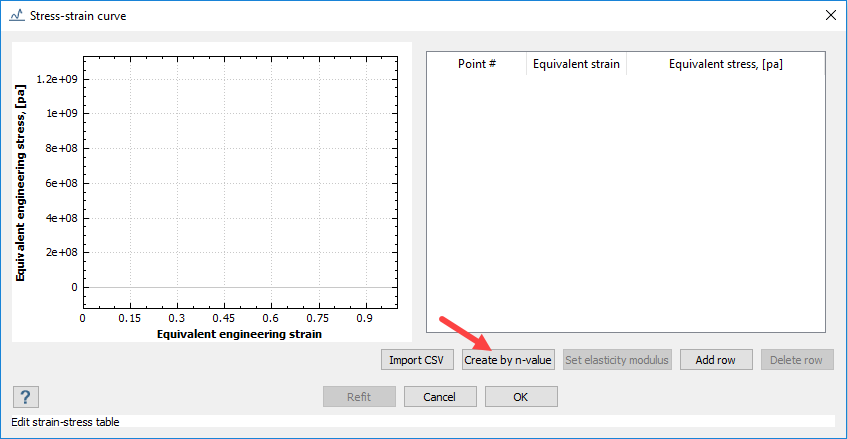
-
In the Stress-strain curve parameters dialog, select
Low-carbon steel from the drop-down menu. Then click
OK.
Figure 15. 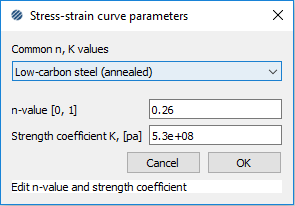
-
In the Stress-strain curve dialog, click
OK.
Figure 16. 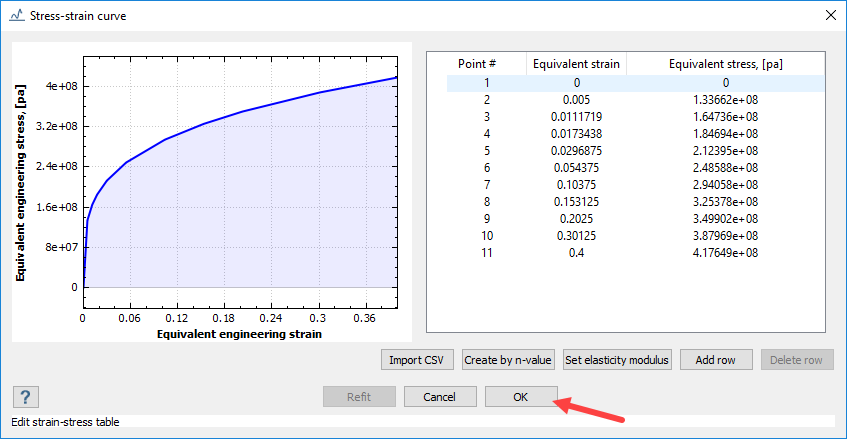
The Elasticity Modulus and yield stresses are calculated from the Stress-strain curve.Figure 17. 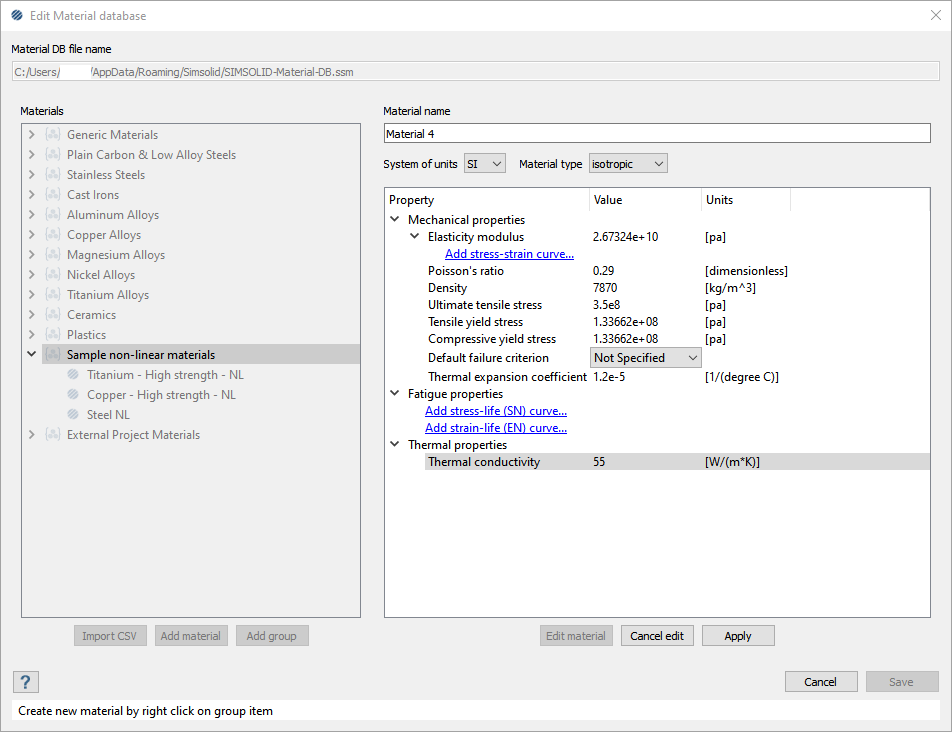
- Enter the other values for the material as shown in Figure 17.
- Click Apply.
- Click Save.
Create Orthotropic Material
-
In the main menu, click .
Figure 18.
- Ensure View materials from option is set to Material database.
-
Create a new group.
-
Click Add group.
Figure 19. 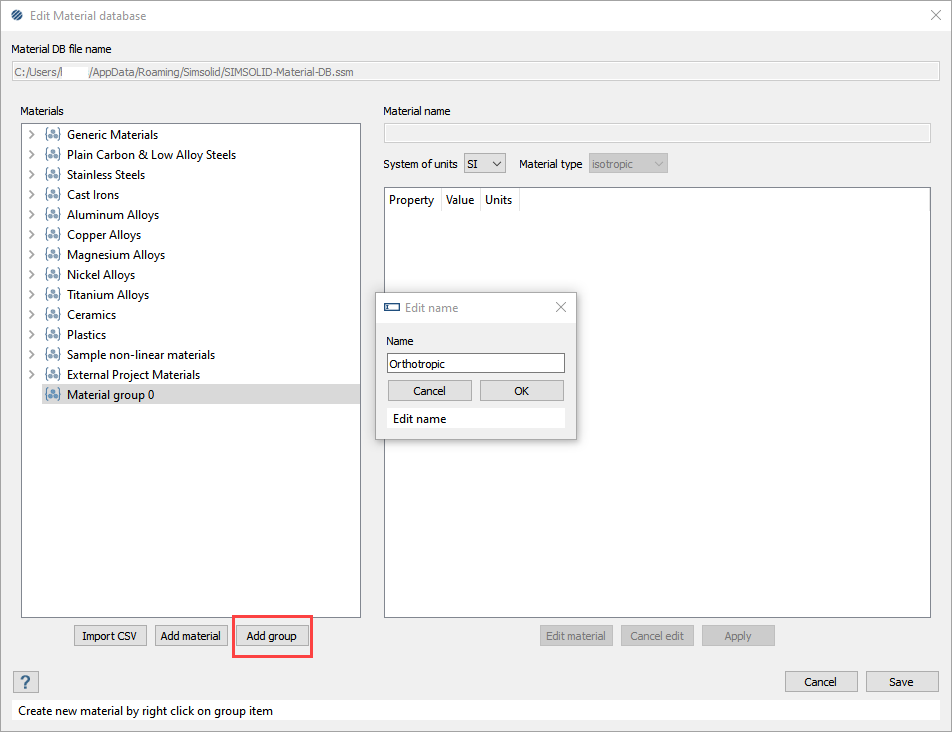
-
Click Add group.
- Right-click on the new group and select Add material.
- For Material name, enter Western_Pine_Test.
- For Material type, select orthotropic from the drop-down menu.
-
Enter material values as shown in Figure 20.
Figure 20. 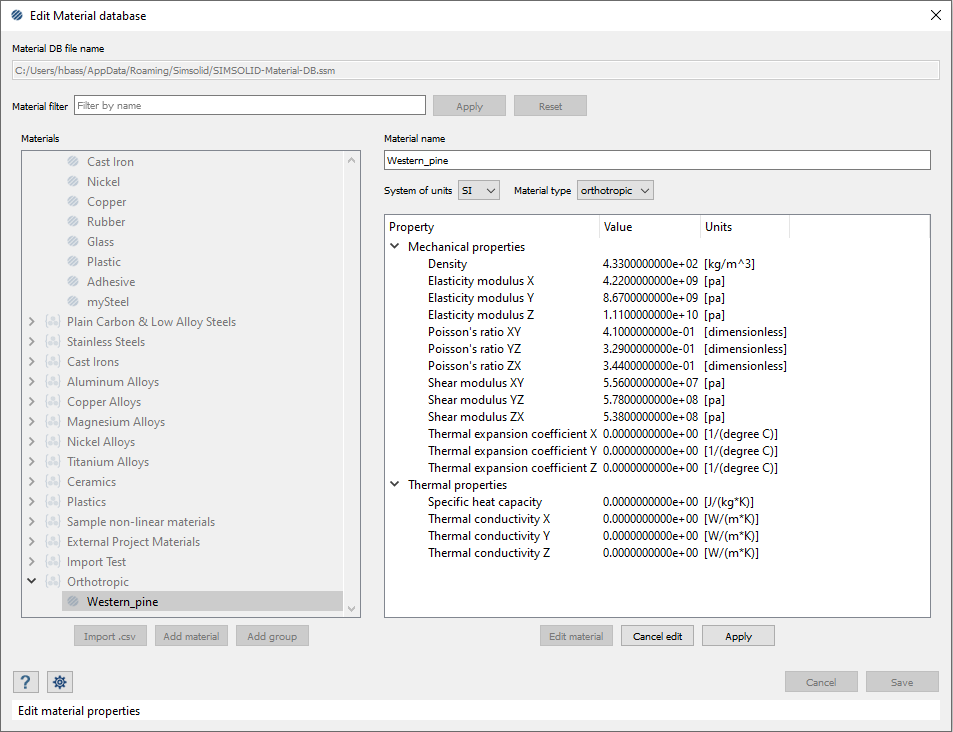
Note: Orthotropic materials can only be defined in the global coordinate system. Right-click parts in the assembly that are assigned orthotropic materials and select Set orthotropic material geometry to re-align the material properties to local coordinates.
Add Fatigue Curves
-
In the main menu, click .
Figure 21.
- Ensure View materials from option is set to Material database.
- In the Generic Materials group, right-click Steel and select Copy from the context menu.
-
Edit the copied material.
- Select Steel_Copy.
- Click Edit material.
-
Add fatigue curves.
-
In the editing field of the dialog, expand the Fatigue
properties branch and click Add stress-life
(SN) curve....
Figure 22. 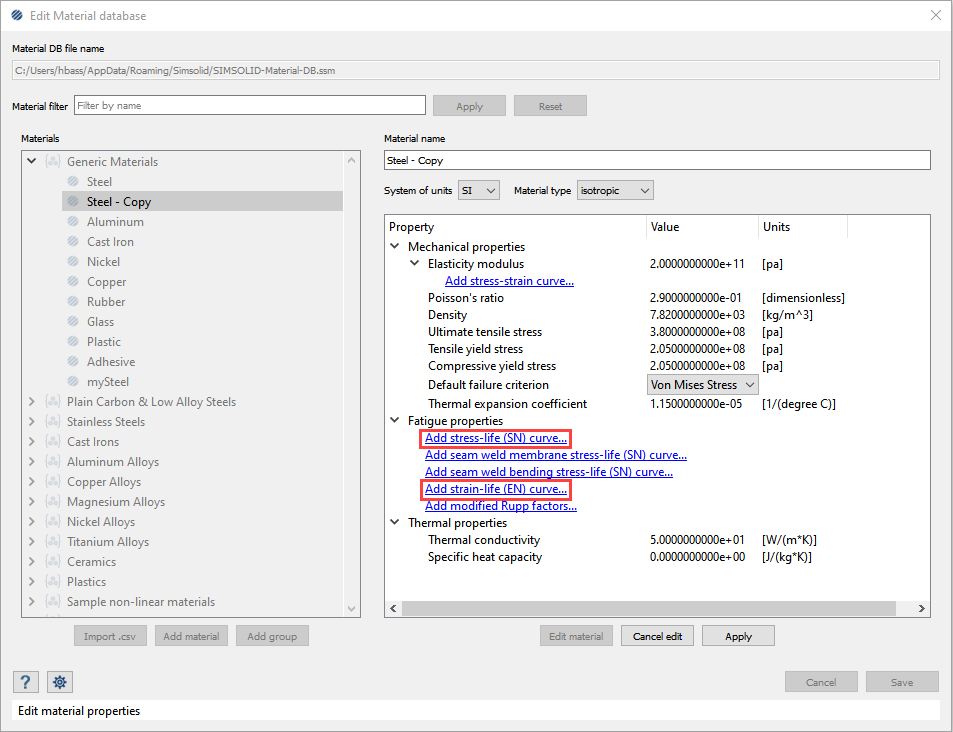
-
Enter the material values as shown in Figure 23.
Figure 23. 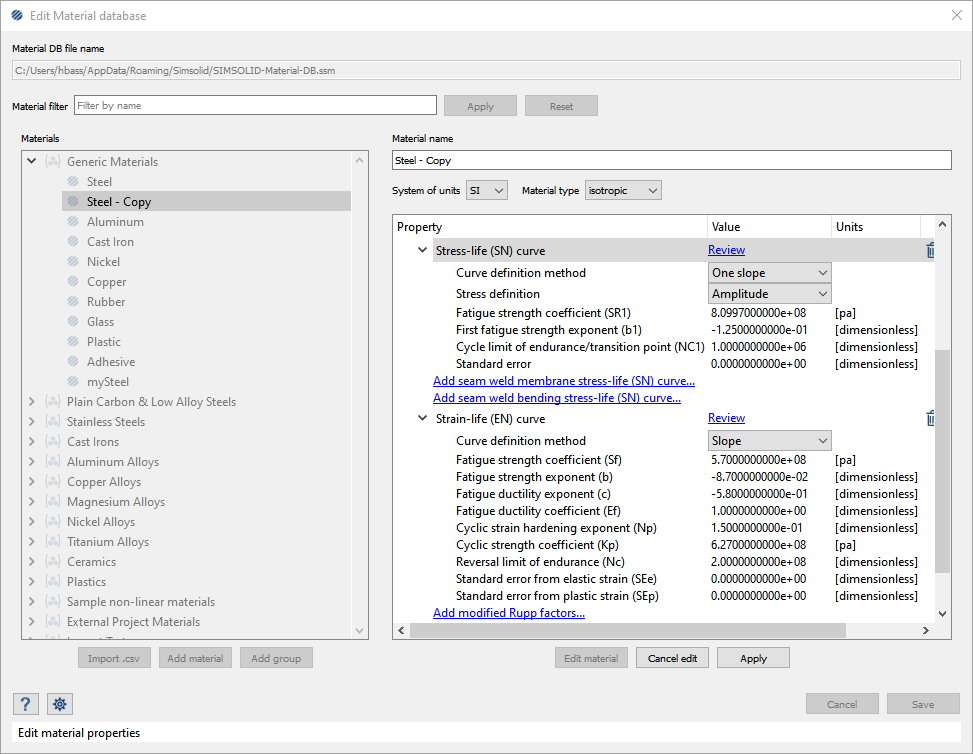
Note: By default, the Curve definition method is set to Estimate from UTS.
-
In the editing field of the dialog, expand the Fatigue
properties branch and click Add stress-life
(SN) curve....
- Click Apply.
- Click Save.
Open Material Database
-
In the main menu, click .
Figure 24.
- Ensure View materials from option is set to Material database.
-
Click Open.
Figure 25. 
-
In the File explorer, browse to NewSimSolidMaterialDB.ssm
and click Open.
Figure 26. 
The new Material Database will be shown in the Material database dialog.
Add Material Database
-
In the main menu, click .
Figure 27.
- Ensure View materials from option is set to Material database.
-
Click New.
Figure 28. 
-
In the File explorer, for File name enter
NewSimSolidMaterialDB-practice and click
Save.
Figure 29. 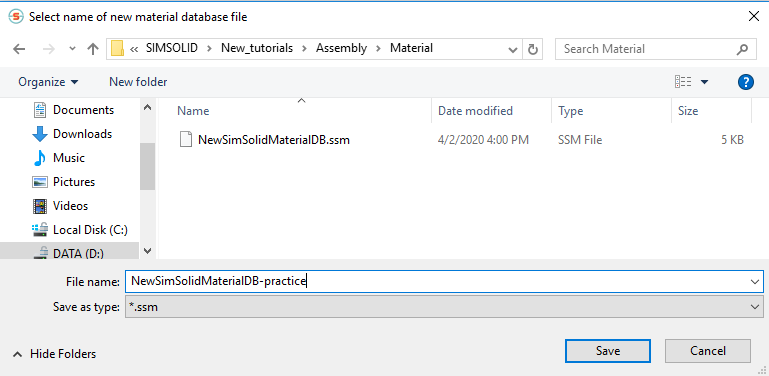
The new Material Database will be shown in the Edit Material database dialog. You can add new materials from the dialog.Figure 30. 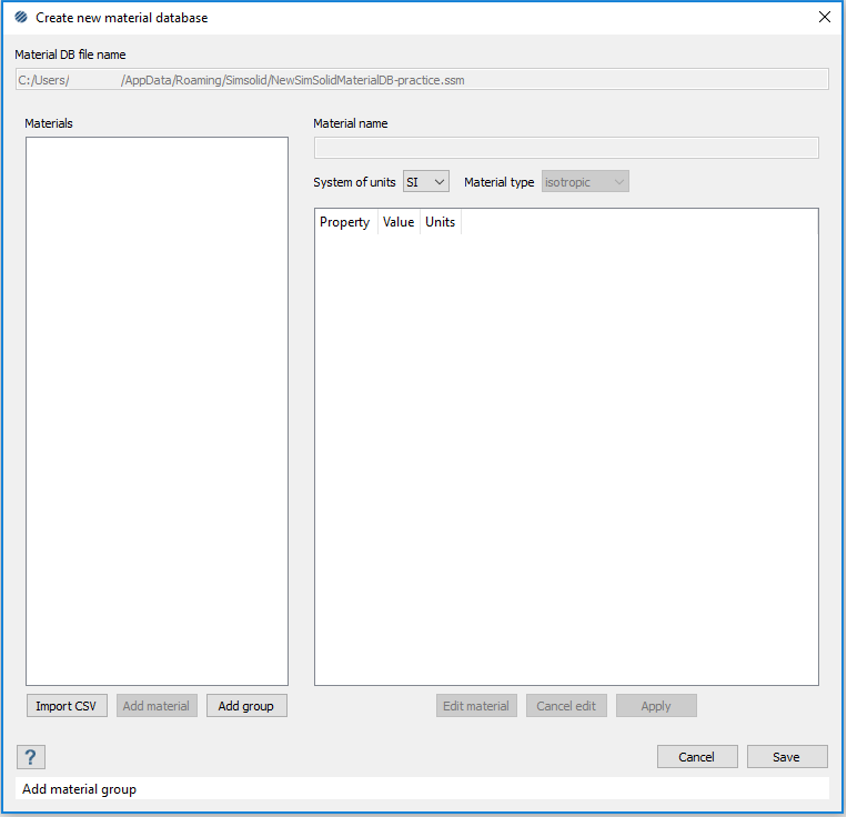
Note: After completing the tutorial, make sure to reopen the default SimSolid Material Database (available at C:\users\<username>\AppData\Roaming\Simsolid\SIMSOLID Material DB.ssm).