Organizing the Flow Volume
After the bearing is created, the next step is to organize the components of the flow volume.
The flow volume solid is cut either manually or by using the Organize Table. The various components are assigned a name according to their properties (name is essentially an alias for the collector).
The size of the mesh (corresponding to each component of the flow volume) is assigned on the basis of the collector name, internally.
It is very important to properly assign the name to a component as the results might deviate if there is improper assignment. For example, the mesh for the billet is always coarser than the mesh done in pocket, so assigning a billet collector to a pocket component might give very different results or meshing can even fail.
Flow volume part is not found in the model. If flow volume is available in the model, please rename the part as “Flow Volume”.In addition, there should be only one part named “Flow Volume,” otherwise a warning will be issued. When you encounter this situation, please combine the flow volumes into one.
There are two ways of organizing solids. The first is to use the Organize Table feature. The second is to cut the flow volume manually and then assign the names.
Organizing Volumes using the Organize Table
Use the Organize Table to organize the flow volume solids.
Before using the table, know the length of each of the components to organize as respective collectors. The Organize Table works on the solid characterized as flow volume only. If there are multiple flow volumes, combine them into one flow volume.
-
From the Extrusion ribbon, click the Organize tool.

-
Check the boxes according to the collectors in the model. For example, for
feeder and a pocket, select the Feeder Length and
Pocket1 Length option and enter the dimensions.
Organization starts from the bottom of the flow volume. If lengths are not entered appropriately, the last component (might be pocket) will be shorter than it should be.
The units selected are also displayed and can be changed if required.
Organizing Volumes Manually
Volumes can be organized manually by entering the values in the dialog. This can be useful if you don't know the length of the components.
-
From the Extrusion ribbon, click the Organize tool.

-
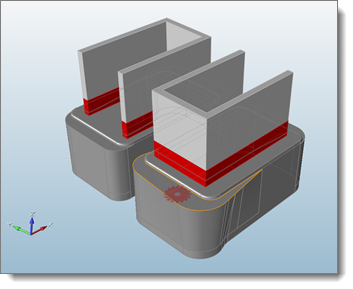
From the guide bar, click Plane
and select the plane through which to cut the solid.
The saw depicts the cutting tool. The plane to select becomes highlighted when the saw is moved.
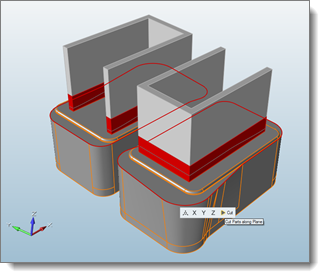
-
Click Cut, or right-click to cut the plane.
-
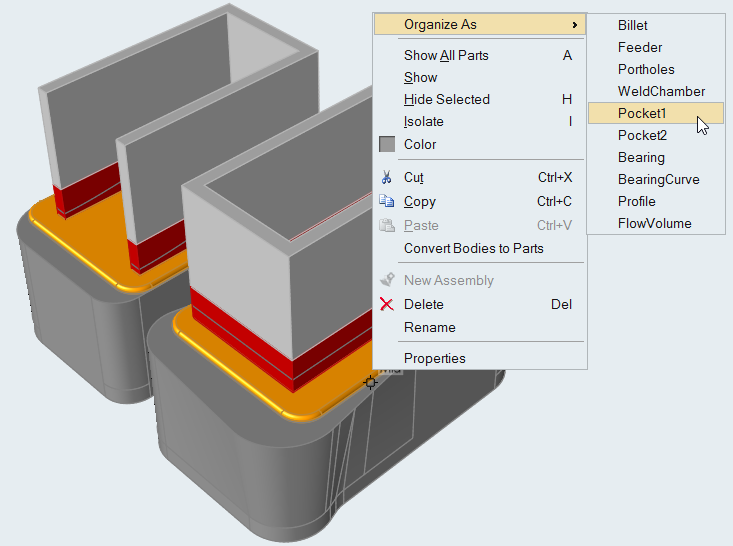
Right-click on the selected part and select Organize As
from the context sensitive menu.