Graphic management
Overview
The graphic functions are available on every graphic area of the Motor Factory application.
 |
|
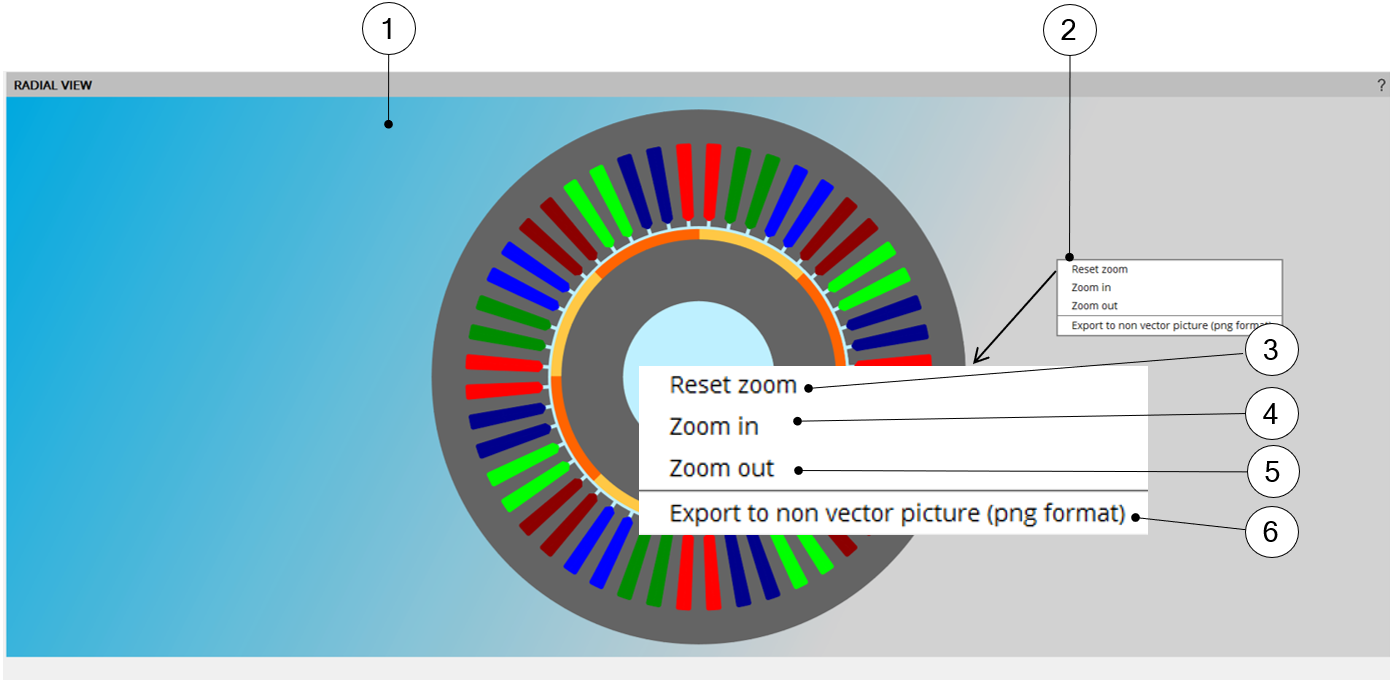
| 1 | From the any graphic window it is possible to access the graphic functions by using the right mouse button. |
| 2 |
A dialog box allows to choose among four functions:
|
| 3 | Reset zoom allows getting back the original size of the picture (i.e.
without zooming). Reset zoom allows making the picture recover its original size. |
| 4-5 | Zoom in and zoom out are used for adjusting the size of the picture,
step by step. Zoom in and zoom out can also be applied by using the scroll wheel on the mouse. |
| 6 | Export function to get a picture with .png format. The picture is captured by considering its original size (i.e. without zooming). |
Management of panels in Motor Factory
When the computer screen is too small or when the resolution of the screen is too low, three buttons appear on the top part of Motor Factory panels.
They allow to remove or to display the right and/or left panels of the screen. See illustrations below.
 |
|
| Dedicated buttons allow the management of panels in Motor Factory | |
| 1 | Three buttons are available to manage the displaying of panels in Motor Factory. |
| 2 | Button to hide right side and/or left side or both sides. |
| 3 | Button to display right side and/or left side or both sides. |
 |
|
| Different ways to display (or remove) the panels in Motor Factory | |
| 1 | Right side removed and left side displayed. |
| 2 | Both sides (right and left) removed. |
| 3 | Right side displayed and left side removed. |
Warning messages
In the DESIGN, TEST or EXPORT area of Motor Factory, warning messages can be issued.
They are stored on the right bottom part of the screen.
 |
|
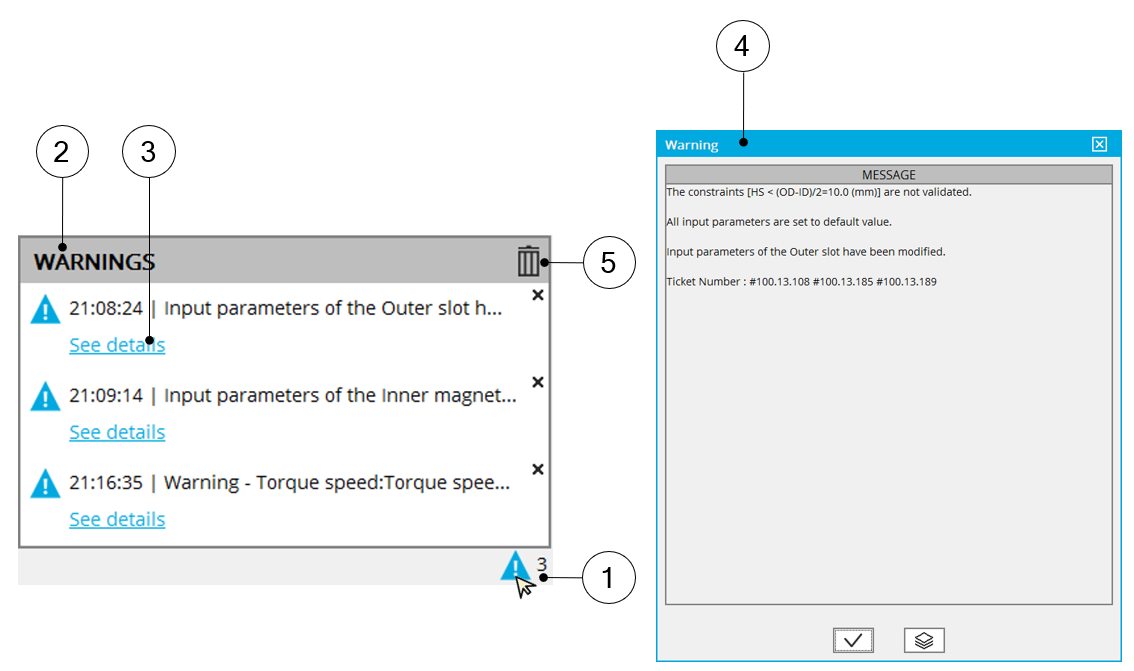
| 1 | Location of the warning messages. The number (3 in the example) indicates the number of warning messages to read. |
| 2 | When the test is running or when designing a machine, messages can appear on the screen to notify user about some warnings to check. |
 |
|
| 1 | Click on the warning message icon to open the corresponding dialog box. |
| 2 | Dialog box dedicated to display warning messages. |
| 3 | Each warning message can be visualized by clicking on: “see details”. |
| 4 | Clicking on “See details” allows to read the warning message. |
| 5 | All the warning messages can be removed from the list by clicking on the bin icon. |
Selection modes in GUI
Section selection mode
The process for choosing the section in which user inputs are defined is implemented in the winding area as illustrated below
 |
|
| Scrolling selection bar – Winding environment | |
| 1 | Scrolling selection bar where Winding, Coil, End-winding, X-Factor and Potting sections can be selected. |
| 2 | Section data can be reached thanks to shortcuts. |
| 3 | Arrow allows to scroll the bar to reach other sections (on the right or the left) when needed. |
| 4 | The bar slides on the right to allow reaching Potting section. |
 |
|
| Scrolling selection bar – External cooling area | |
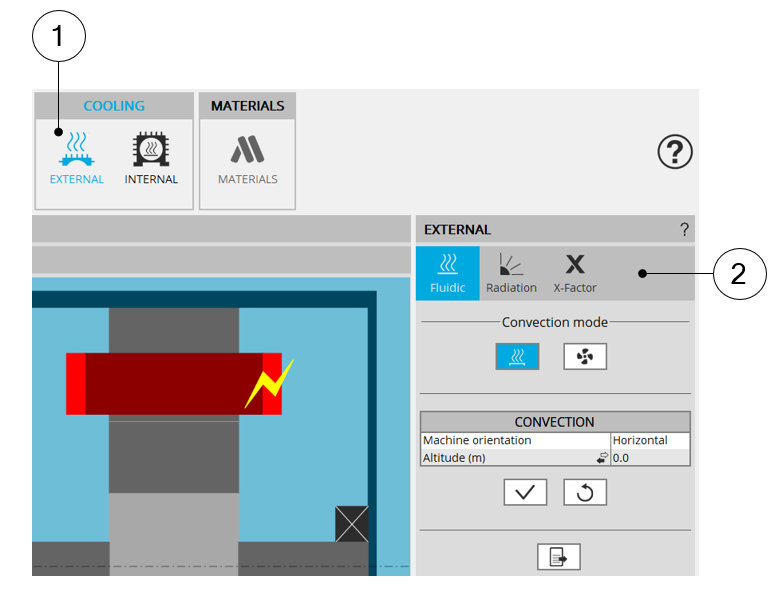
| 1 | External cooling area of Motor Factory design environment. |
| 2 | Scrolling selection bar where Fluidic, Radiation, X-Factor sections can
be selected. In that case, all the sections can be reached without sliding the bar. |
 |
|
| Scrolling selection bar – Internal cooling area | |
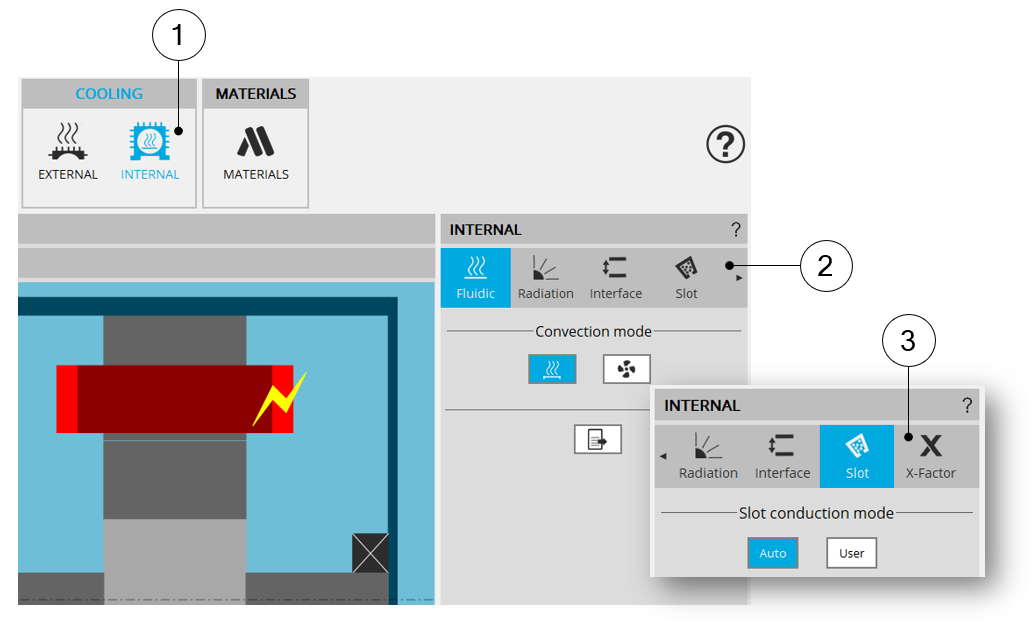
| 1 | Internal cooling area of Motor Factory design environment. |
| 2 | Scrolling selection bar where Fluidic, Radiation, Interface, Slot sections can be selected. |
| 3 | The bar slides on the right to allow reaching X-Factor section. |
4.2 Multiple choices for inputs
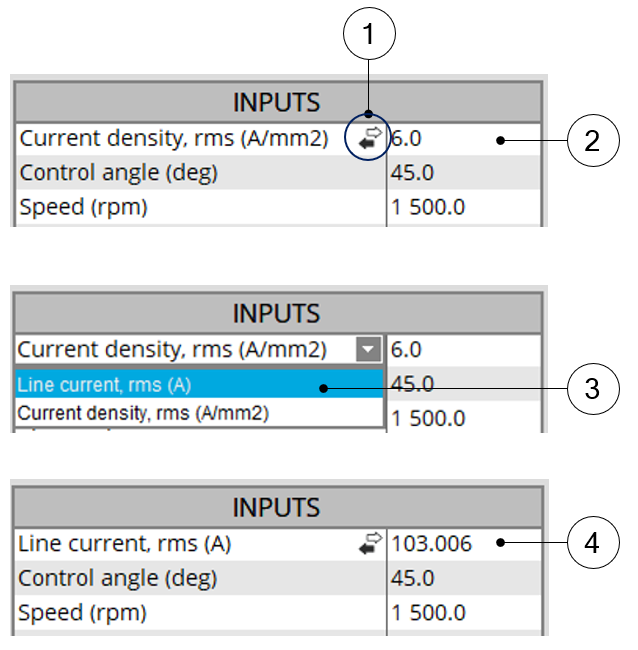
A process allowing Multiple choices for selecting the type of user’s inputs has been implemented. This allow to give users several choices within only one input line. Please see the below example showing the different ways to define the electrical current in conductors.
 |
|
| Scrolling selection bar – External cooling area | |
| 1 | Icon allowing to give multiple choices to the users. |
| 2 | First choice = Current density (A/mm²). |
| 3 | In that case two choices are possible: either the current density or the
line current. Whatever is the choice the units and the corresponding data are updated. |
| 4 | Second choice = Line current, rms (A). |