Part Library Lock
Use the library manager to lock or unlock a part.
If a part is locked, the part cannot be inserted with the Insert function and a warning message will be shown when configuring BOM by Schematic in UDMS.
-
Search parts.
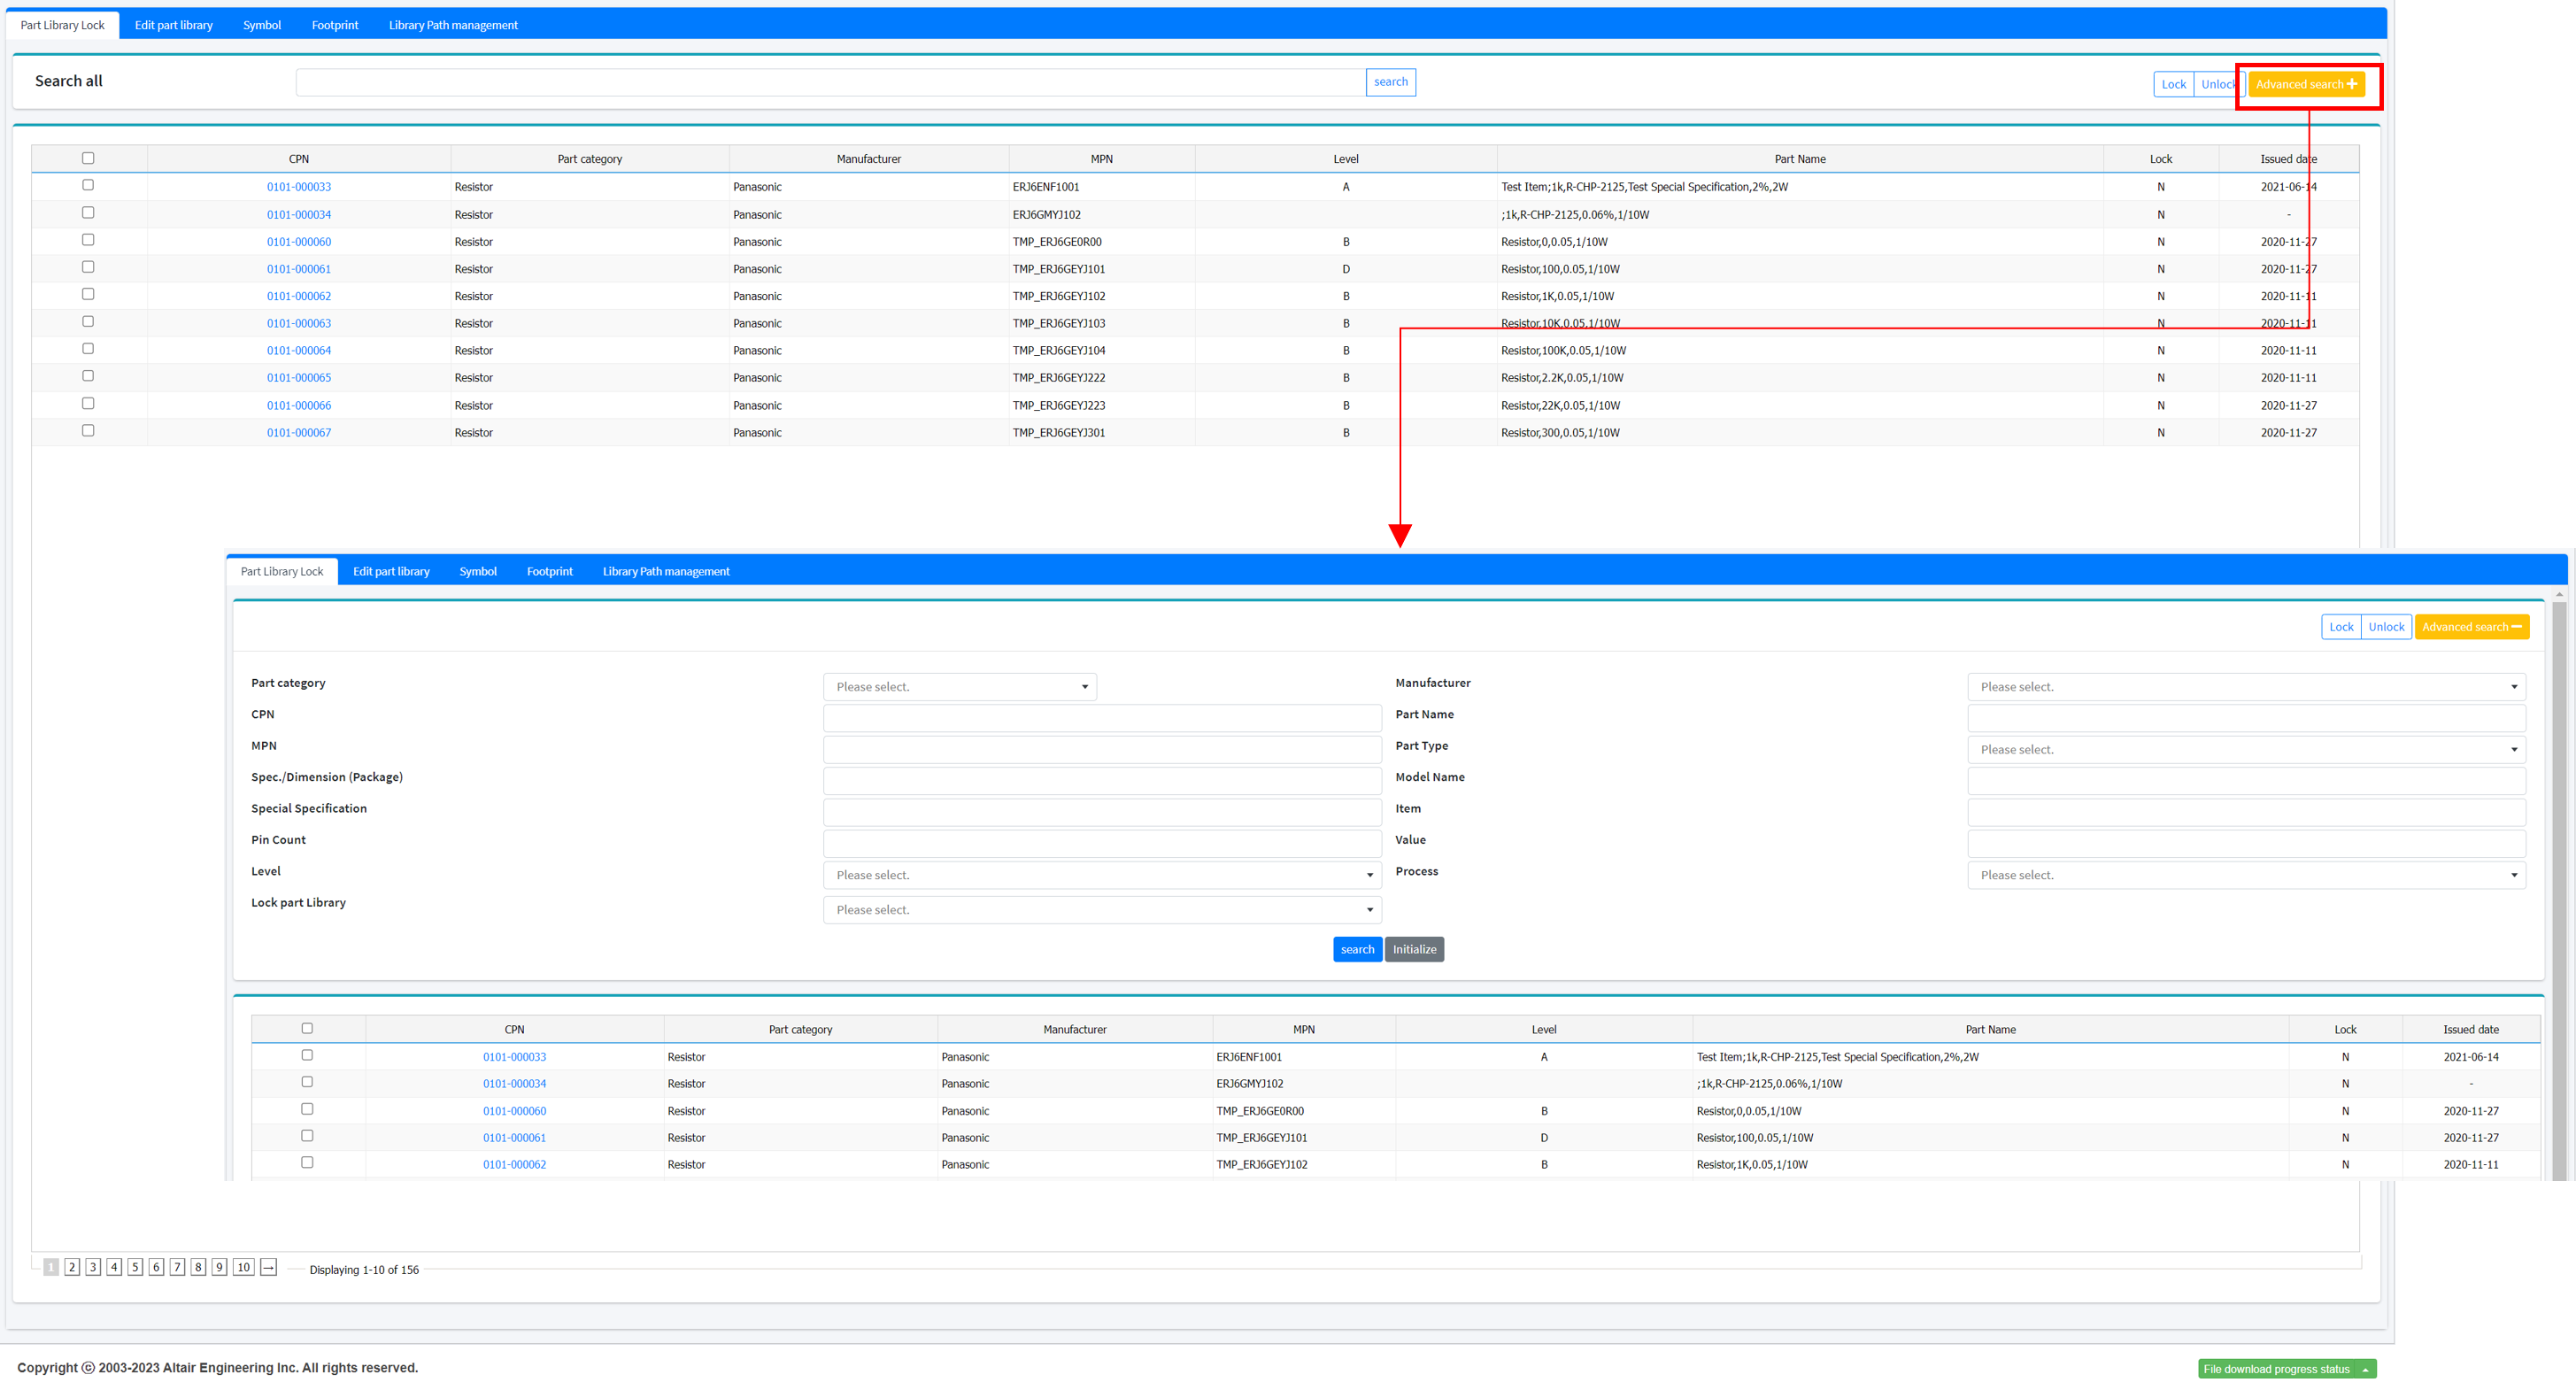
Figure 1. -
Lock parts that cannot be used due to defects or supply disruptions.
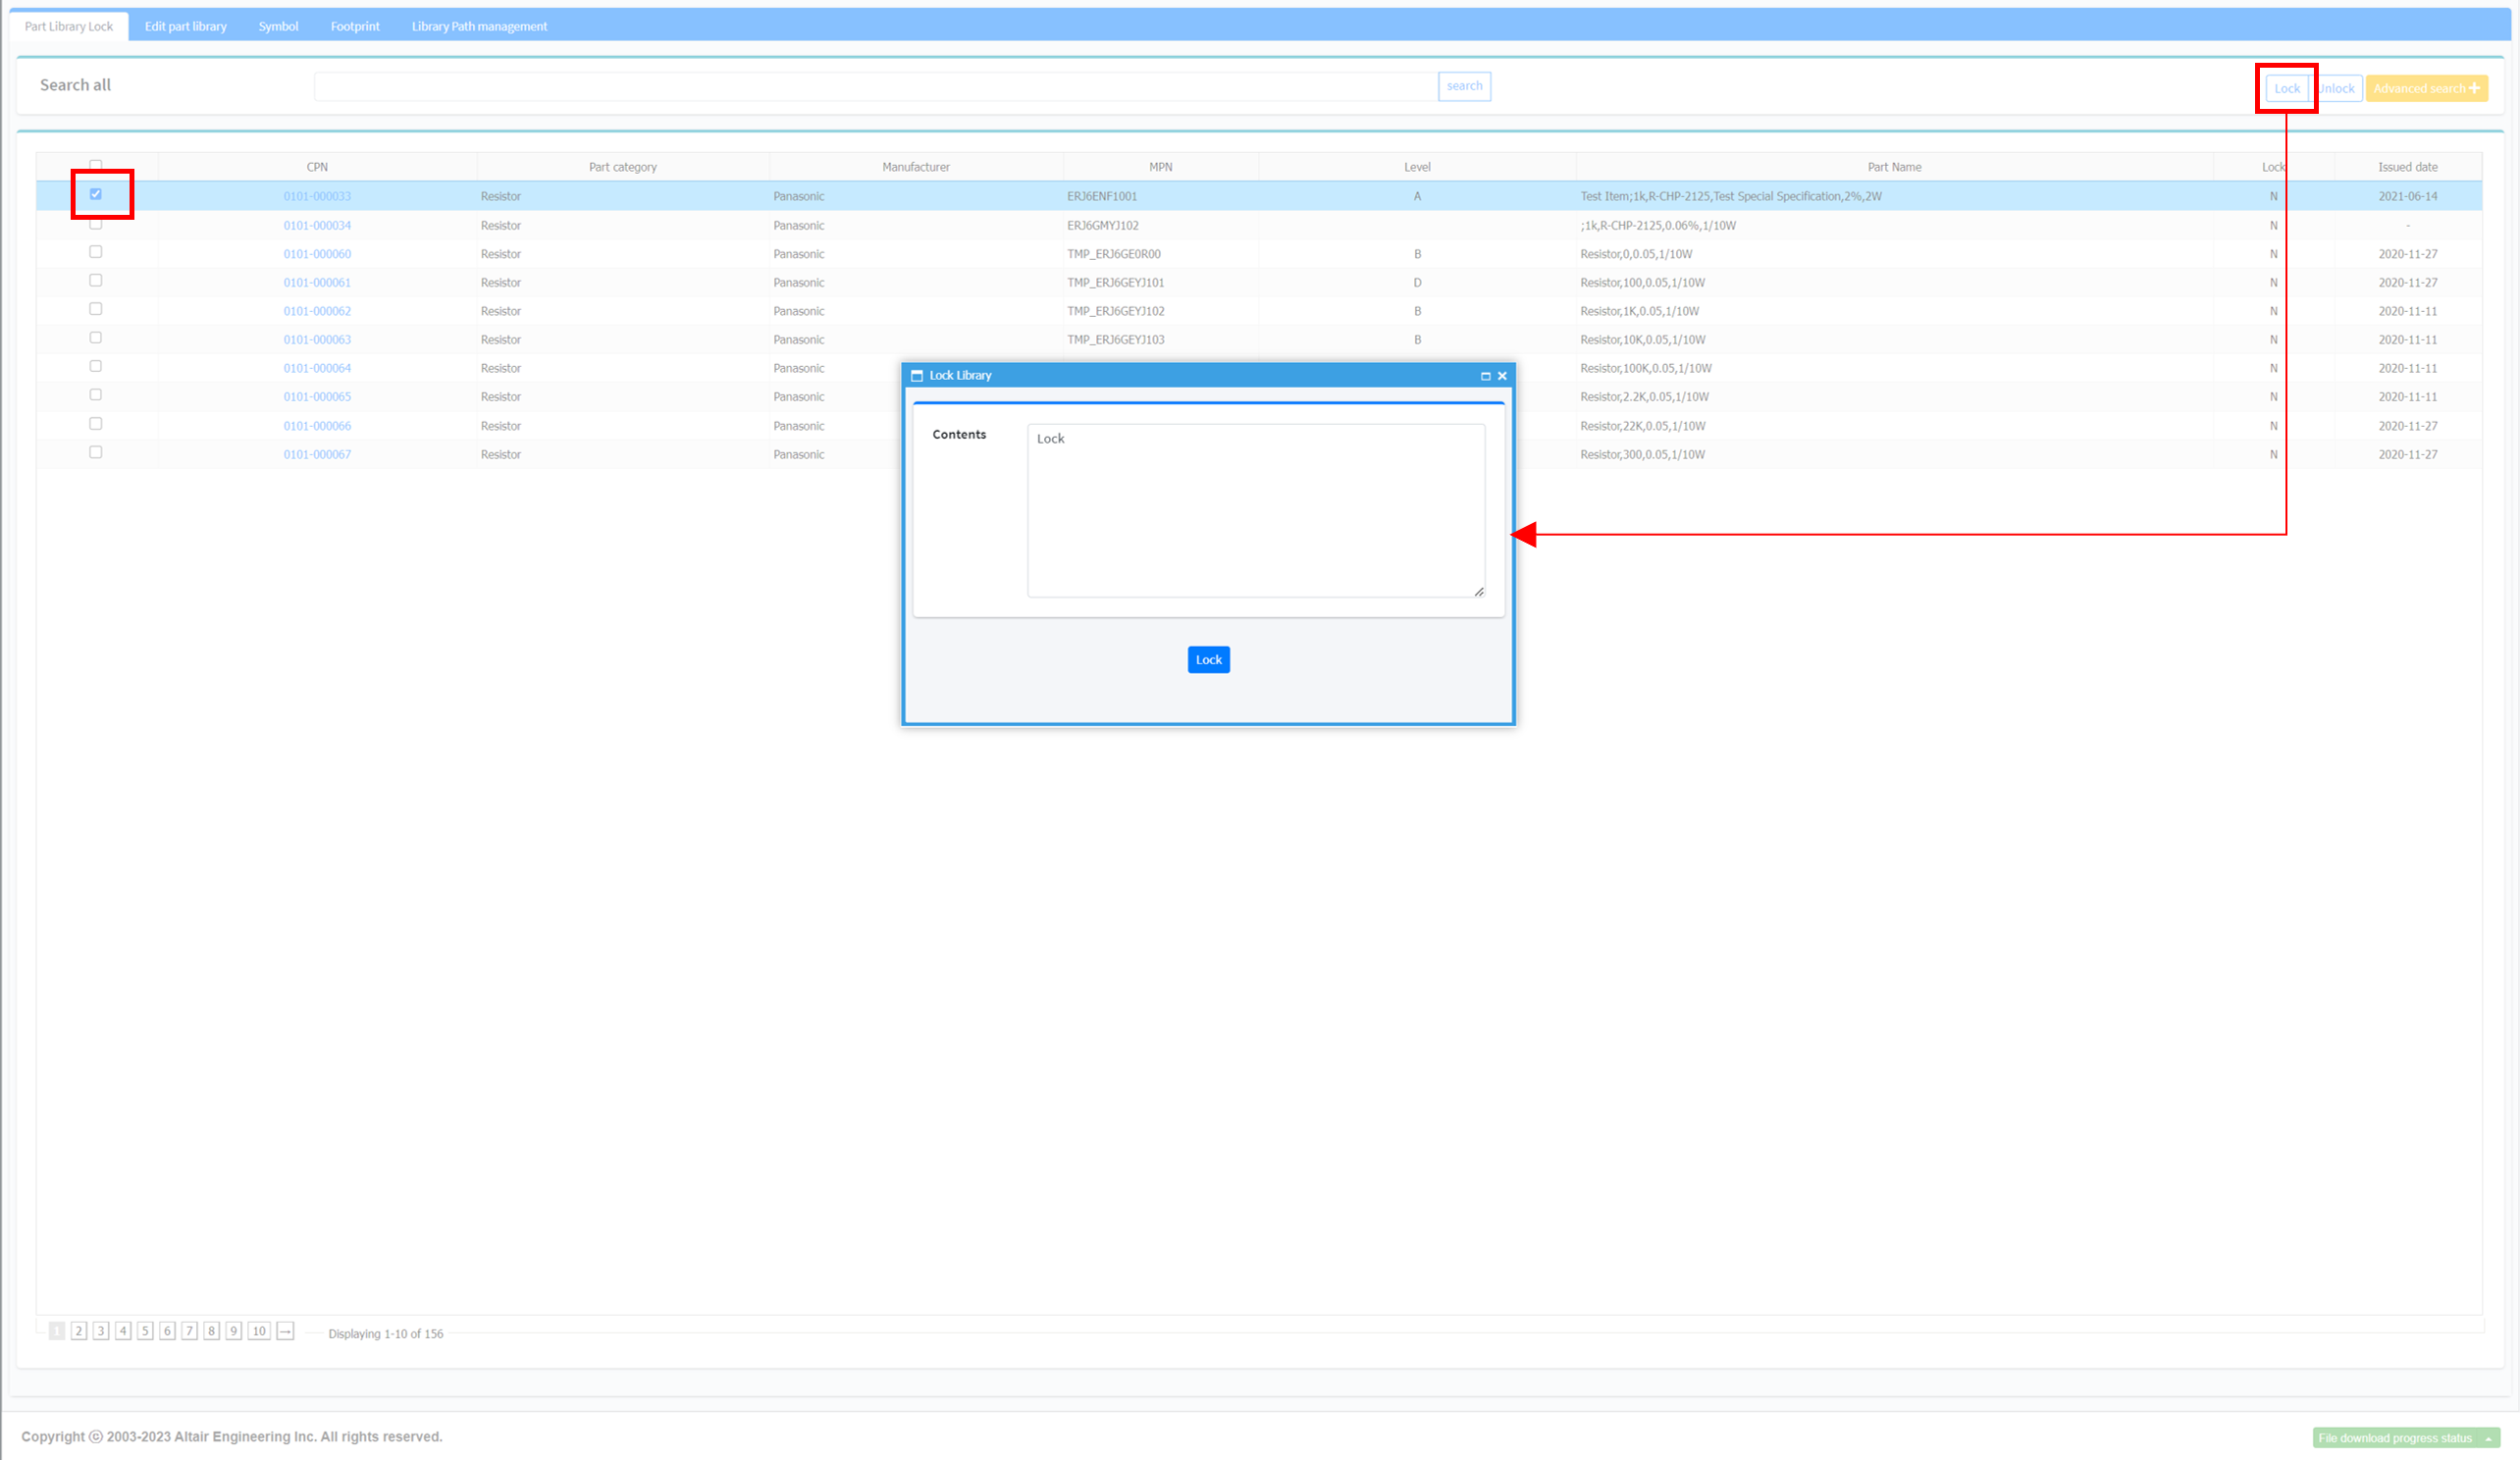
Figure 2.When the part is locked, the lock flag is changed to Y in the result list and the date of change is displayed.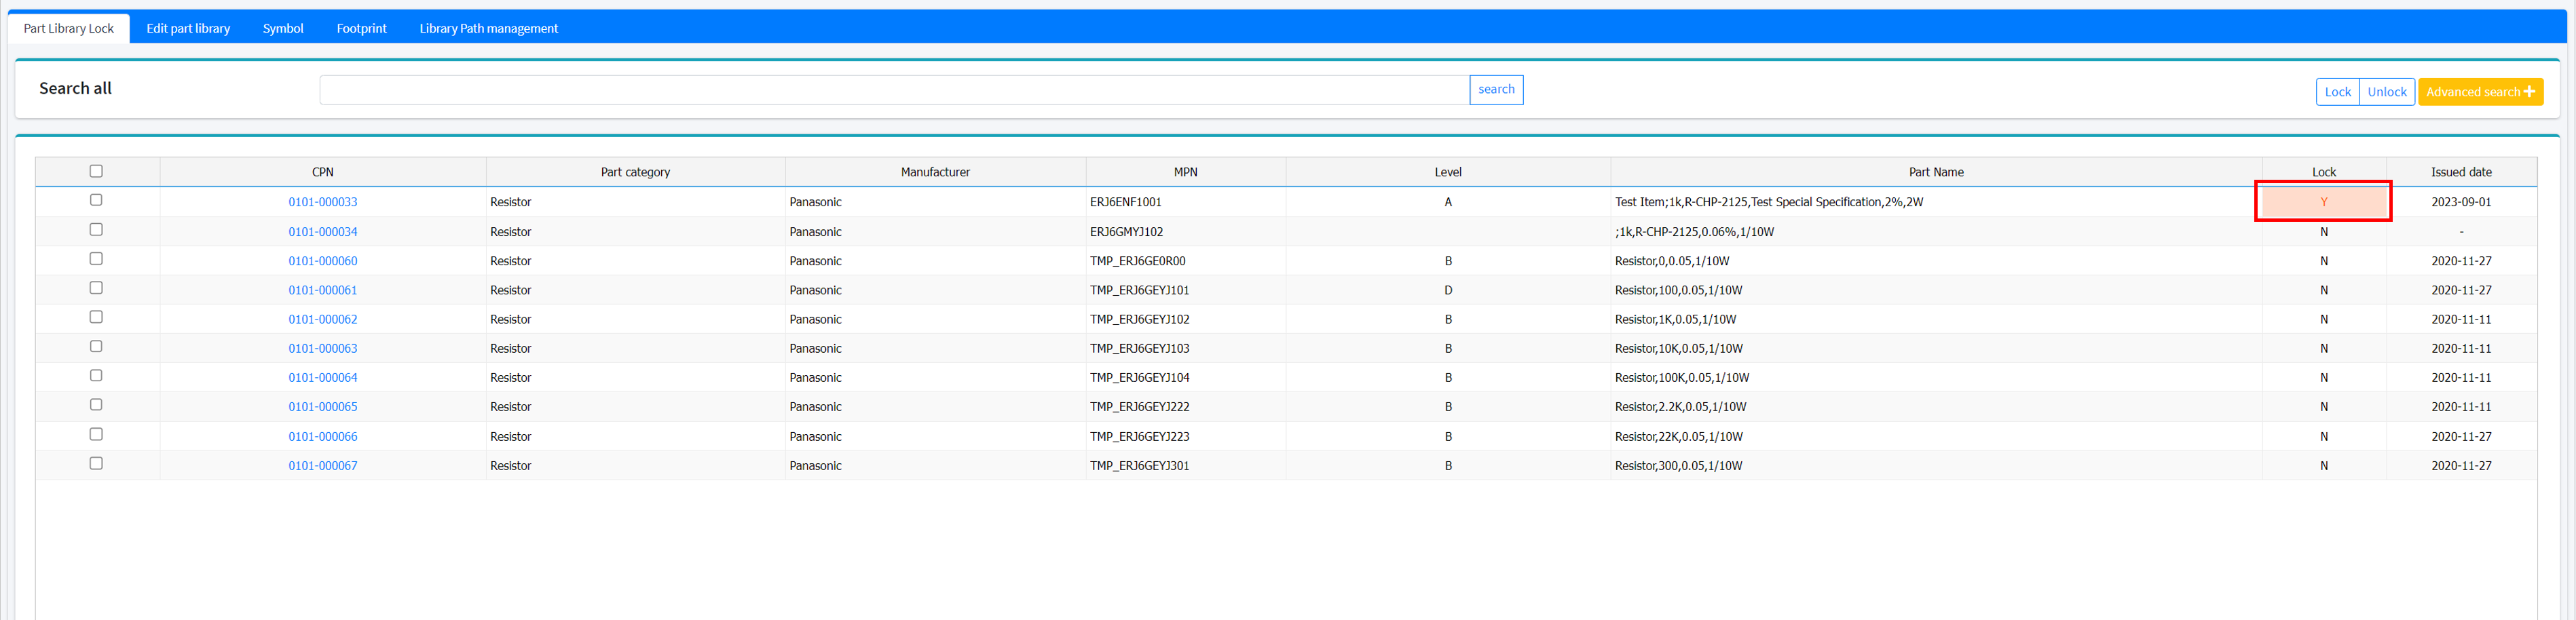
Figure 3. -
Unlock parts when they become available.
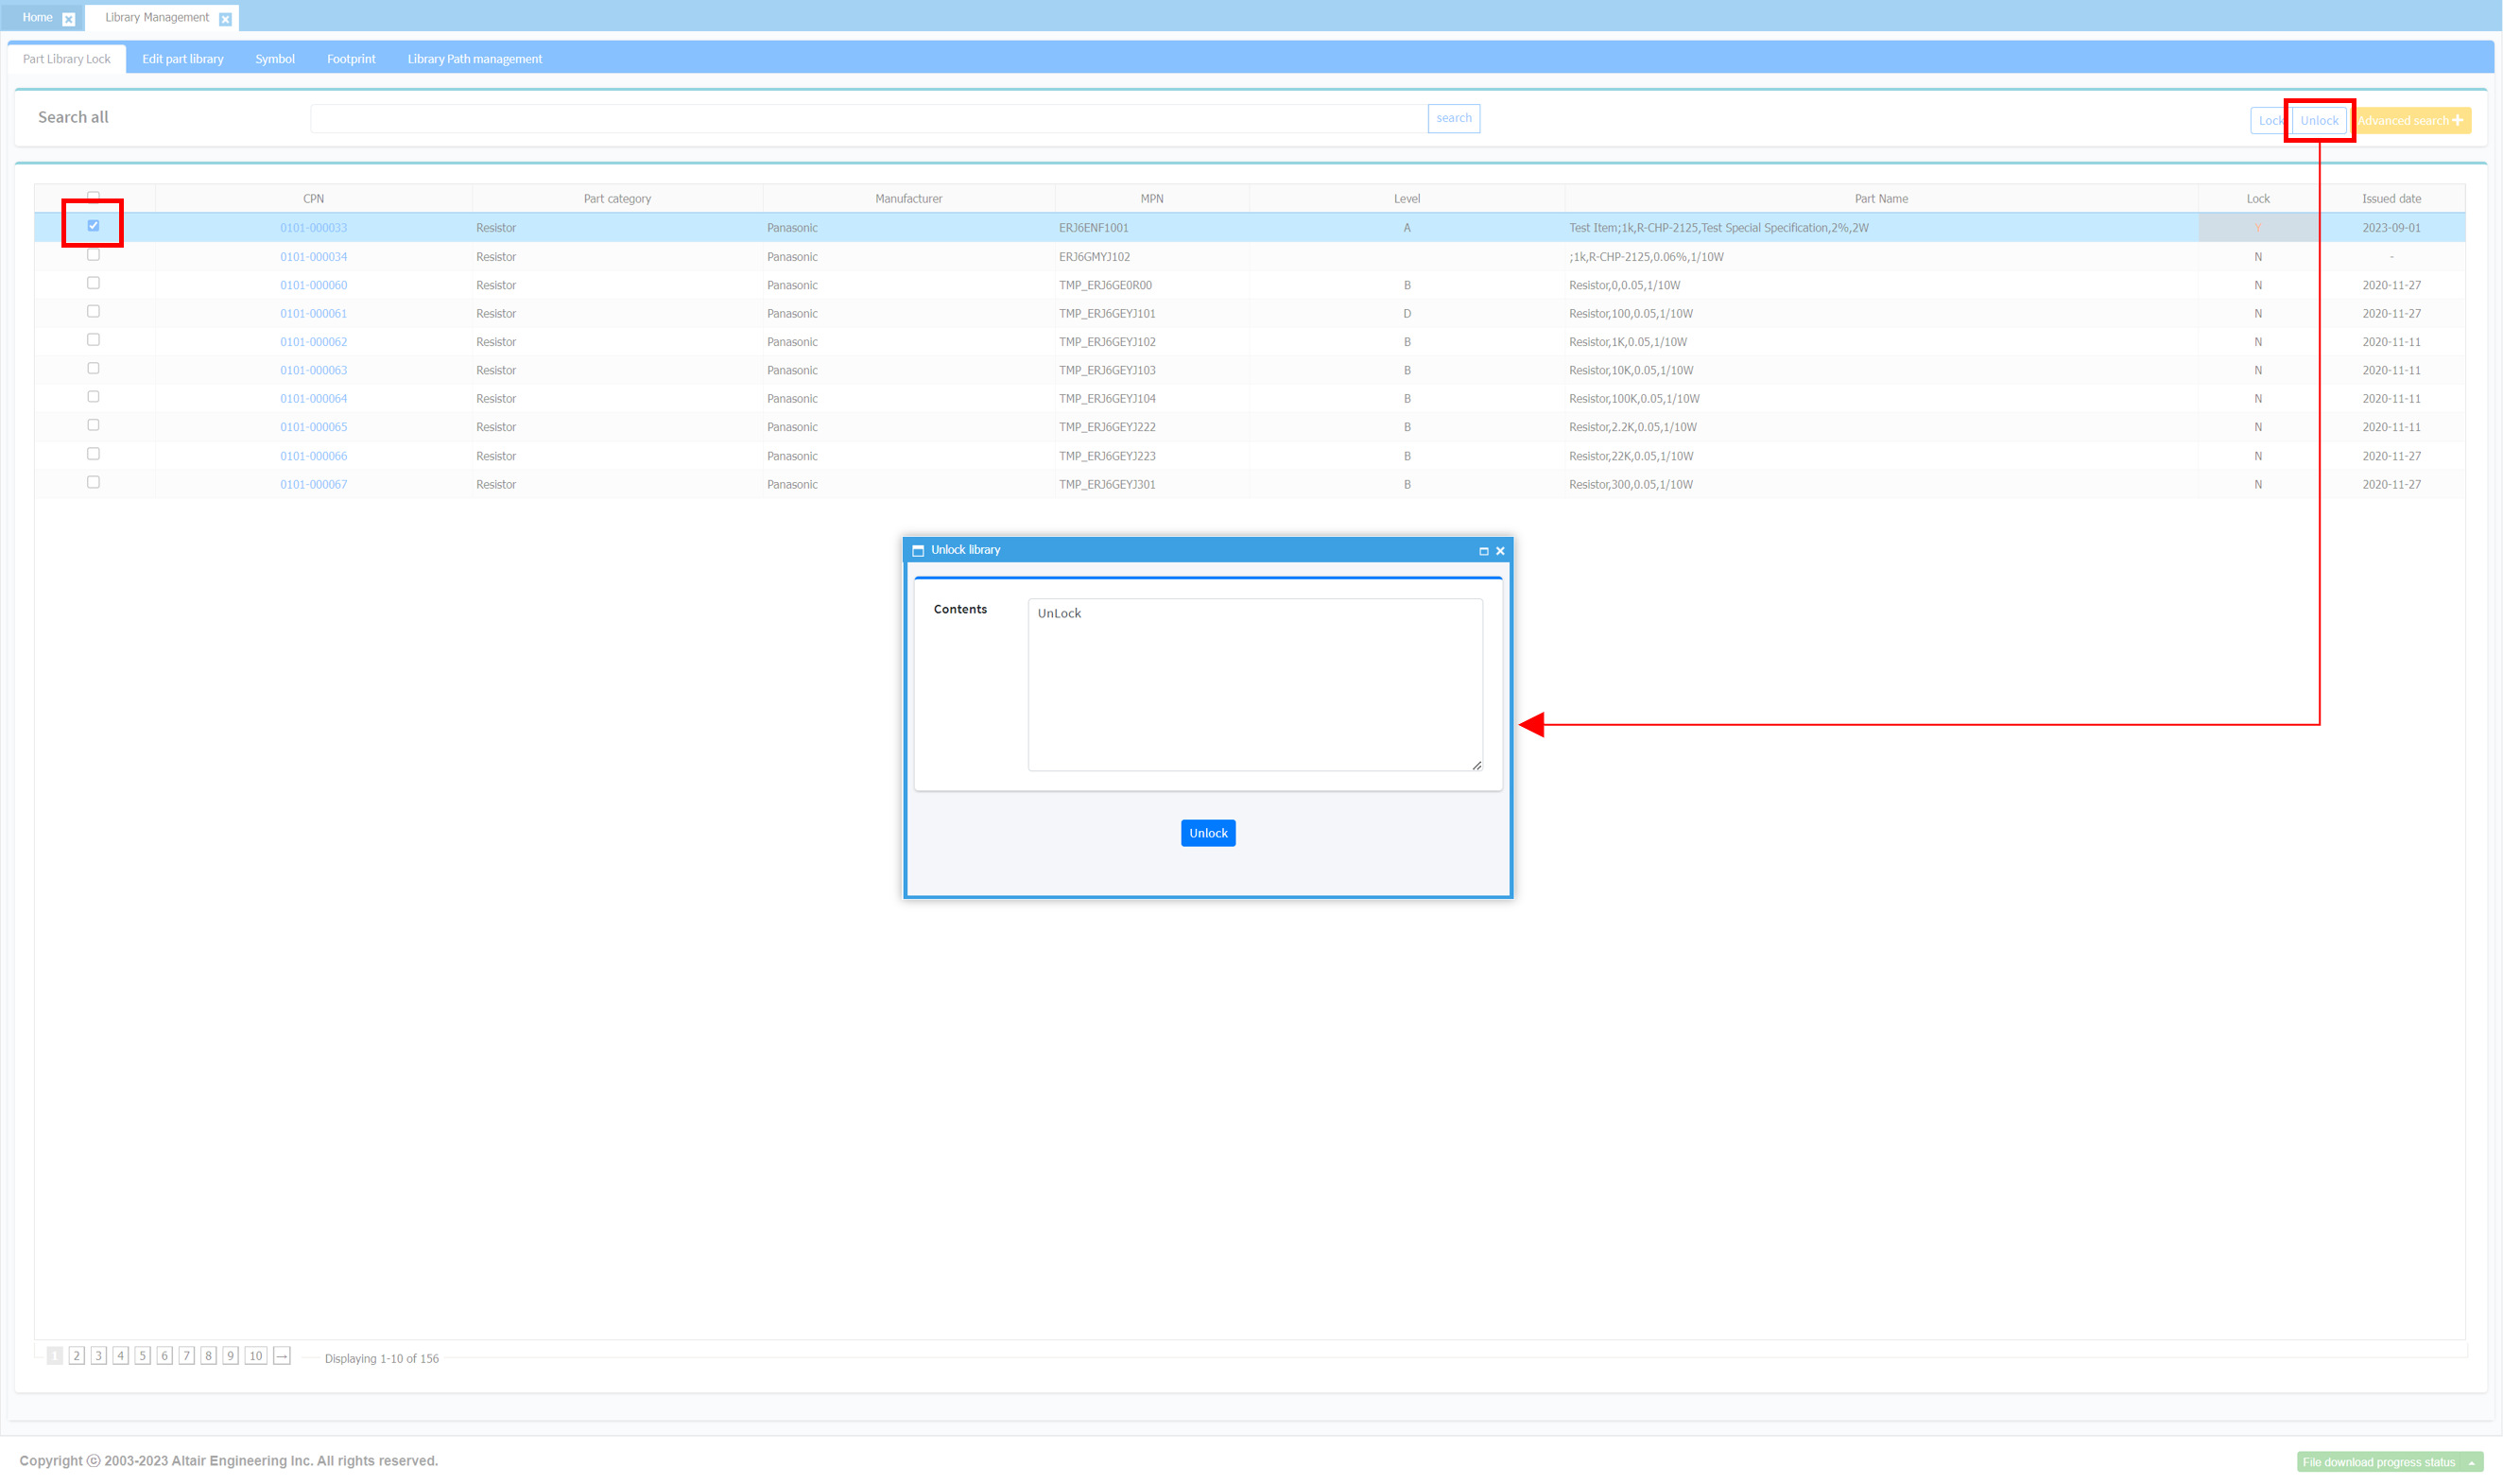
Figure 4.When the part unlocked, the lock flag is changed to N in the result list and the date of change is displayed. -
Click a part CPN to display the part history and
detailed information.
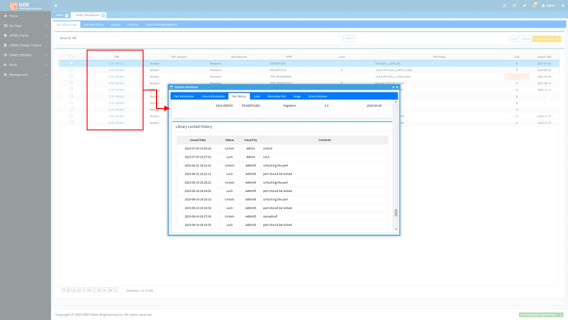
Figure 5.