Adding Data
You can add as many tables as you need to your workspace. Once added, tables can be:
Adding Initial Data
-
On the Start Page, do one of the following:
-
Select Open Data and then use the Select Open Data Source to Open dialog to add your data source.
-
Locate your file on your desktop or network and then drag it to the Start Page
-
Open a web page, select the data, and then drag it to the Start Page
-
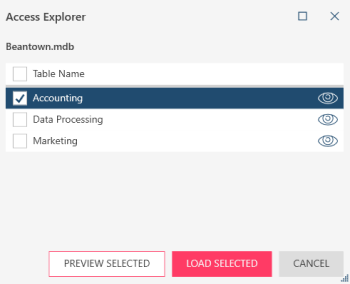
When some file-based data sources are opened, other settings must be specified via an explorer to ensure that the correct table is imported into the application. For example, if your data source is a Microsoft Access file that contains several tables, you can select which table(s) to open via the Access Explorer.
-
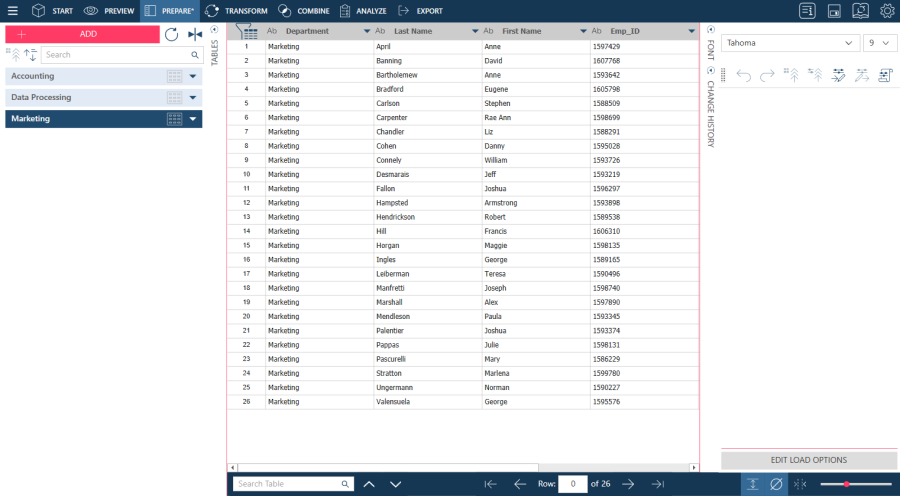
Continue loading your tables into your workspace by selecting the tables of interest and then clicking Load Selected.
You are brought to the Prepare window.
Notes:
-
Letters beyond 64 are truncated when opening tables from Excel files with column names exceeding 64 characters because the Access driver used to read these files imposes a 64-character limit.
-
If, instead of loading the data source directly into your workspace, you wish to view its contents first, click Preview Selected instead.
-
Some tables, such as CSV tables, must be previewed prior to loading into your workspace to ensure that the data display correctly. When such tables are loaded into Data Prep Studio, you are first brought to the Preview window.
-
Other tables, such as those from cloud-based and third-party data sources, open directly in the Prepare window.
-
When loading multiple files (e.g., PDF + Excel spreadsheet + CSV) via drag and drop, multiple dialogs may display for further configuration (e.g., Report Design for PDF reports, PDF Table Extractor for PDF files, Access Explorer for Microsoft Access files, etc.). These dialogs display one at a time, enabling you to refine the data to be added to your workspace as part of the typical loading process. If you select Cancel in any of these dialogs before the loading process is complete, the following dialog displays.
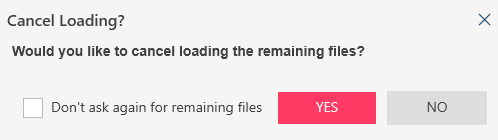
The options you select will enable you to either continue loading the rest of the files or cancel the rest of the loading process completely.
Adding more data
If you want to add more tables to your workspace, do one of the following:
-
Click Open Data in the Start Page to launch the Select Open Data Source to Open dialog once more.
-
Click New in the Preview window, navigate to the location of your data source and then open it.
-
Select Add in the Prepare window, navigate to the location of your data source, and then open it.
-
Drag a file to the Prepare window. This action immediately loads the data to your Prepare window.
Adding a Web-Based Data Source
-
In the Select Data Source to Open dialog, click Open Web File.

The Open Data Source from Web dialog displays.

The left-hand dropdown allows you to choose the storage system in which your data resides:
-
HTTP (http://)
-
HTTPS (https://)
-
WEBDAV (http://)
-
SECURED WEBDAV (https://)
-
FTP (ftp://)
-
SFTP (sftp://)
-
Amazon S3 (awss3://)
-
Azure Data Lake Storage Gen2 (adl://)
-
Azure Blob Storage (abs://)
-
Oracle Cloud Infrastructure (oci://)
-
Google Cloud Storage (gcs://)
-
Altair Monarch Server Library (dor://)
Note: Credentials for cloud-based storage systems can be specified in the Server section of The Application Default Settings.
-
In the right-hand field, enter the complete URL containing your data source, including its extension, if available. Alternatively, click the Browse button and then use the browser that displays to navigate to and select the data source you wish to open.
You can import data sources of the following file types:
-
Microsoft Access (.mdb, .accdb)
-
Report (.dat, .prn, .rpt, .txt, .log, .pdf, .xps, .htm)
-
Delimited text (.csv, .tab, .txt, .dat, .tsv, .scsv)
-
Microsoft Excel (.xls, .xlsx, .xlsm, .xlsb, .csv)
-
HTML (.htm, .html)
-
JSON (.json)
-
SAS Transport V5 Format (.xpt, .stx)
-
SAS Transport V8 Format (.v8xpt, .xpt8, .2xpt)
-
XML (.xml)
-
Monarch (.dprj, .xprj, .dmod, .xmod)
-
Data Prep Workspace (.dpwx)
-
Click OK when you are finished.
-
If the credentials set in Server > Application Default Settings are invalid or empty, you are asked to provide them at this point.
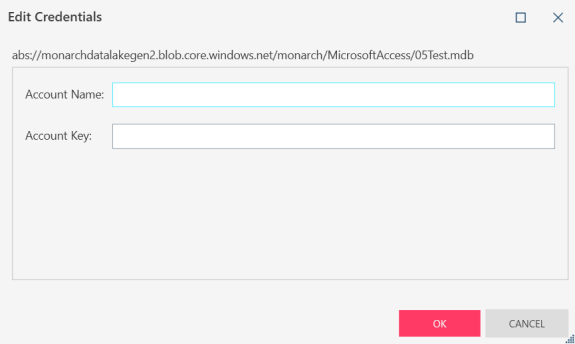
Provide the required details and then click OK.
Adding data source files via drag and drop
You can drag and drop a file if this is readily available on your workstation or network.
-
Navigate to the location of the file you want to open.
-
Drag the file to the Start Page, Preview window, or Prepare window.
-
If you open a database, you are brought to the Preview window. Data Prep Studio automatically displays all tables (or worksheets) in your database.
-
If you open a report, you are brought to the Report Design window, where you can define the fields you want to use.
-
Adding data sources from other workspaces
You can add tables saved in workspaces to your current workspace.
-
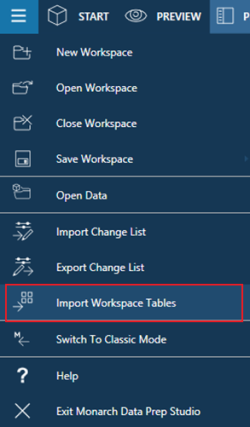
Click on the application menu icon on the upper left-hand corner of your screen and then select Import Workspace Tables from the options that display.
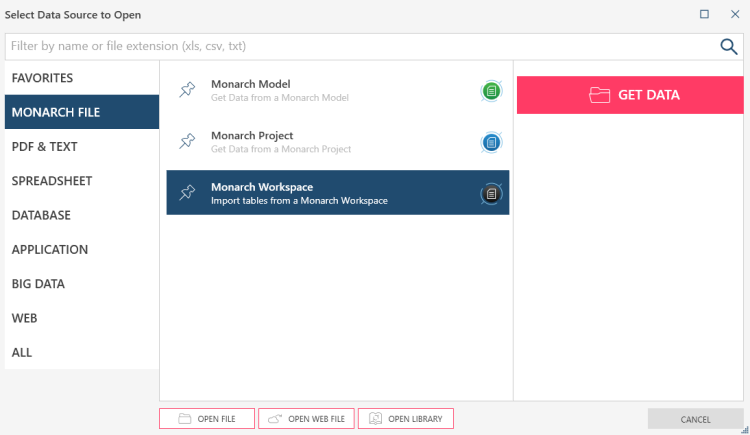
Alternatively, in the Start, Preview, or Prepare windows, select Open Data (in the Start page), New (in the Preview window) or Add (in the Prepare window) to launch the Select Data Source to Open dialog. Using this dialog, select Monarch File > Monarch Workspace > Get Data.
-
An Open dialog displays. Use this dialog to navigate to and select the workspace containing tables you wish to add to your table.
-
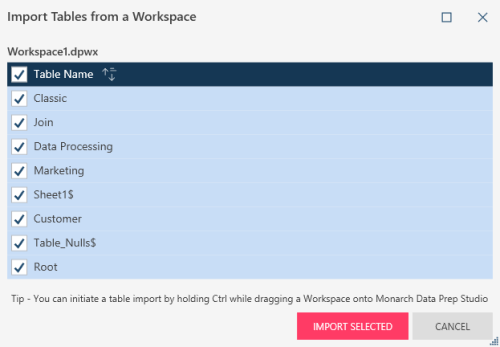
If the workspace contains a single table, this table is added to your workspace. Otherwise, the Import Tables from a Workspace dialog displays. Use this dialog to select which tables in the workspace should be added to your current workspace.
-
Click the Import Selected button when you are finished.
The tables you selected are added to your workspace.
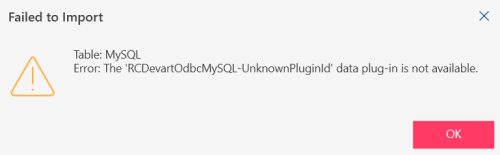
Note that even if a table references a missing plugin, this table can be added to a workspace. However, the following error message (as an example) displays:
Adding data from a web page
-
Go the web page you want to use.
-
Highlight and select the information you want to use.
-
Drag the selection to the Start Page, Preview window, or Prepare window.
Adding data from third-party products
You can load other data sources from third-party products into your workspace using Data Prep Studio's various data connectors. This page provides more information on this topic.
Closing tables
Once you have added tables to your workspace, you can close them in one of two ways:
- In the Preview window, select the tables you wish to remove and then click Close Selected. If you wish to close all tables that you have added to your workspace, click Close All instead.
- In the Prepare window, right-click on the table you wish to close and then select Delete from the context menu that displays.
Related Links
© 2025 Altair Engineering Inc. All Rights Reserved.