Exporting Tables in Data Prep Studio
You can export individual or multiple tables after combining and transforming these.
Tables may be exported in Data Prep Studio via two ways:
-
Named Exports - These exports are set up using the Export window and saved with the workspace.
-
Quick Exports - These exports are set up from the Prepare window via the table list context menu or by right-clicking on a table in the Export window. Quick exports are not saved with the workspace.
Setting up Named Exports
-
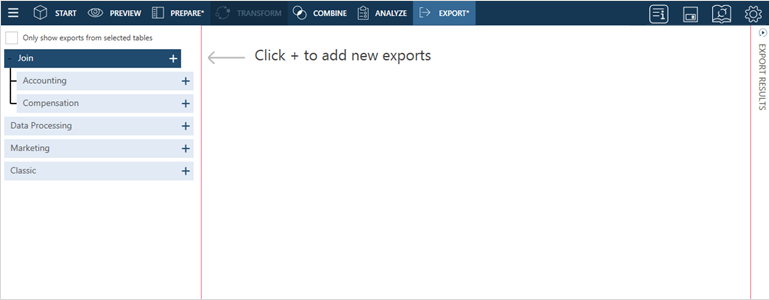
Select Export from the Data Prep Studio toolbar.
The Export Window displays:
-
Click the Add Export
 button located to the right of the table you wish to export and, from the options that display, select an export format.
You can export tables to the following formats:
-
Microsoft Excel (.xls, .xlsx, .xlsm)
-
Microsoft Access (.mdb, .accdb)
-
CSV
-
Fixed Text
-
PDF
-
JSON
-
XML
-
Microsoft Power BI
-
IBM Cognos Analytics
-
SAS Transport File Format V5
-
SAS Transport File Format V8
-
Altair Knowledge Studio (.kdd)
-
Tableau Hyper (.hyper)
-
Tableau Server/Cloud (.hyper)
-
Qlik (.qvx)
NOTE:
-
Data exported in Data Prep Studio to Excel files are exported as named ranges. Thus, when the table is opened, the worksheet name displayed corresponds to that of the named range.
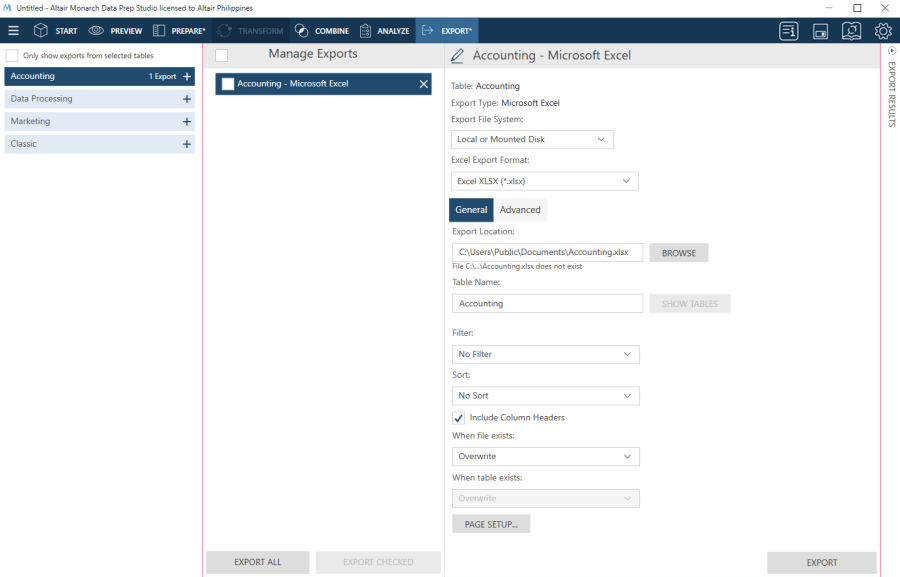
The table you selected displays in the Manage Exports panel and its properties display in the Export Properties panel.
-
-
Rename the export if you wish by clicking on the Edit
 button located to the left of the Export name (in the figure above, "Accounting - Microsoft Excel") and then entering a new name into the field. Click the Accept
  or Cancel
  icons to accept or reject your specified changes, respectively.
 -
Specify general export options as necessary. Your export options will vary depending on the export type. Select an export type below to view its corresponding export options:
If exporting to the Microsoft Excel file format, specify advanced export settings if necessary.
-
If you wish to export other tables, set them up by repeating Steps 2 to 4.
-
If you wish to limit the exports displayed in the Manage Exports panel to only those created from specific selected tables, tick the Only show exports from selected tables box located at the top of the table selector.
-
In the Manage Exports panel, tick the boxes of the tables you wish to export and then click Export Checked when you are finished.
If you wish to export all of the tables in the panel, click the Export All button instead. There is no need to select individual tables in this case.
If you wish to export a newly defined table, click Export at the bottom of the Export Properties panel after specifying the necessary export details.
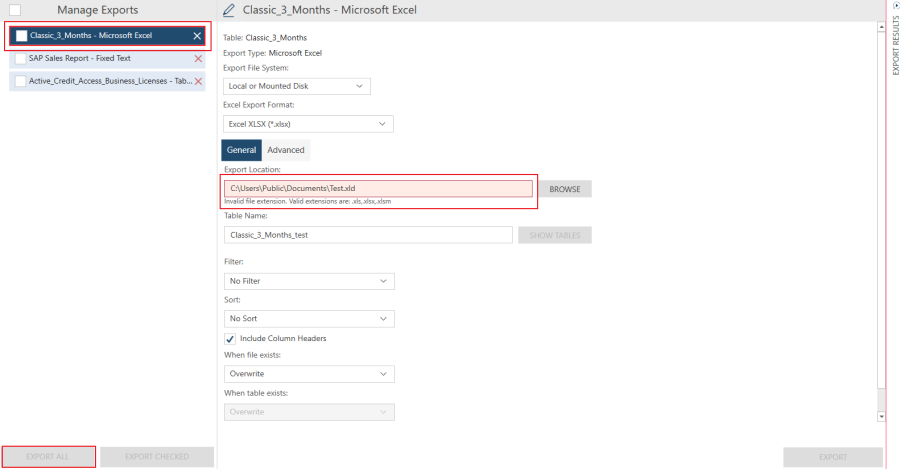
If you have several exports configured and an export validation occurs, for example, the file extension for a specific export does not match the allowed extensions for a certain export type or the file name is too long, the Export All button is disabled and the problematic export is identified by a red border in the Manage Exports panel. The issues related to this export must be resolved before all exports can be executed.
Setting up Quick Exports
-
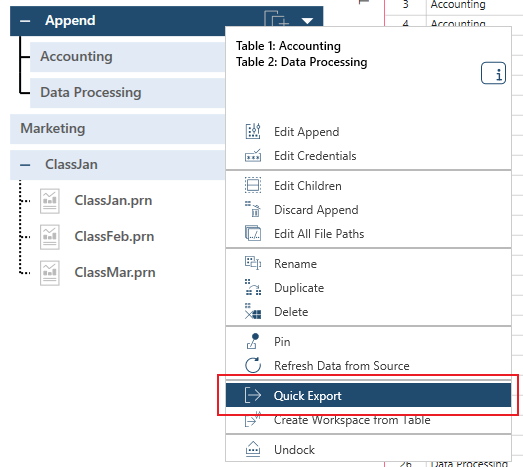
In the Prepare window, click on the drop-down arrow located to the right of a table you wish to export to display its context menu and then select Quick Export from the options that display.
Alternatively, you can select this table in the Export window, right-click on your mouse and then select Quick Export Table.
The Select an Export Type dialog displays.
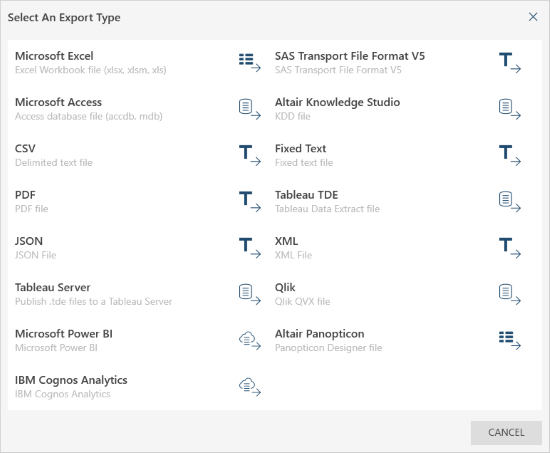
-
Choose a file type to which your table should be exported.
Doing so displays an Export Properties dialog.
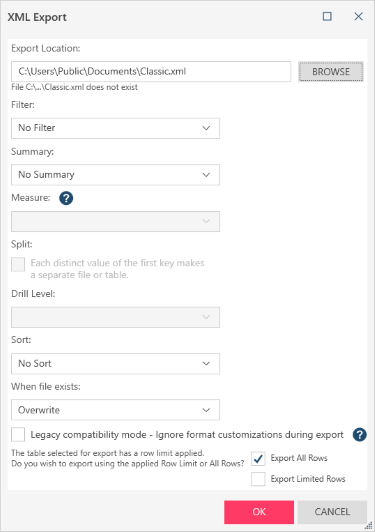
-
Modify the properties of your export using the table provided above as a guide and then click OK when you are finished.
Tracking export results
The export results display in a panel located to the right of the Export window. Although hidden by default, this panel is automatically launched when an export operation is completed.
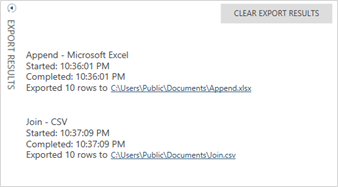
You can erase all export results from this panel by clicking on the Clear Export Results button located at the top right-hand corner of the panel.
Canceling export operations
You can cancel an export operation from the Export Results panel provided that the operation has not yet been completed.
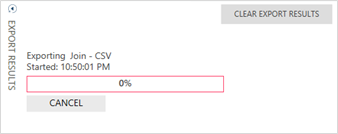
Click the Cancel button provided to cancel a non-completed export operation.
Viewing export results
To view the exported file, click on the export link provided in the Export Results panel. A file browser pointing to the location of the exported file displays.
Notes:
Appending to .qvx Files
-
The export columns are matched to the existing columns in the file based on the column name and the type of data
-
For numeric columns, the existing file’s decimal precision is used
-
If no columns were matched, the export aborts and informs the user in the export results.
-
If some, but not all, columns were matched the export result includes a line indicating how many columns were matched (i.e. "8 of the 10 export columns were matched and appended to the file.")
-
If all columns are matched successfully, no additional information is added to the export results.
Exporting .qvx Changes
-
When creating the numeric columns for the file, the decimal precision is obtained from the column’s format.
-
-
If the information can be obtained from the column's format, the .qvx file’s column is set to the correct precision
-
Otherwise, no formatting is specified for the column. This tells QlikView/QlikSense to display the information as it thinks best.
-
Related links
© 2025 Altair Engineering Inc. All Rights Reserved.