Create Hierarchies
Create hierarchy after importing the AD data.
The process that is followed to create new hierarchy are:
- Select AD data source - select the AD server to fetch the source data.
- Define Hierarchy - define the hierarchy as required.
- Review Hierarchy - review the hierarchy and confirm the changes.
-
Click Hierarchies tab in the Organization Hierarchy
dashboard.
Figure 1. Hierarchy 
The list of Hierarchies added is displayed. -
Click Create New Hierarchy.
The list of AD data that is imported is displayed.
Figure 2. List of AD Data Source 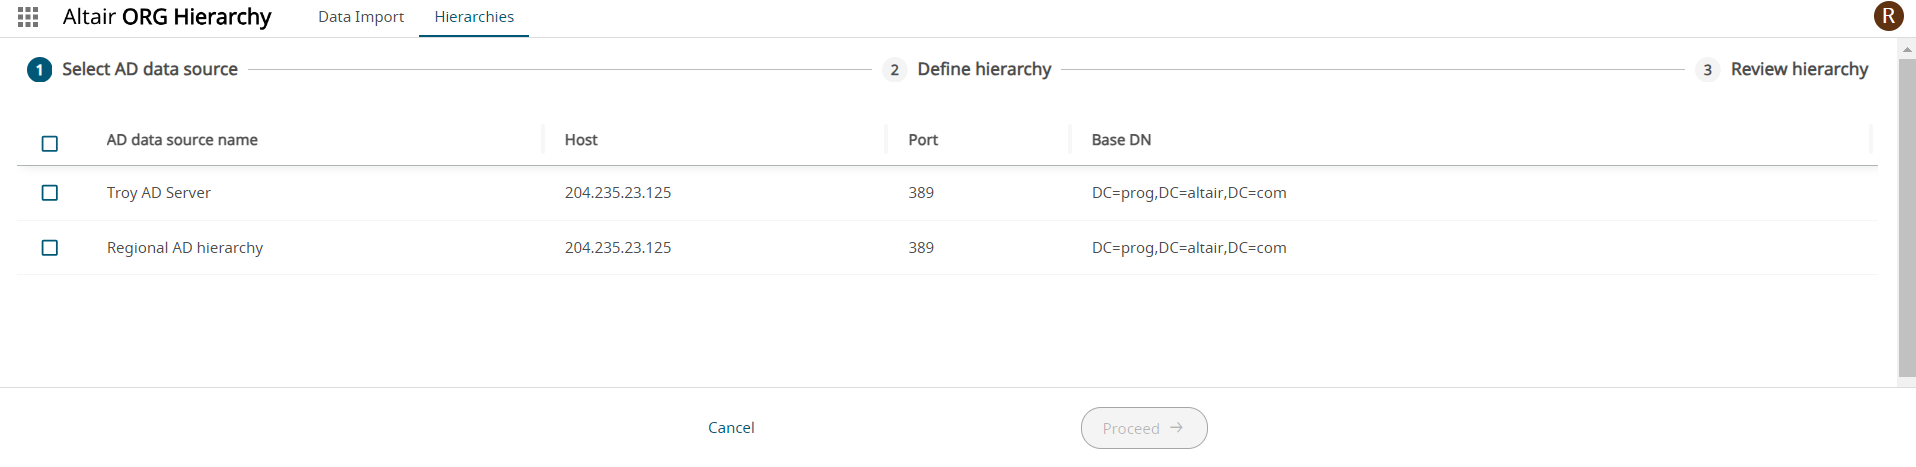
-
Select the AD data source from the list and click
Proceed.
Figure 3. Selected AD Data Source 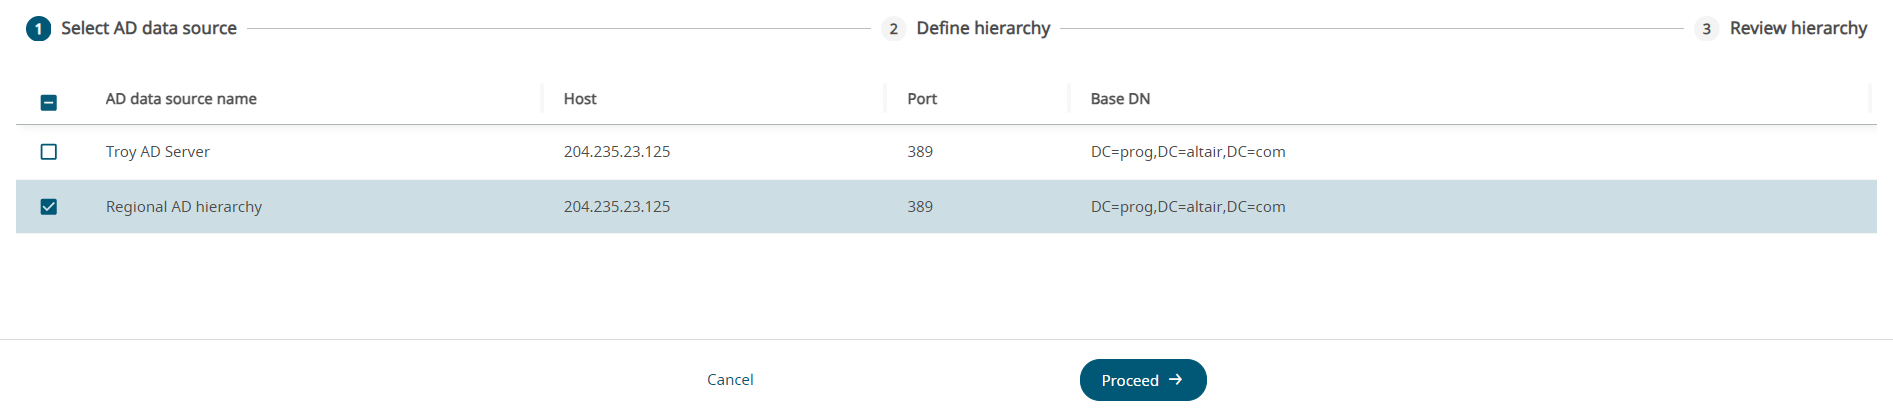
Define Hierarchy screen will be displayed with the Selected Attributes.Figure 4. Define Hierarchy 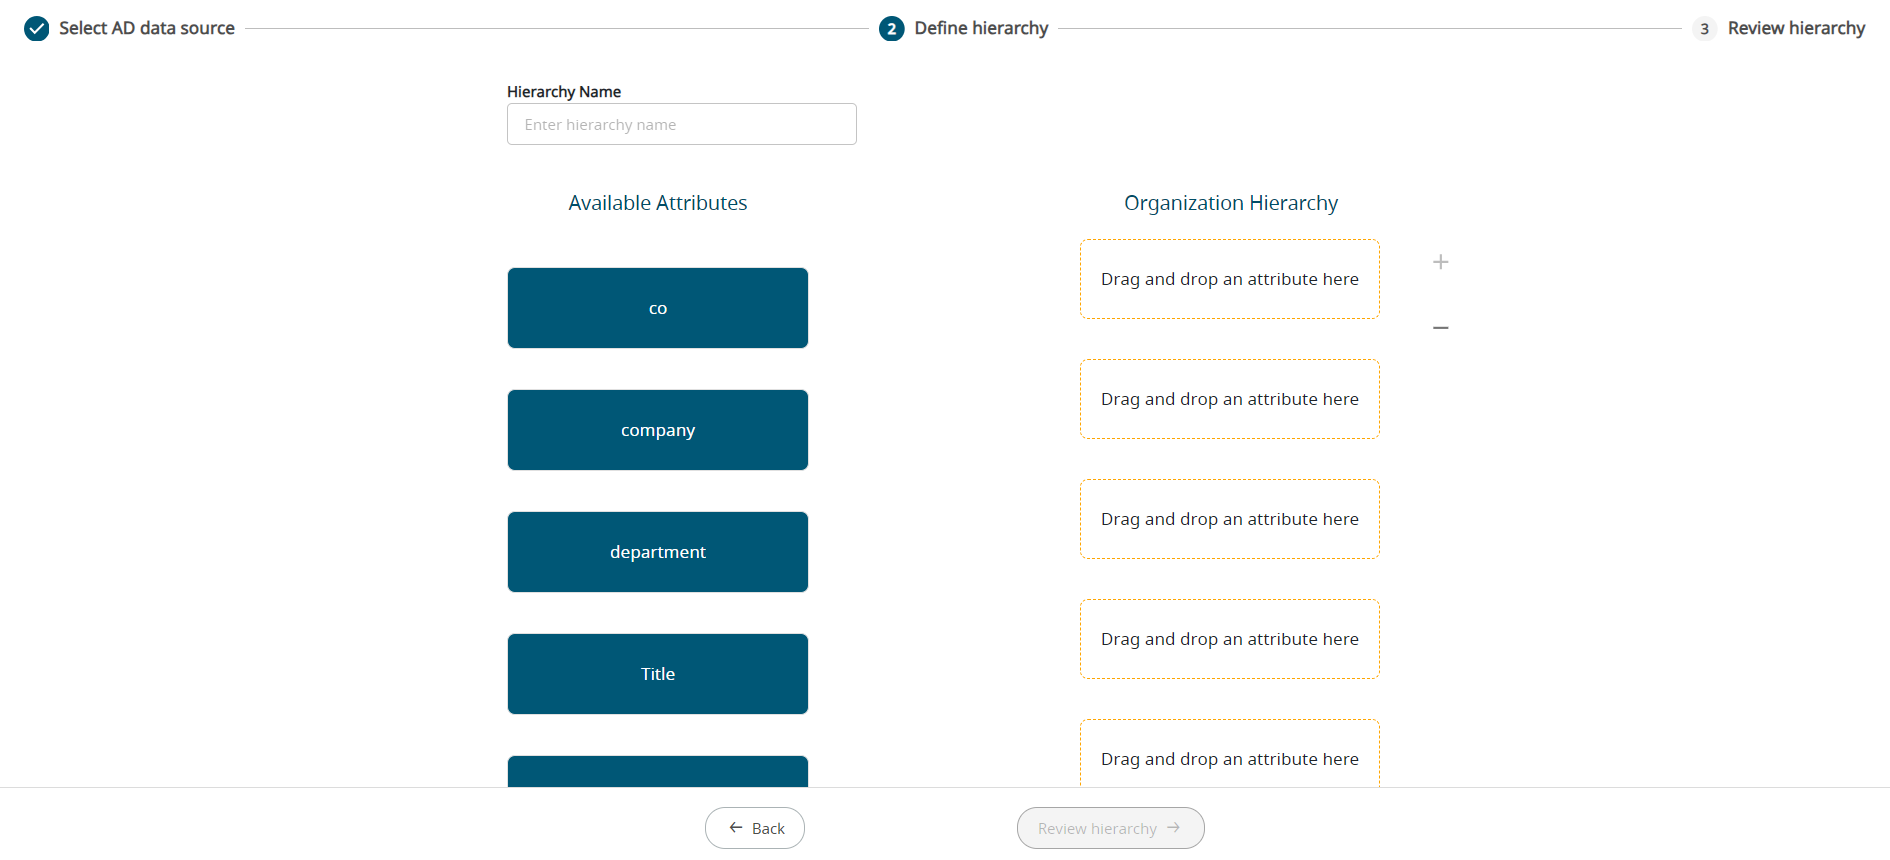
-
Drag-and-drop the attributes from the Available
Attributes to Organization Hierarchy
column.
Figure 5. Drag-and-Drop Hierarchy 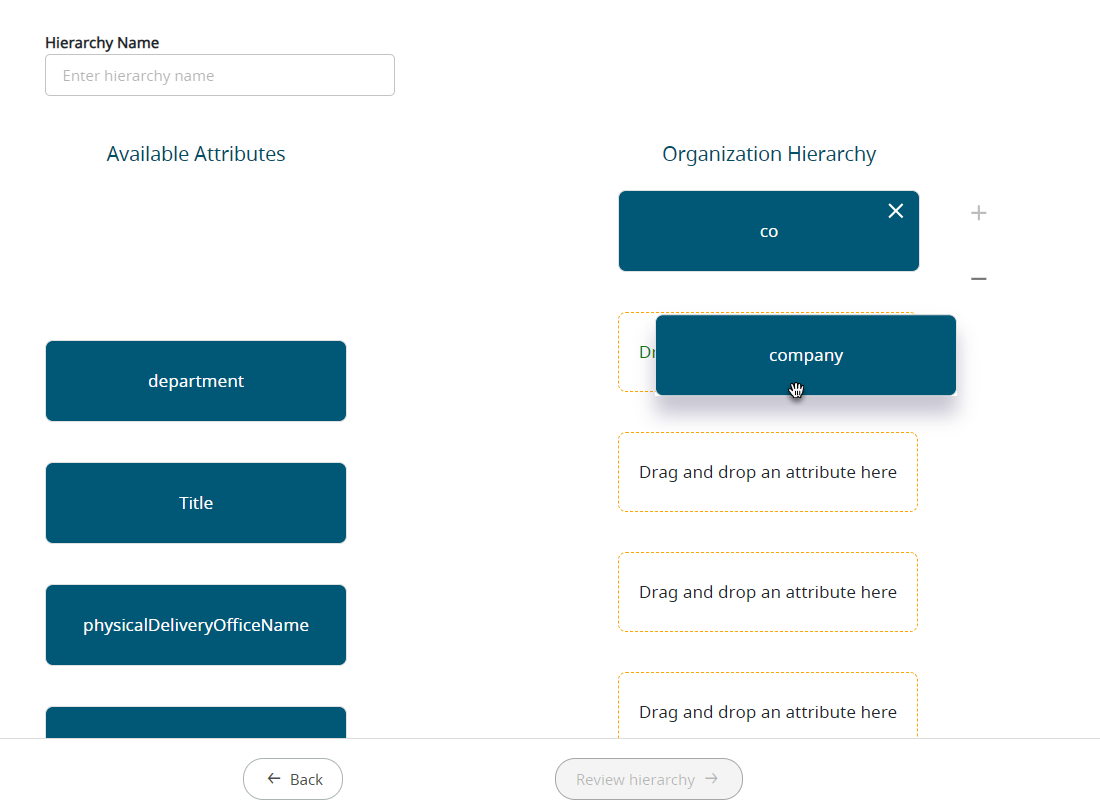
-
Review the Organization Hierarchy that is selected.
Figure 6. Organization Hierarchy 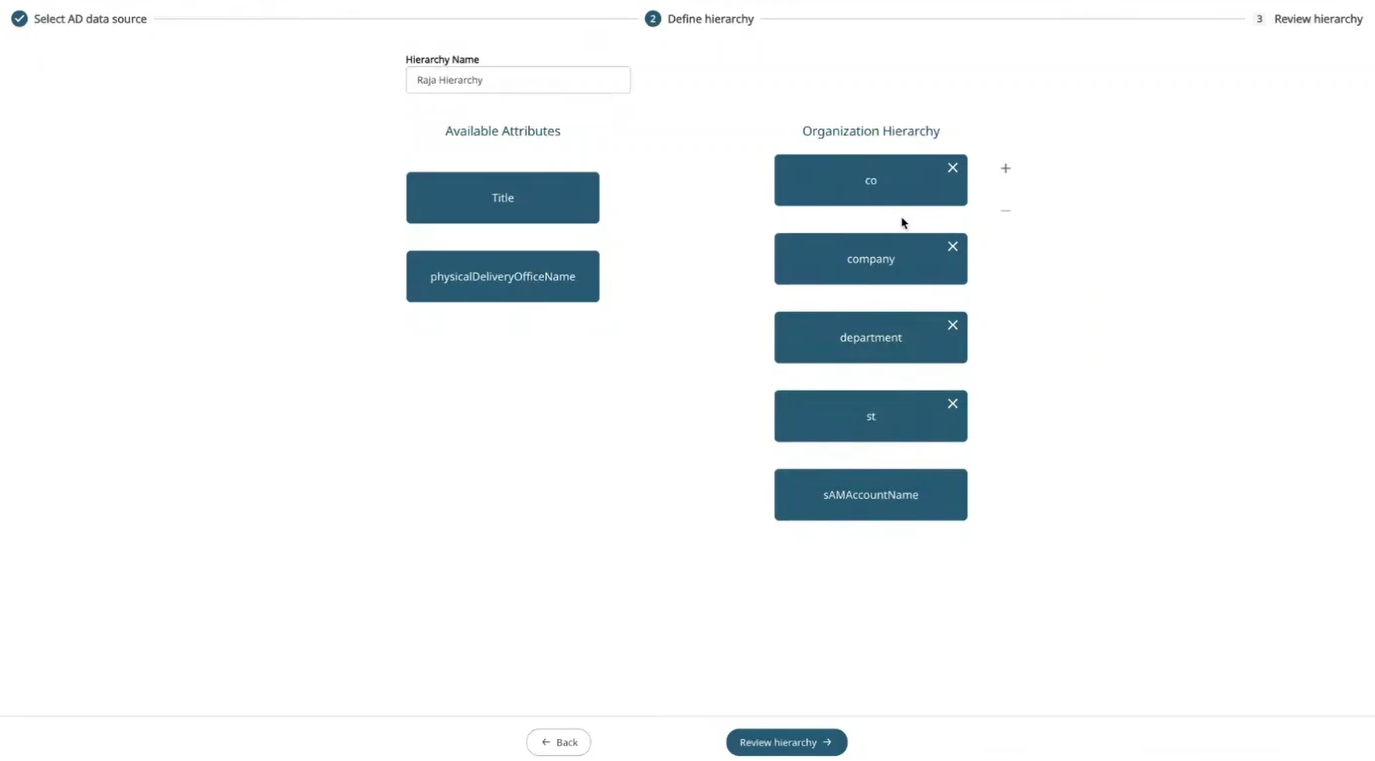
Note: Click to remove the empty boxes and
  to add the boxes.
 -
Click Review Hierarchy.
The Organization Hierarchy selected is displayed.
Figure 7. Review Hierarchy 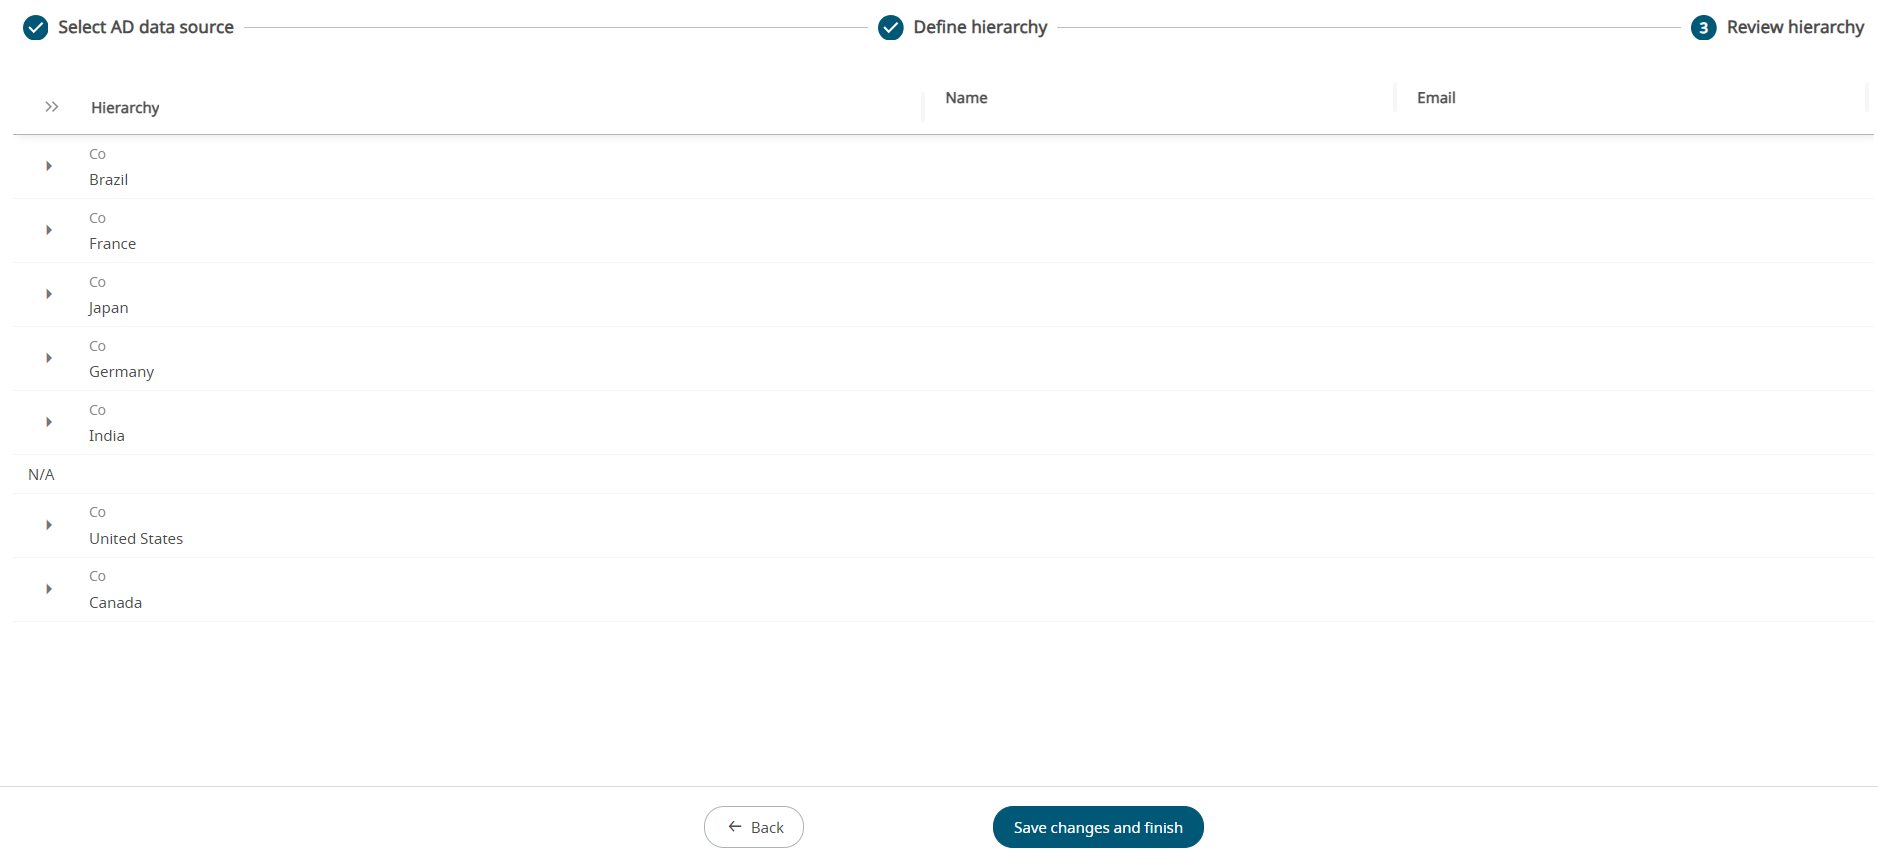
-
Click
 to expand the attributes of the hierarchy.
Figure 8. Expand Organization Hierarchy 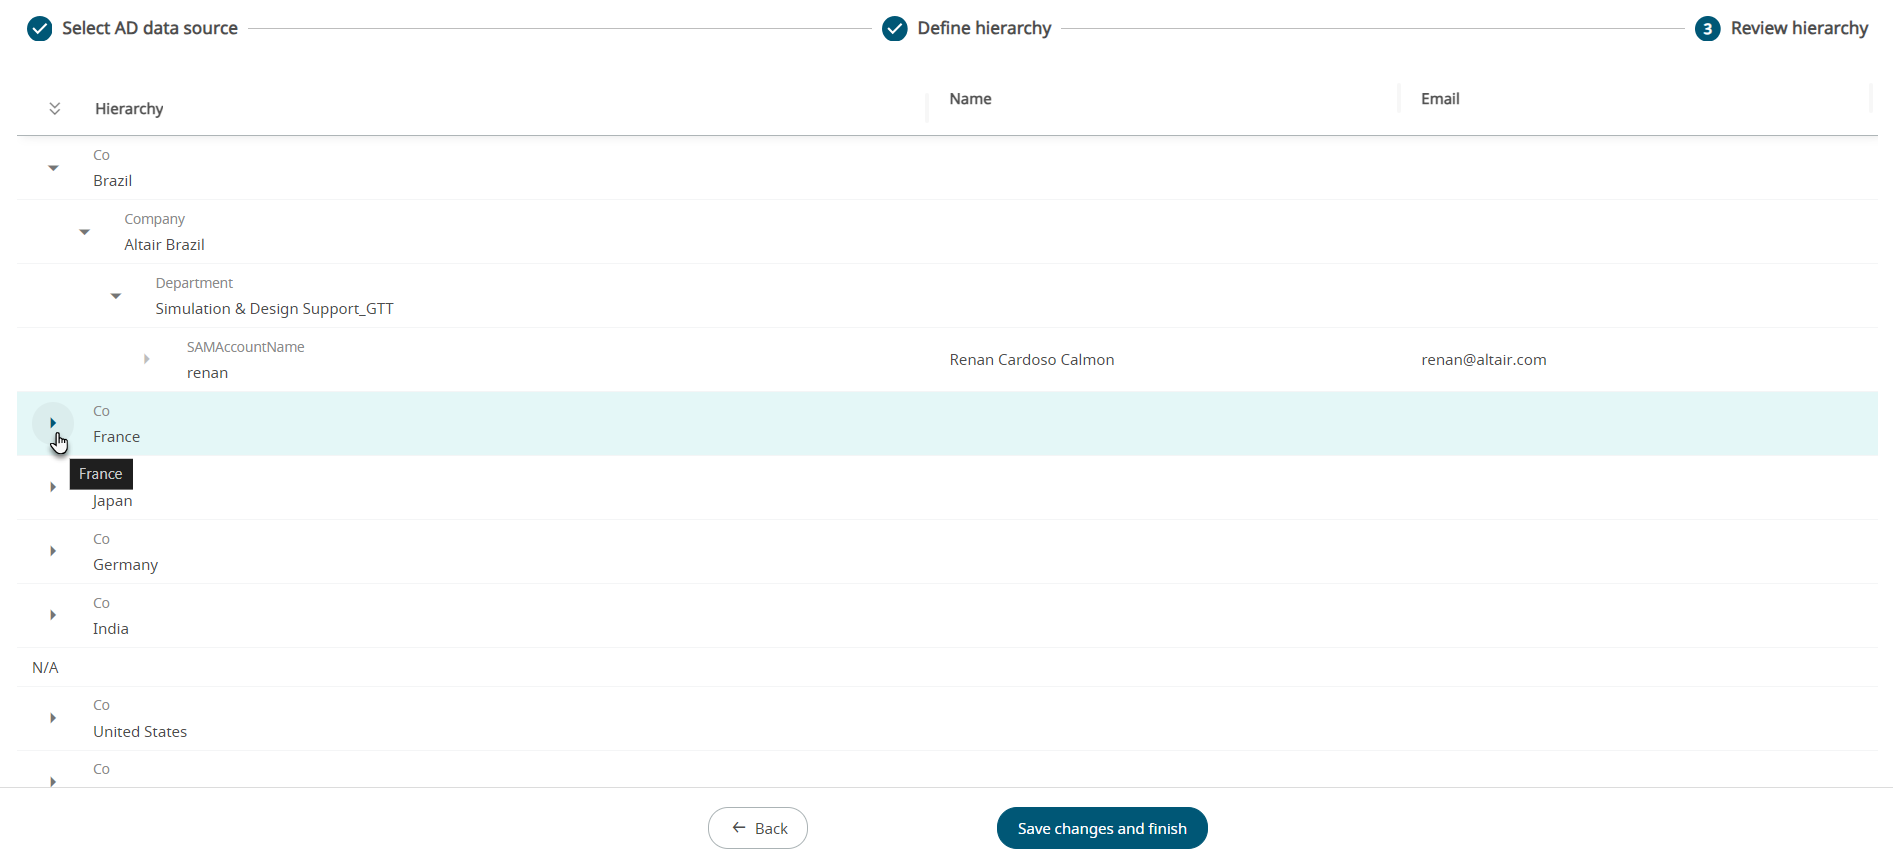
Note: Click Back to make any changes to the hierarchy list. -
Click Save Changes and Finish after reviewing the
Hierarchies.
The hierarchy will be added to the list.
Figure 9. Hierarchy List 
Note: Refreshing the reporting portal will make new hierarchies available for reporting.The hierarchy created will be displayed in:- SLUAS Module - Select Historical tab. Select
Usage by Hierarchy Report. The new
hierarchy will be listed in the drop-down menu of
Hierarchy.
Figure 10. Hierarchy in SLUAS Module 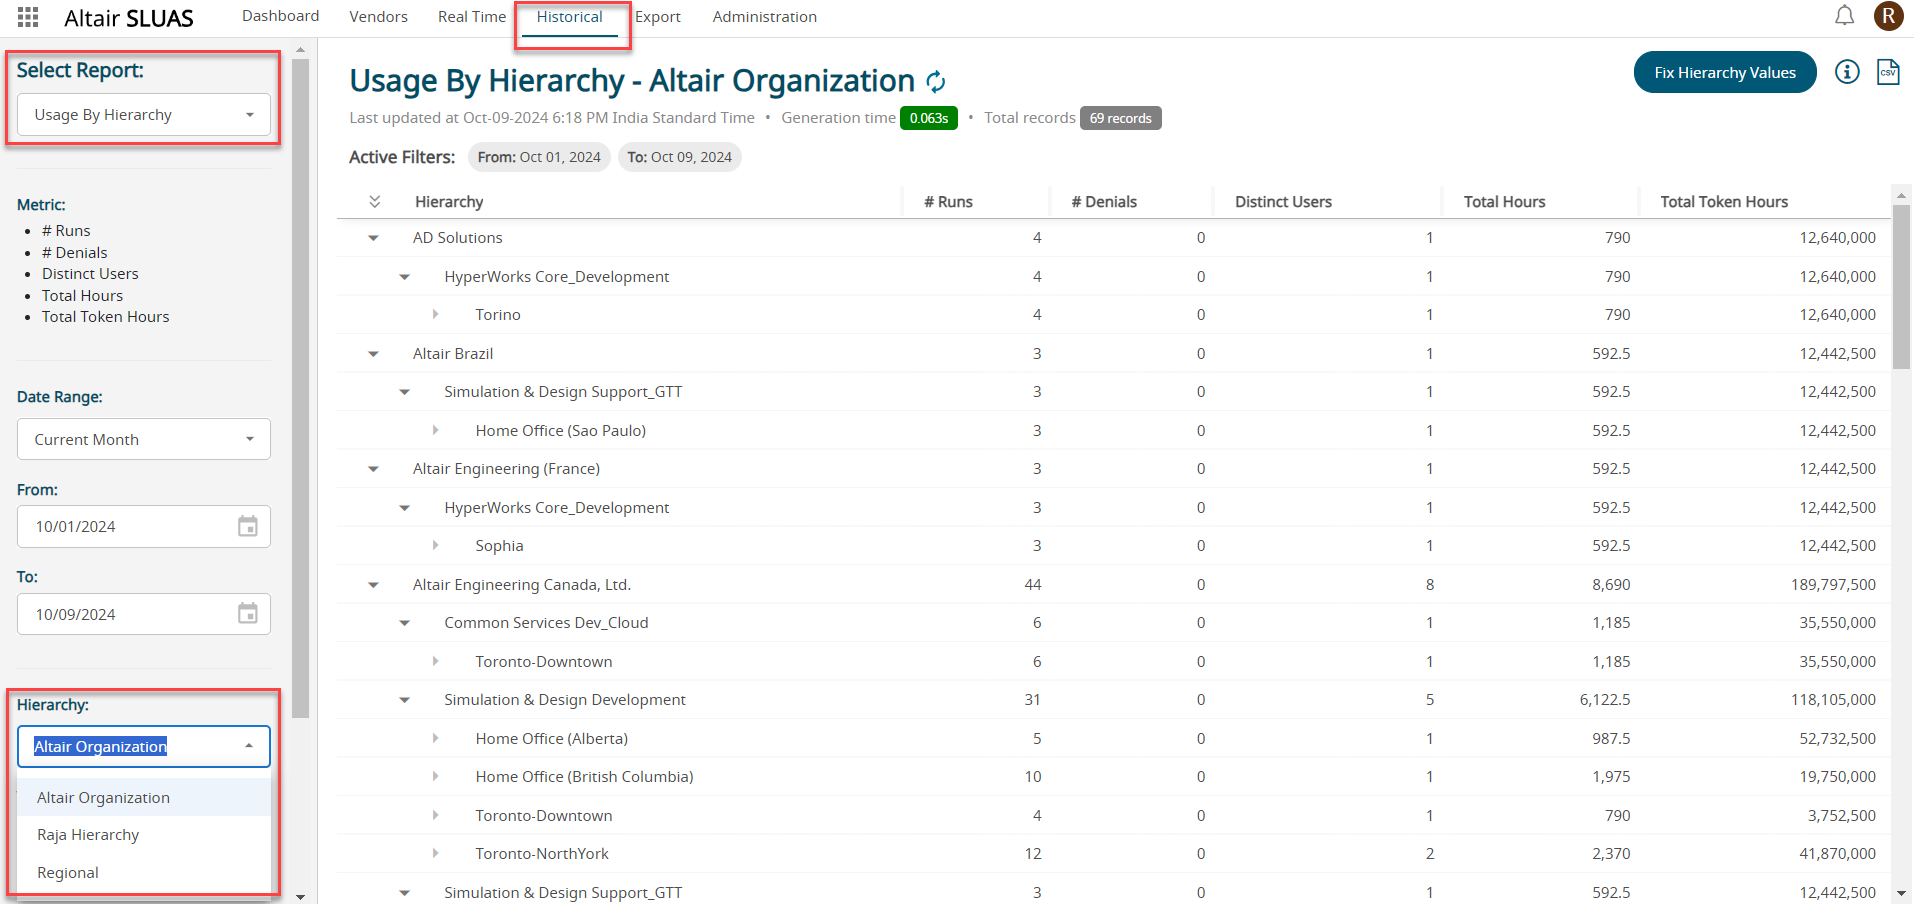
- SLUAS Module - Select Historical tab. Select
Usage by Hierarchy Report. The new
hierarchy will be listed in the drop-down menu of
Hierarchy.