Add Active Directory Server
Add Active Directory (AD) server to import the data.
- Connection Setup - connect to the AD server.
- Attribute Selection - select the attribute and modify the attribute values.
- Clean up Attribute Values - clean up the attribute values before importing the AD data.
-
Click Add New AD Server in the Organization Hierarchy
dashboard.
Setup directory server (LDAP / AD) connection is displayed.
Figure 1. Setup Directory Server 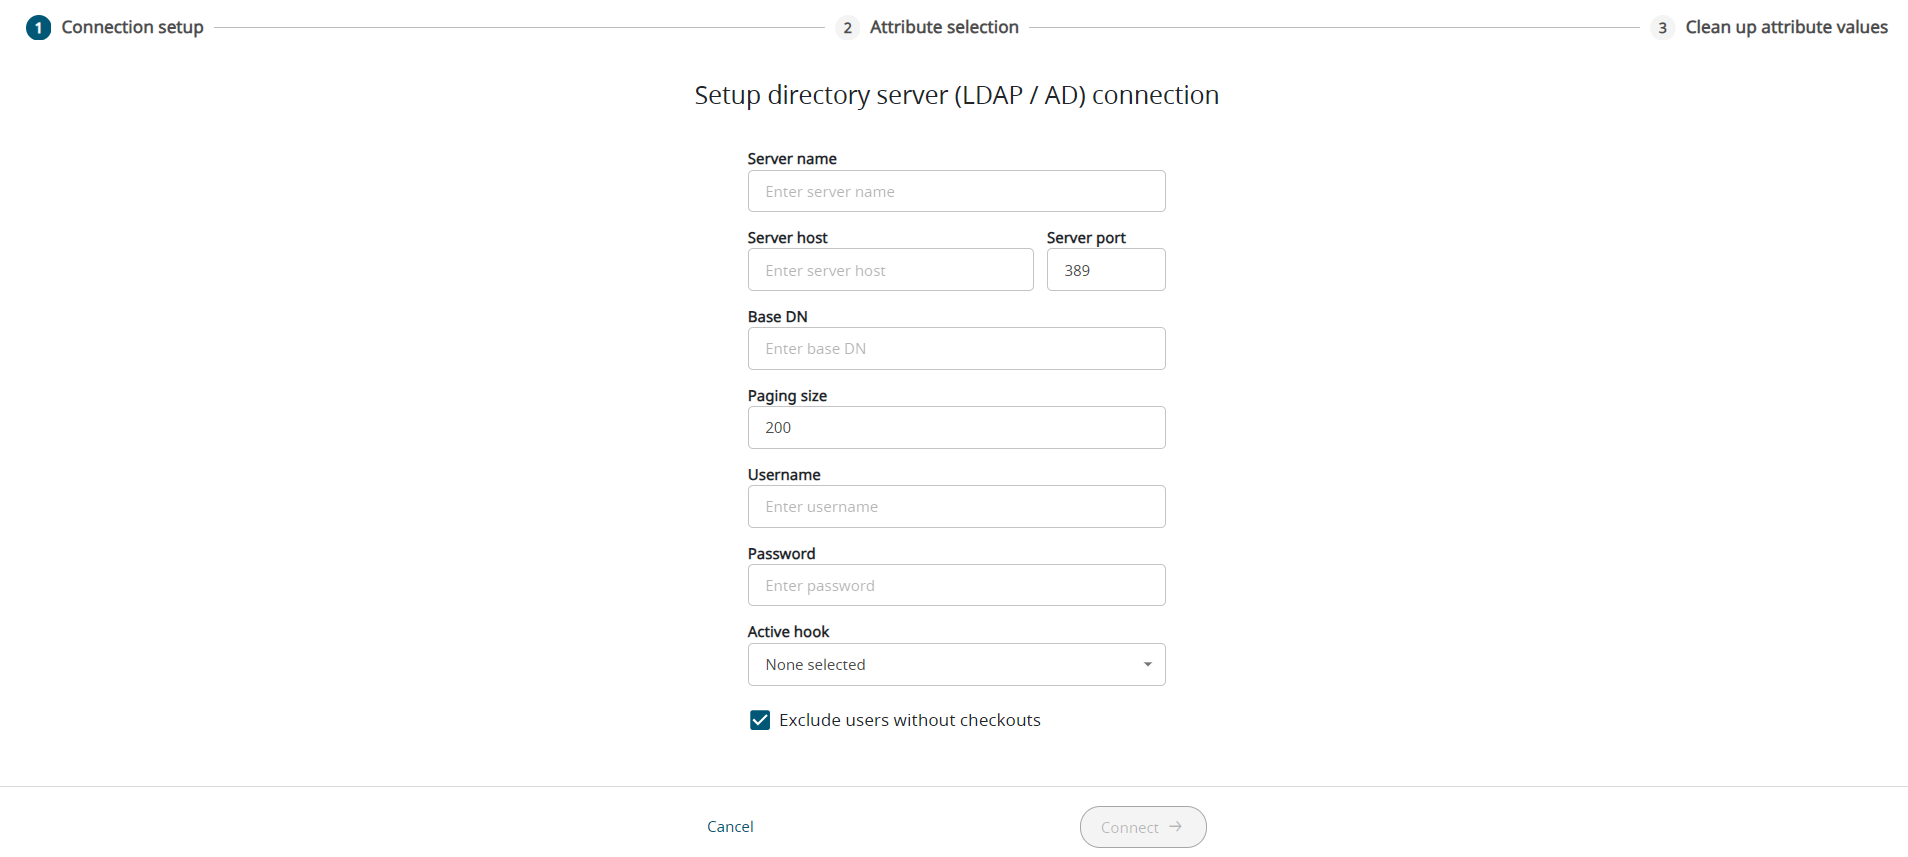
-
Enter the following details:
- Server name - Enter the server name.
- Server host - Enter the server host name or IP address.
- Server port - Enter the server port. The default port that is used to
connect to the server is 389. Note: Ensure the server host and port number provided is accessible.
- Base DN - Enter the base Distinguished Name (DN) to identify the entry
in the AD. The users list should be available in the base DN
provided.
For example, the base DN format to be entered is as follows: DC=prog,DC=<company name>,DC=com.
- Paging Size - Enter the paging size of the users list to be displayed from the AD.
- Username - Enter the AD server user name credential.
- Password - Enter the AD server password credential.
- Active hook - Select the hook that is created from the drop-down list.
- Exclude users without checkouts
Figure 2. Setup Directory Server - Details 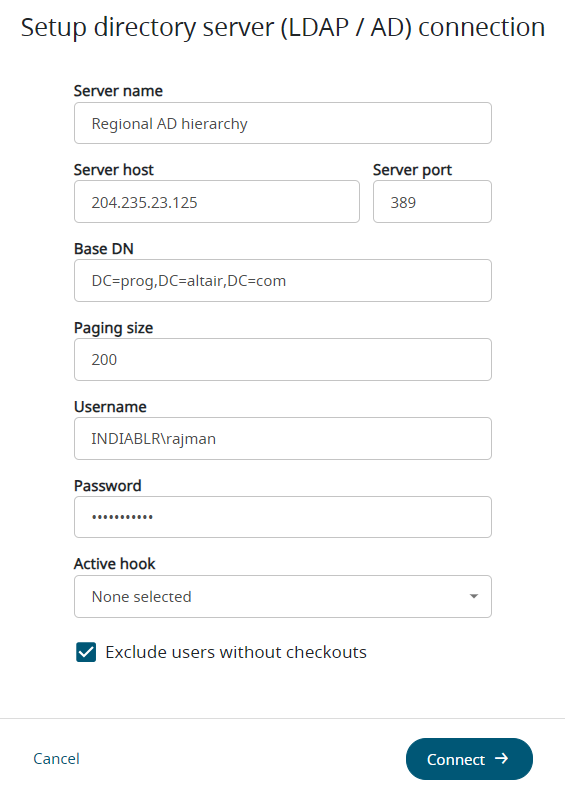
-
Click Connect.
The AD server will be connected and the data will be fetched.
Figure 3. AD Server Details 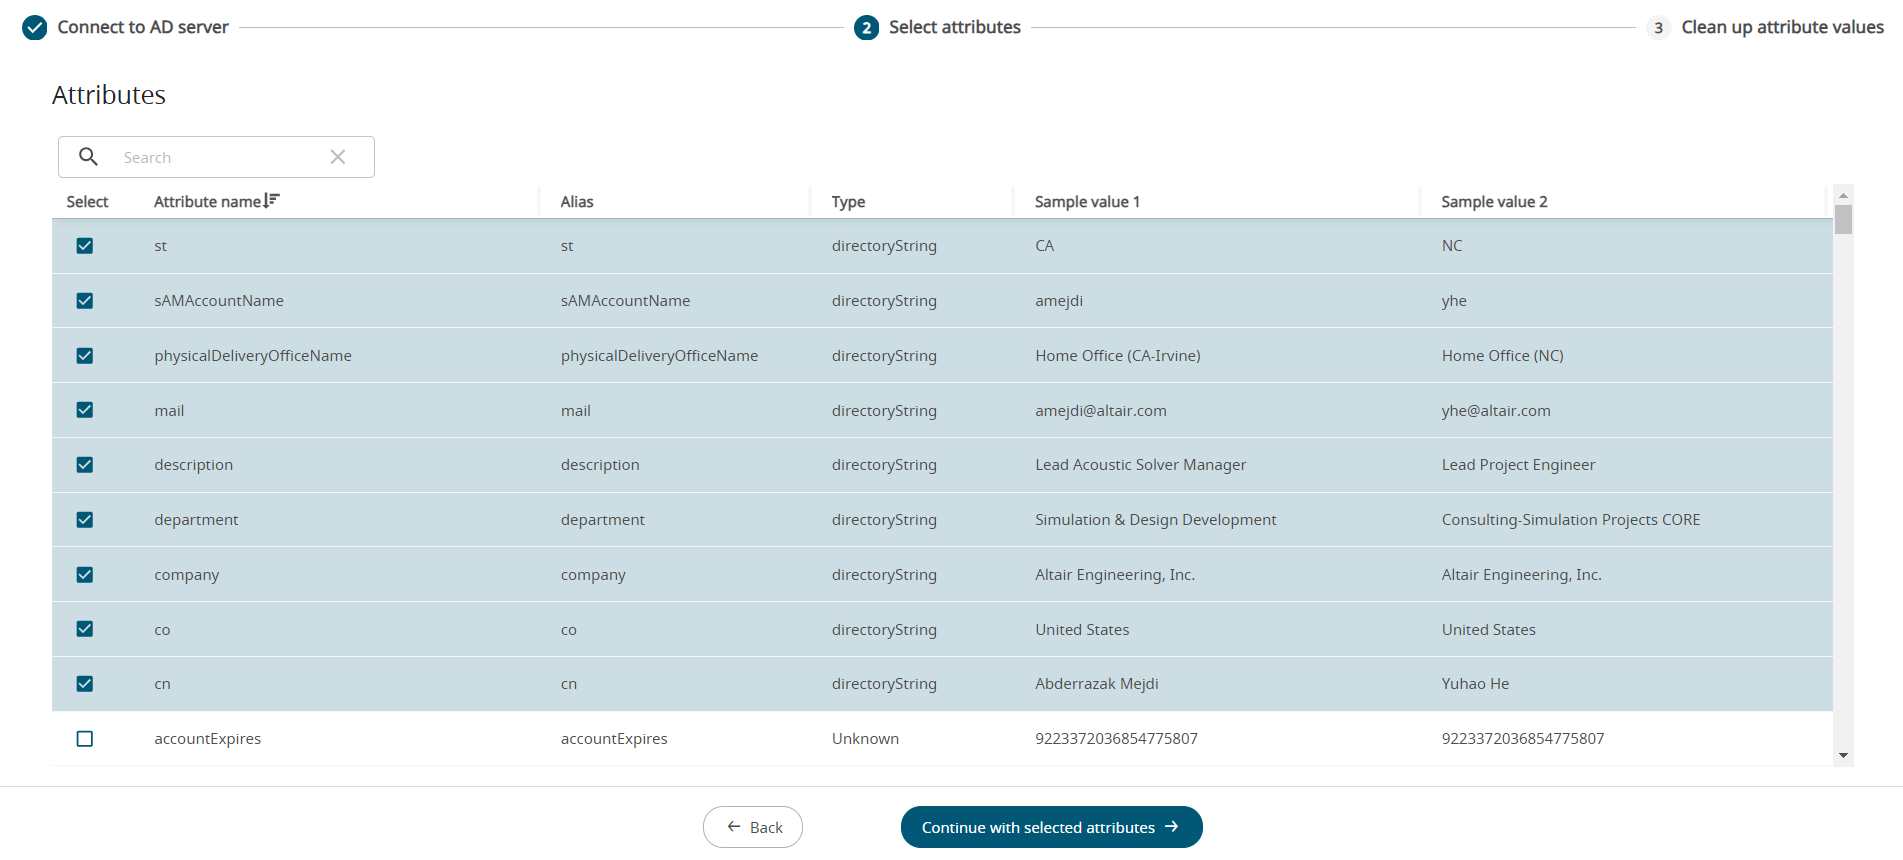
The complete data from the AD will be listed. Some of the data will be pre-selected based on the criteria that is set. Apart from the pre-selected data, it allows you to select other attributes to be added in the hierarchy.
Note: You cannot remove the pre-selected data from the list.Sample values of the attributes from the AD are displayed in the list.Figure 4. Attributes Sample Values 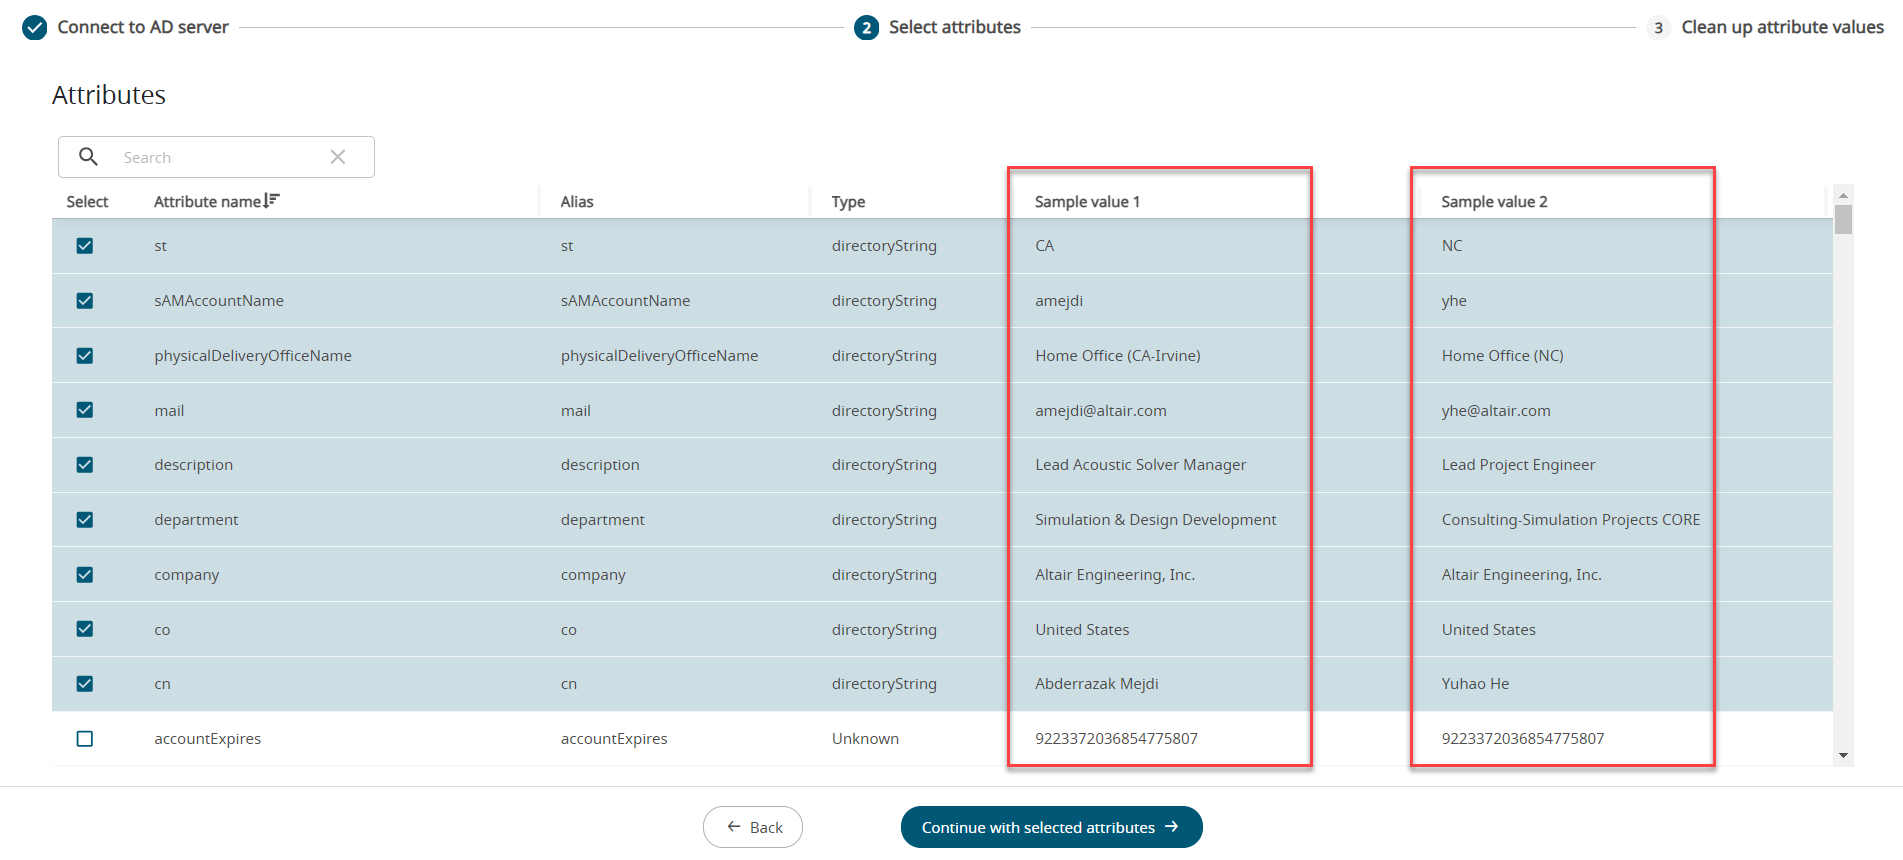
-
Double-click the Alias field to update the alias value of the attribute.
Figure 5. Update the Values 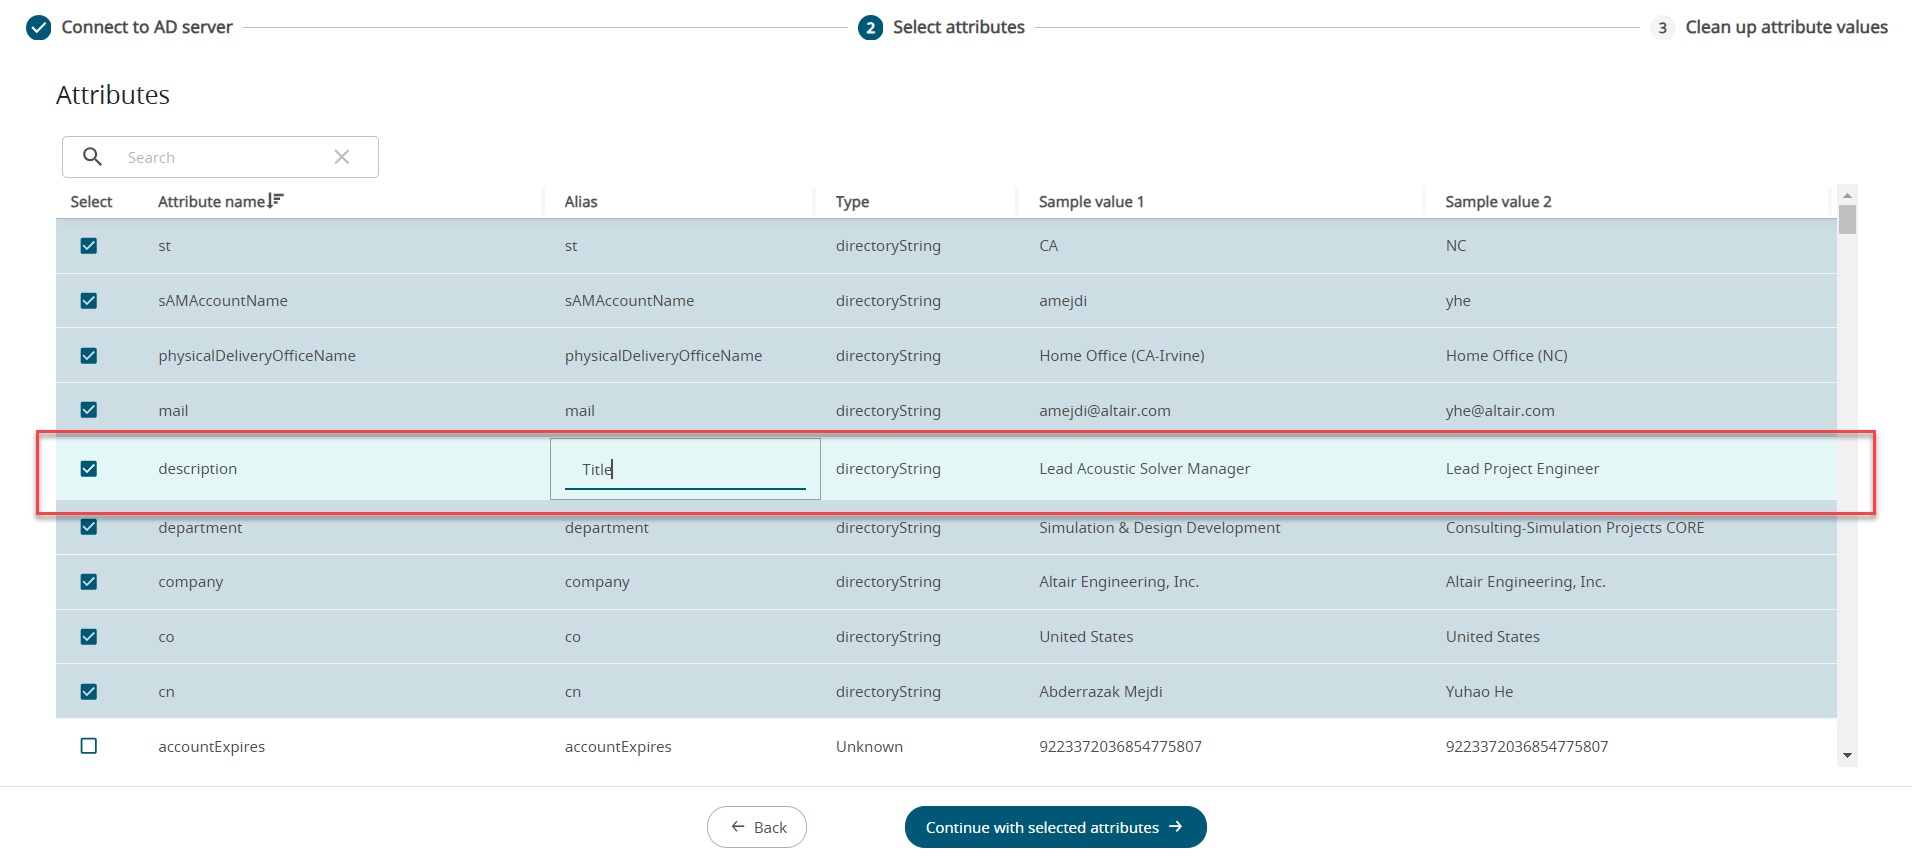
-
Click Continue with Selected Attributes.
Figure 6. Selected AD Attributes 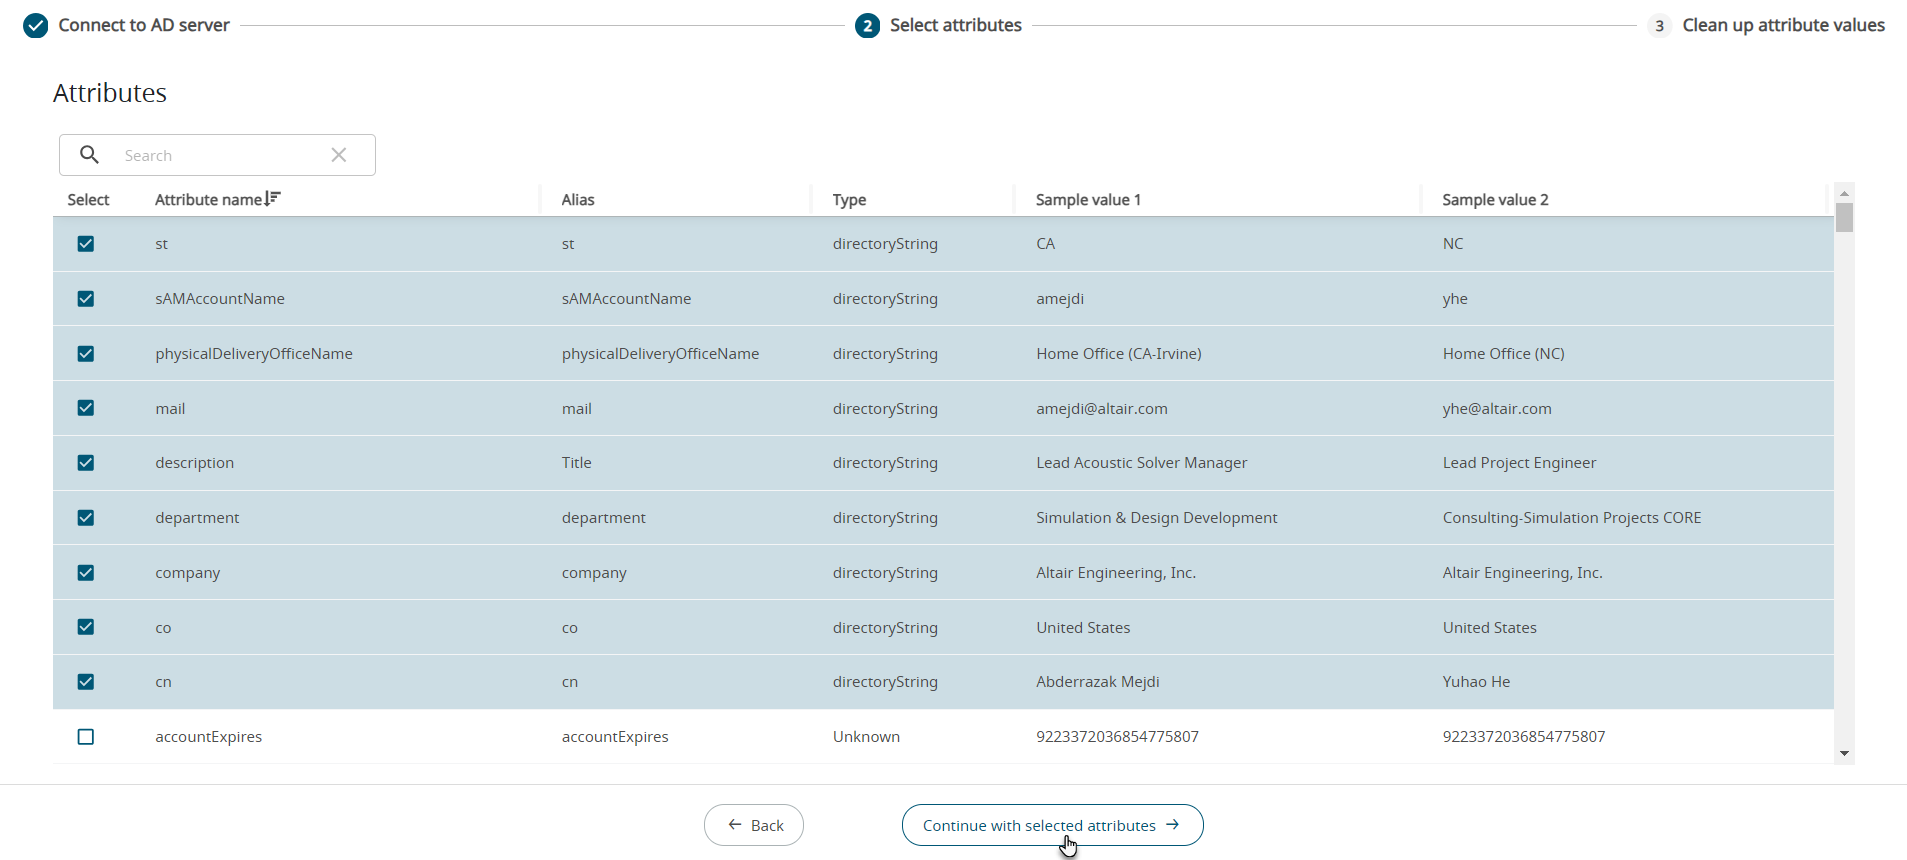 Attribute values cleanup list will be displayed.
Figure 7. Attribute Values Cleanup 
The list provides Raw AD attribute values from the AD and the Cleaned up attribute aliases.
Note: The Value column is from the Active Directory. The Alias column value will be imported and used in all the reports.The message to clean up the attribute alias data before importing the AD is displayed at the top of the screen.Please fix below empty data issues before proceeding further There are empty values for attribute 'cn' There are empty values for attribute 'co' There are empty values for attribute 'company' There are empty values for attribute 'department' There are empty values for attribute 'description' There are empty values for attribute 'mail' There are empty values for attribute 'physicalDeliveryOfficeName' There are empty values for attribute 'st'
Select the attributes one-by-one and update the values before importing the data.
-
Select co (Country) attribute from the drop down list.
Figure 8. Select an Attribute to Clean up 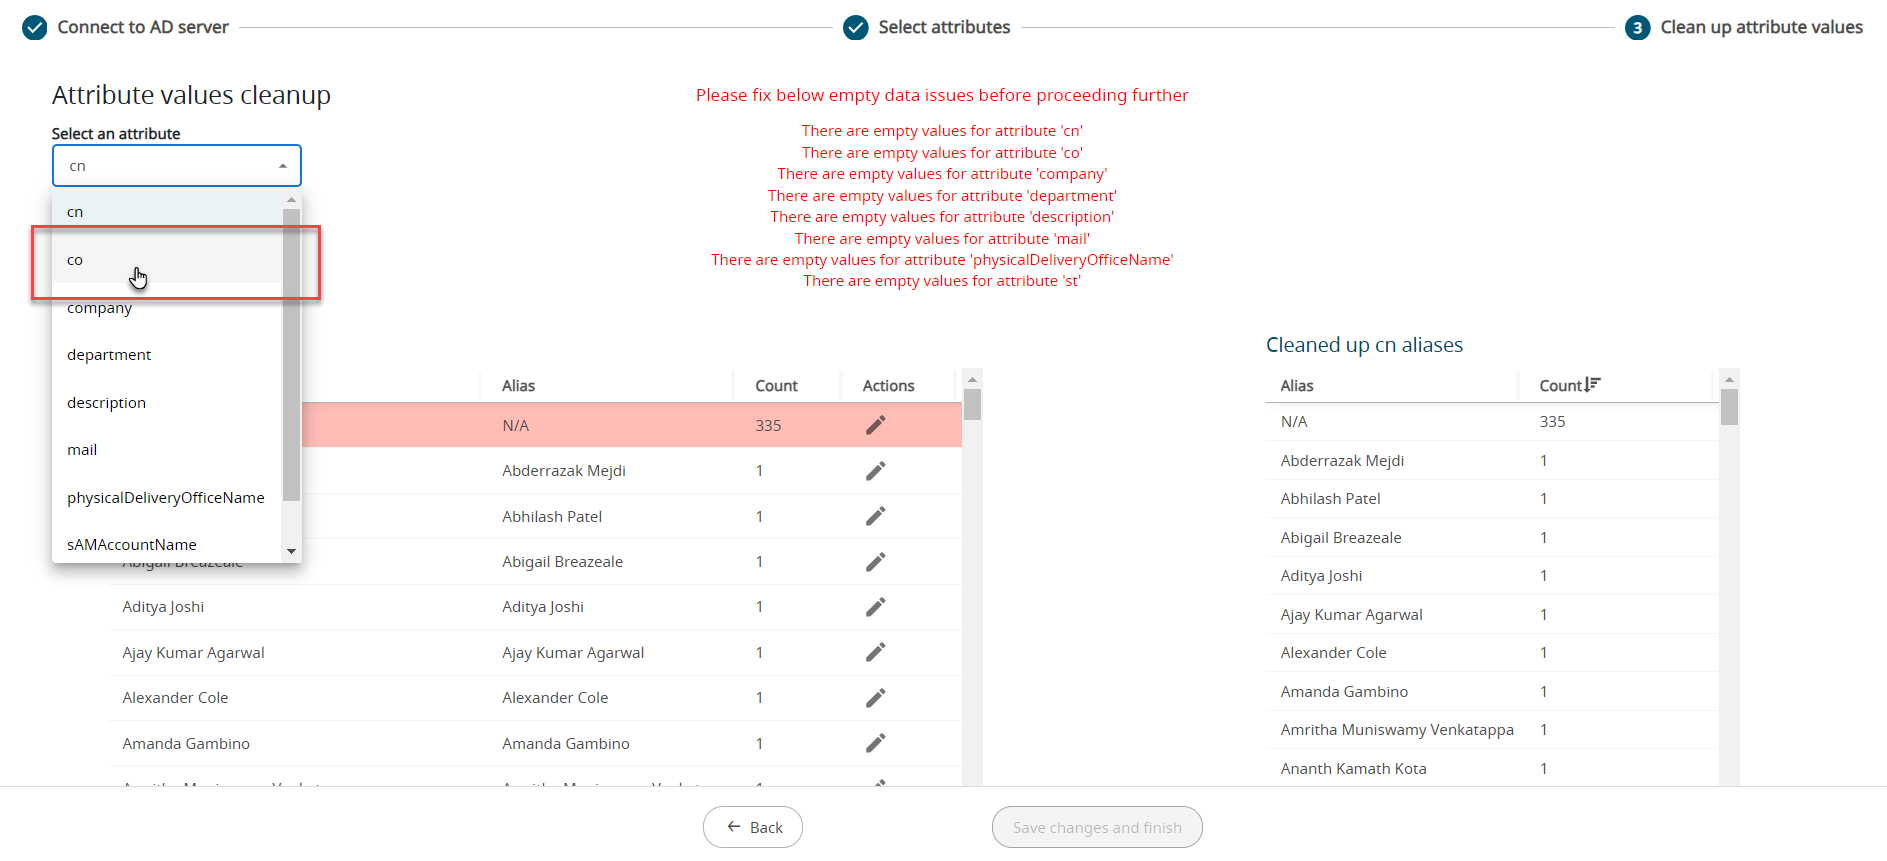
The raw AD data attribute CO value list is displayed.Figure 9. CO Attribute List 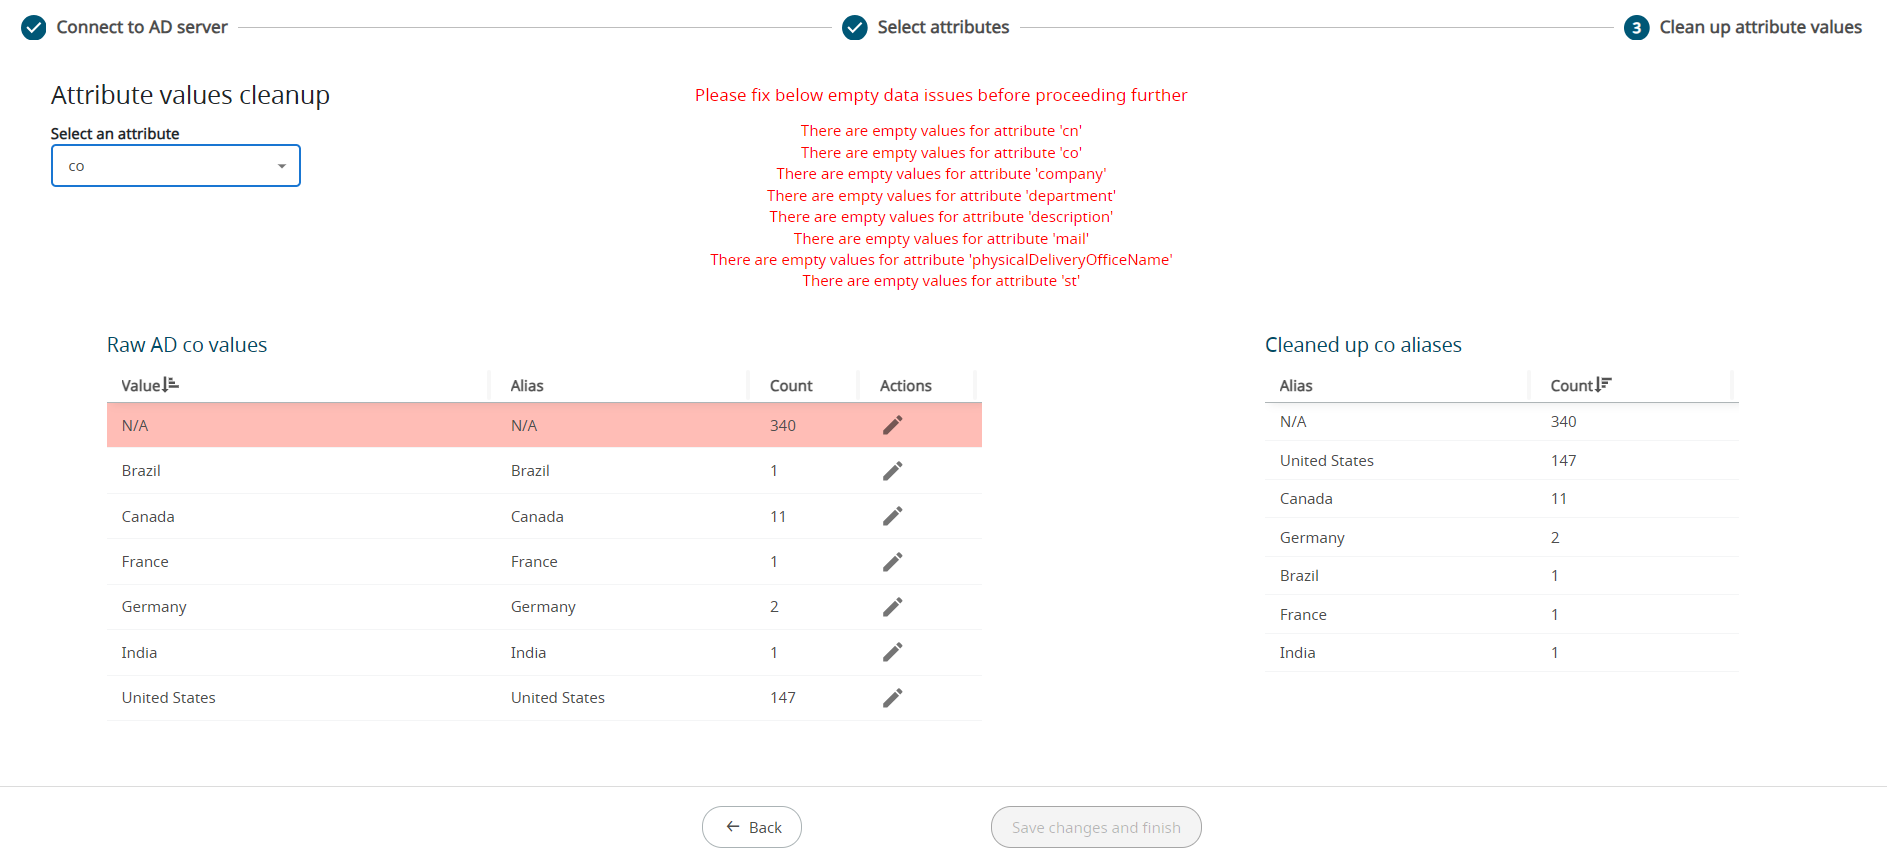
In this example, the count of the co (Country) attribute indicates that there are 340 records where the value specified is N/A. -
Update the Alias values of the attributes using one of the following
choice:
- Click Alias column of the
N/A row and update the value for all the
N/A attributes globally.
Figure 10. Edit Attribute Values Globally 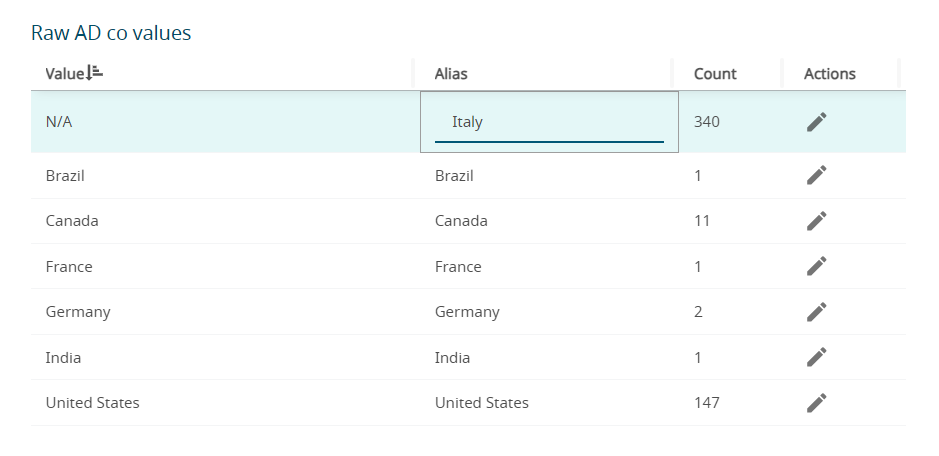
- Click
 .
.Figure 11. Edit Attribute Option 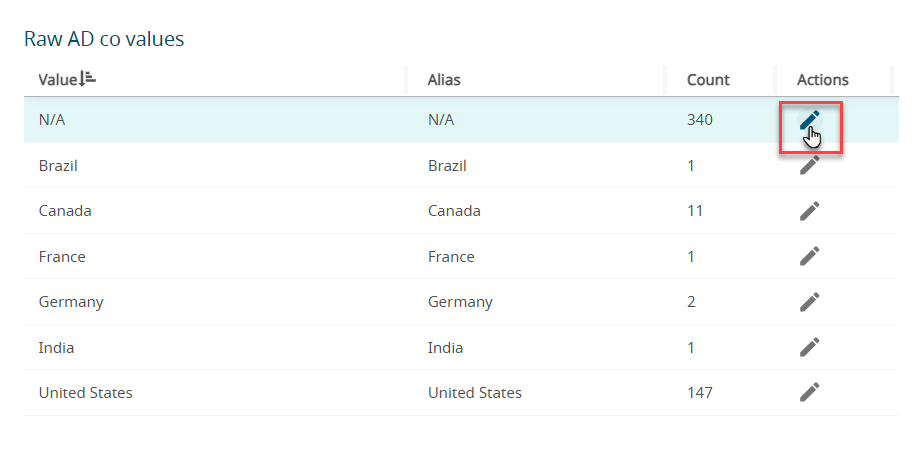
The Edit Raw AD Values window is displayed with the list of attributes that has empty values.Figure 12. Edit Raw AD Values 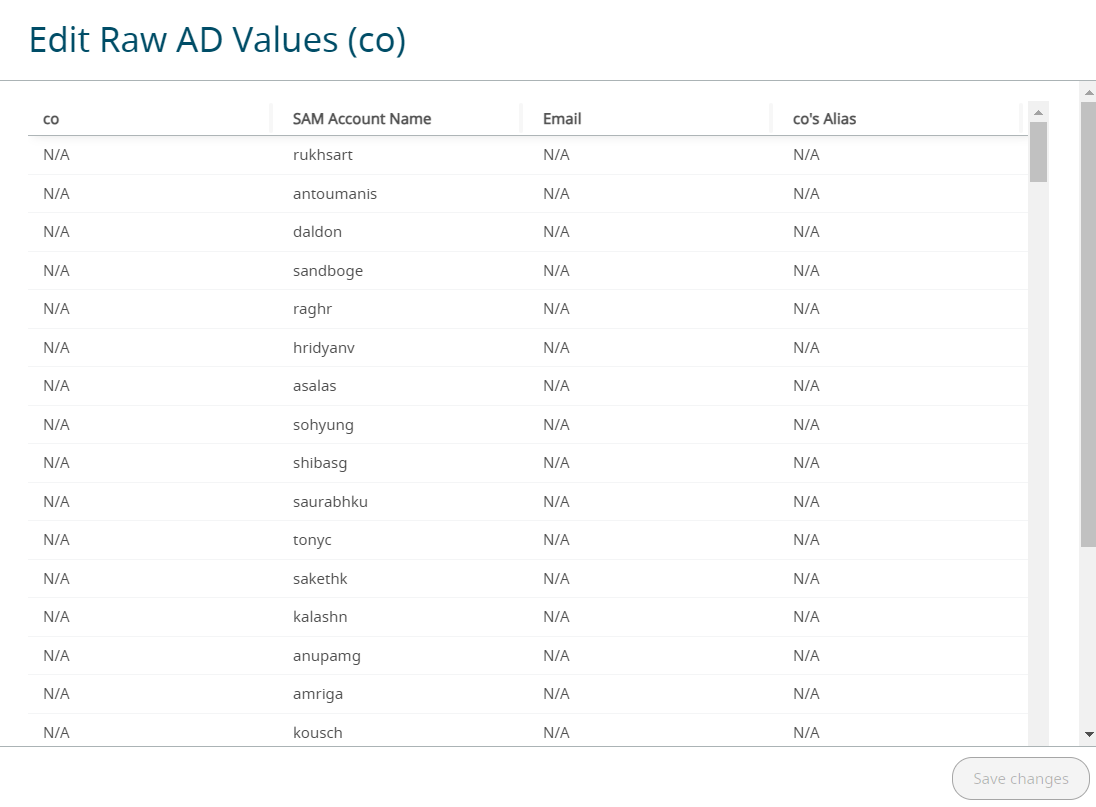
Update the Alias parameter values individually.Figure 13. Update Raw AD Values 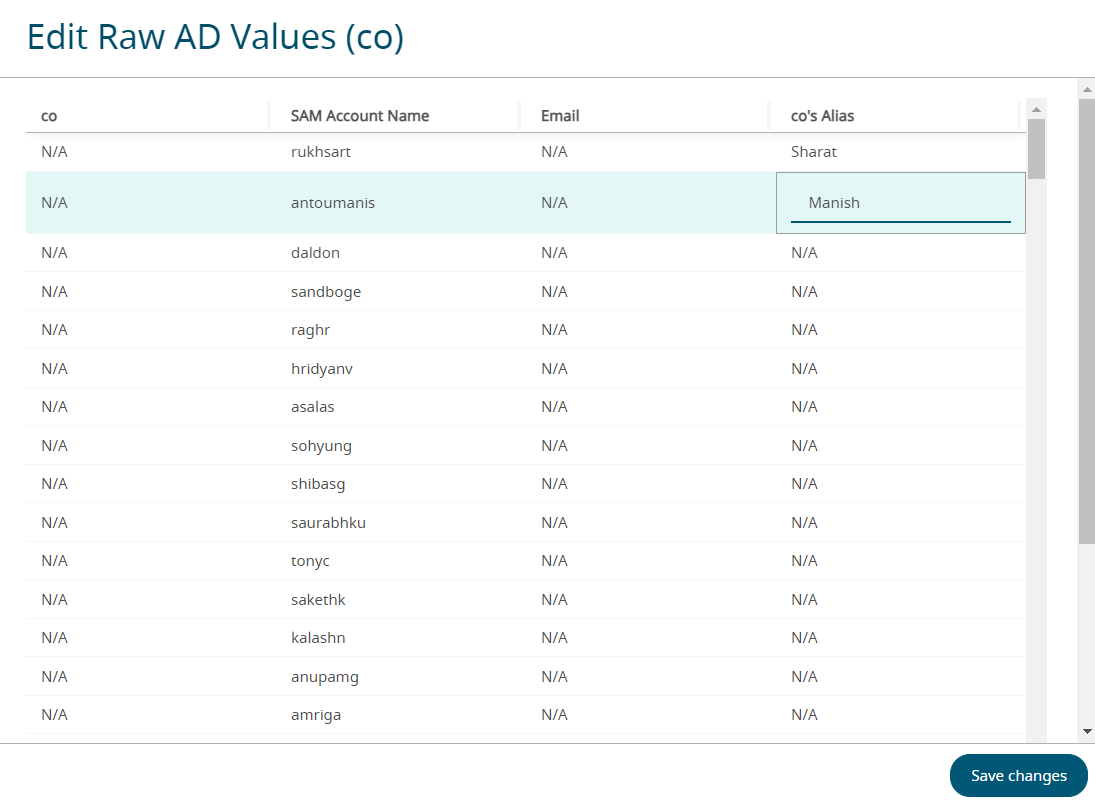
The changes to the attributes values are in the local copy of the AD directory.Tip: It is recommended that the updates are done individually for each attribute, so that it is verified before it is used in the reports. - Click Alias column of the
N/A row and update the value for all the
N/A attributes globally.
-
Click Save Changes.
The updated Raw AD Values is displayed.
Figure 14. Updated Raw AD Values 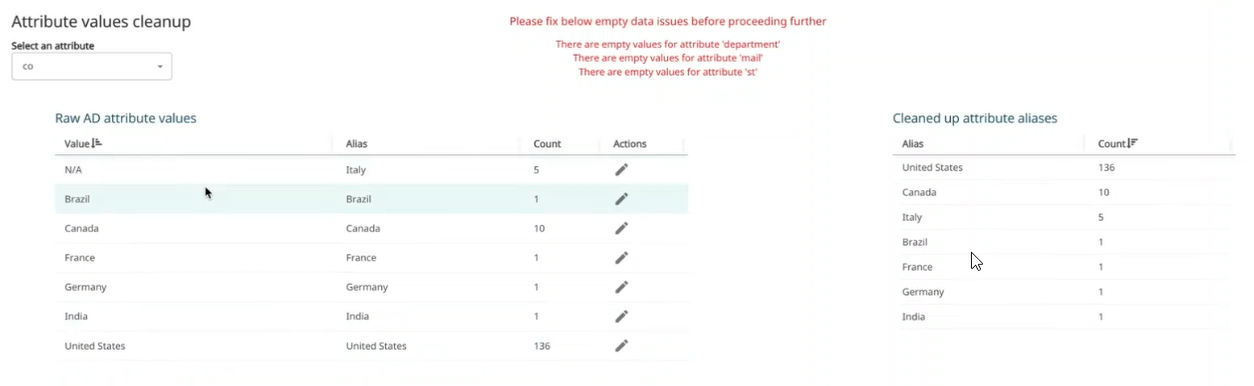
Similarly, update the alias values for all the attributes.
Note: We create a copy of AD data and perform all the user suggested updates on our local copy. No changes are done to the Active Directory (AD). -
Click Save Changes and Finish to add the AD server.
Figure 15. Add Active Directory 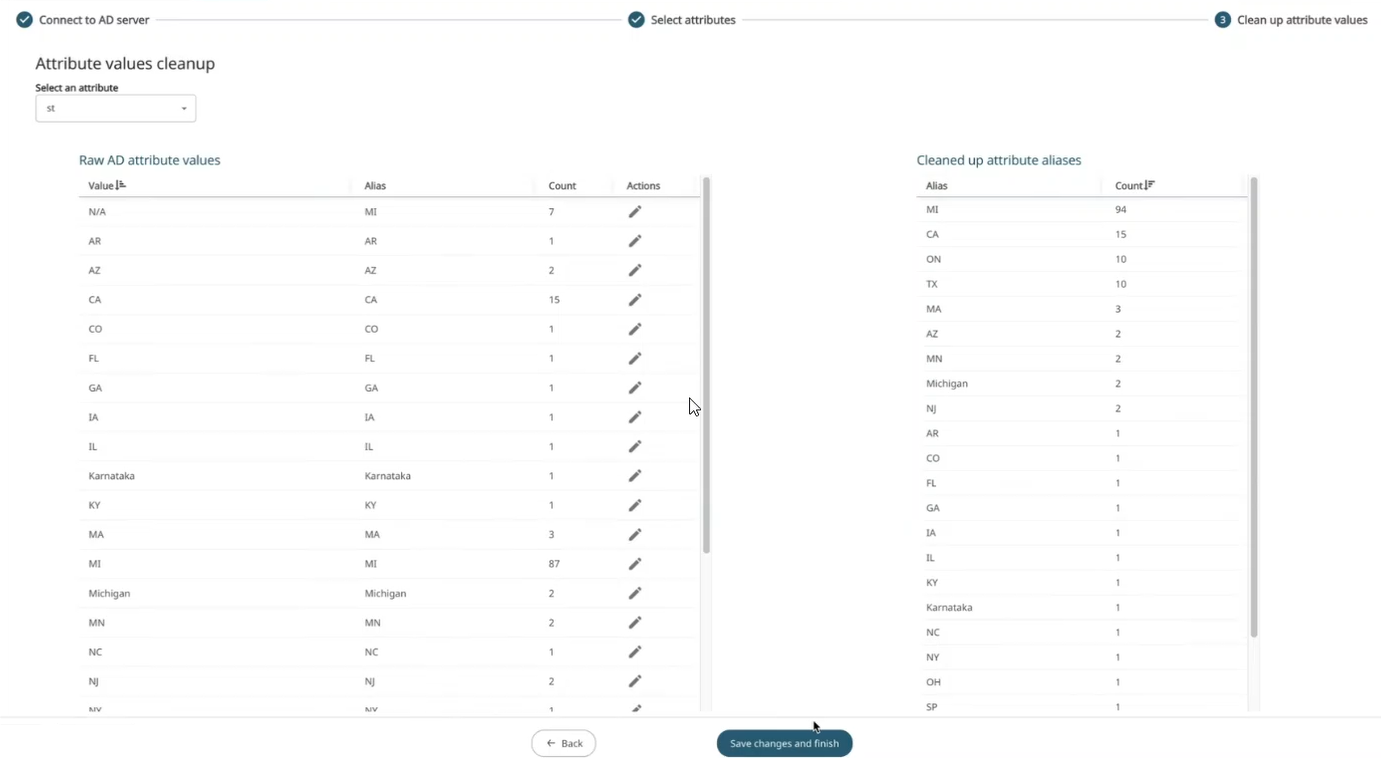
The AD server will be added.Figure 16. AD Server - Added 