
Define Wind Tunnel
Use the Edit Tunnel tool to define the size of the wind tunnel.
-
From the Setup ribbon, click the Edit Tunnel tool.
Figure 1. 
-
Edit the wind tunnel's height, width, and length in the microdialogs that appear in the modeling window.
Figure 2. 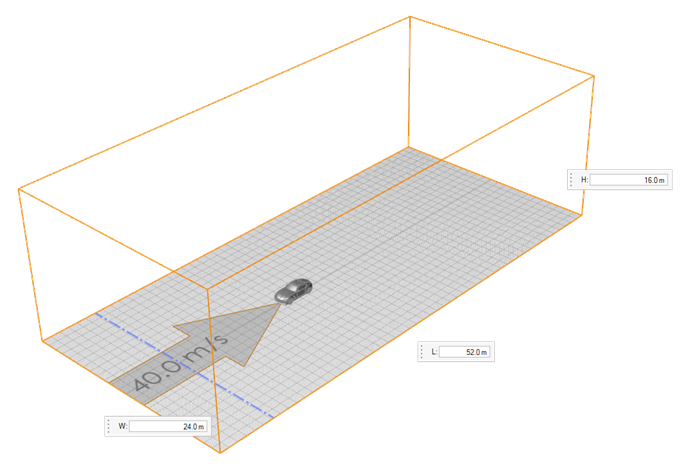
-
Edit the inflow velocity and tunnel extent properties in the modeling window.
Tip: You can also define inflow velocity by double-clicking the large arrow at the bottom of the tunnel and entering a value in the microdialog.
- Optional: Select the boundary layer suction line in the modeling window and turn the boundary layer suction off in the microdialog.
- Optional: Select the boundary layer suction line in the modeling window and define the location reference in the microdialog.
-
Edit the boundary layer suction by selecting the boundary layer suction line in
the modeling window and completing one of the
following:
- Enter a distance value in the microdialog.
Figure 3. 
- Click
 in the microdialog and drag the boundary layer
suction line.
in the microdialog and drag the boundary layer
suction line.
Figure 4. 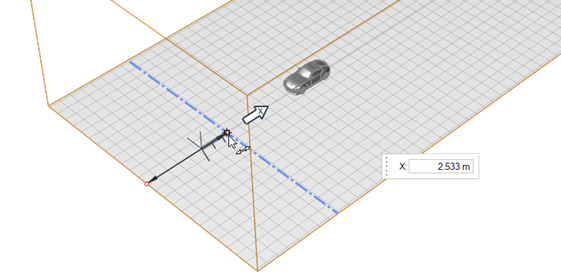
- Optional:
Define Ground Configuration properties (among others) in the Property
Editor panel.
-
Define ground configuration properties, including:
- Enable BL (boundary layer) Suction.
- Location reference.
- Distance.
- Enable Ground Patch: Create a finite
ground patch with a no-slip boundary condition around the car
instead of the entire wind tunnel floor.Note: When a ground patch is enabled, it will become visible in the model window.
- Length: sets the length of the ground patch behind the car as a ratio of the car's length.
- Width: sets the width of the ground patch on either side of the car as a ratio of the car's width.
Figure 5. 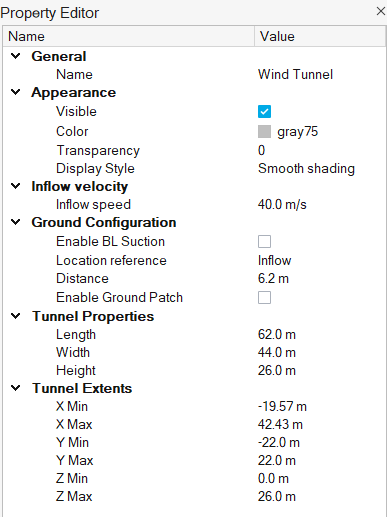
- Enable BL (boundary layer) Suction.
-
Define ground configuration properties, including:
- Optional:
Configure thermal properties in the Temperature BC section
of the Property Editor.
Note: Activate thermal functionality by enabling Thermal Model in the Run dialog.
- Define the Inlet temperature.
- Select a BC Type (boundary condition), between Adiabatic and Temperature. If Temperature, define the temperature.
- Engage inlet or outlet Absorbing BC. This absorbs pressure fluctuations through the boundaries, reducing transients.