Submit a job by selecting an input file from your mounted location in Windows
Explorer.
The job is submitted to the selected appliance. You can view the job results using
Altair Drive. After the job is
complete, a folder with the name of the input file is created and the result files are
copied to it.
Run a simulation job by selecting your input files from Altair Drive and choose a solver in the Altair One Desktop
appliance. Use the Altair One Custom appliance to launch an application remotely in
your browser to view your model output result files.
Your mounted files location is displayed in Windows
Explorer.
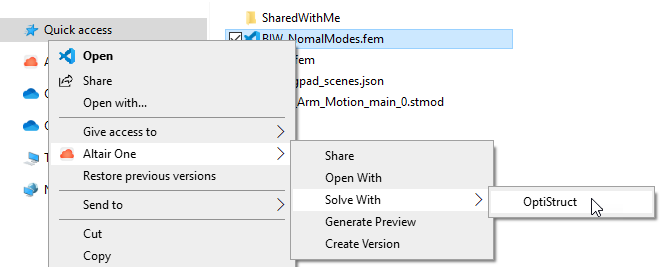
Right-click the input file, select Altair One > Solve With > solver.
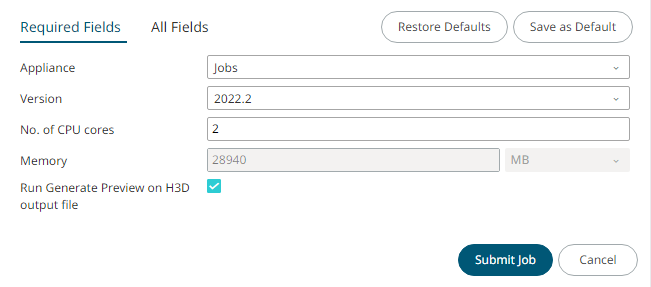
Figure 1. Solve With A job submission form is displayed.Figure 2. Submit Job
Fill the required fields in the job submission form.
For Appliance, select the appliance where the
solver is available.
For Version, select the required version of the
solver.
Optional: The chosen Input File is displayed. Click to choose a different version of the file
for the same solver.
Enter Number of CPU Cores for the job.
Enter Memory and its units.
Select a Job Directory Path to save your job
result files. By default, it uses the same path as your input
file.
Select Run Generate Preview on the H3D output
file if you wish to generate a preview of the H3D result
file. This enables you to preview the model details when the job is
complete.
Select Run Extract Plot Data on H3D output file
if you wish to extract plot data of the H3D result file. This enables
you to view the plot data when the job is complete.
Tip: To view more application arguments click
All Fields. To reset the form, click
Restore Defaults. To save your current inputs as
default, click Save as Default.
Click Submit Job.
After you submit the job, Windows notifications will appear to help you
to monitor it. To view all notifications, open the action centre from the
Windows system tray () or use Win+A.
 to choose a different version of the file
for the same solver.
to choose a different version of the file
for the same solver.
 ) or use Win+A.